How to set up ODBC
Some actions that connect to a database require ODBC settings. ODBC settings can be done with the same procedure for each action.
Here we will introduce the setup procedure for ODBC using the connection settings with SQLServer as an example.
|
The ODBC driver is available in 32-bit and 64-bit versions. In addition to calling up the FA-Server setting screen below, you can also set up the ODBC data source from the Windows control panel. When calling up the setting screen from FA-Server below, if the currently running FA-Server version is a 32-bit version, the 32-bit ODBC setting screen will be displayed, and if it is a 64-bit version, the 64-bit ODBC setting screen will be displayed. On the other hand, when setting up from the Windows control panel, both the 32-bit and 64-bit versions of the ODBC driver to be used may be displayed, so be sure to select the appropriate version and set it up. |
|---|
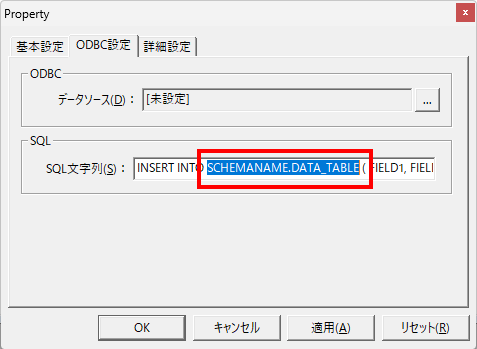
1.ODBC Settings tab
From the ODBC Settings tab of the target action, click the Select button to the right of Data Source.

The ODBC setting dialog will then be displayed. Click the "Select" button on the screen that appears.
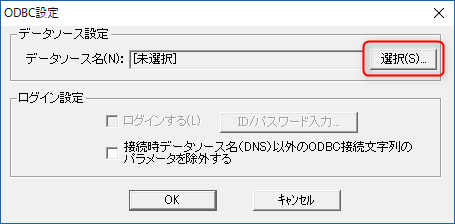
Then the data source selection dialog will appear.
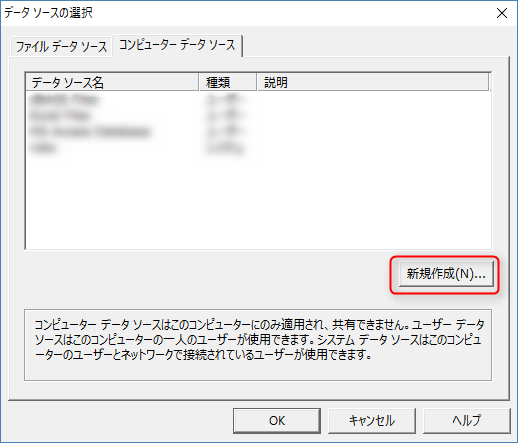
2.Creating a Data Source
From the Data Source Selection screen, click "Create New", select Create a User Data Source, and click Next.

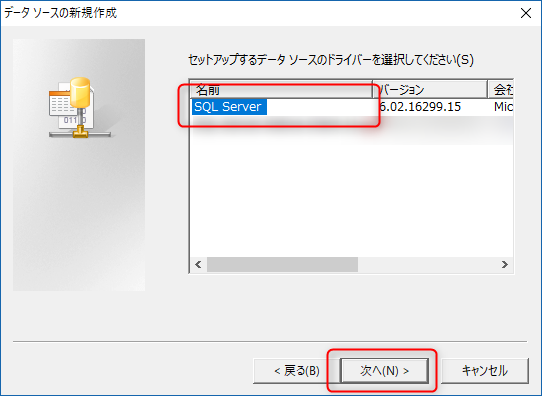
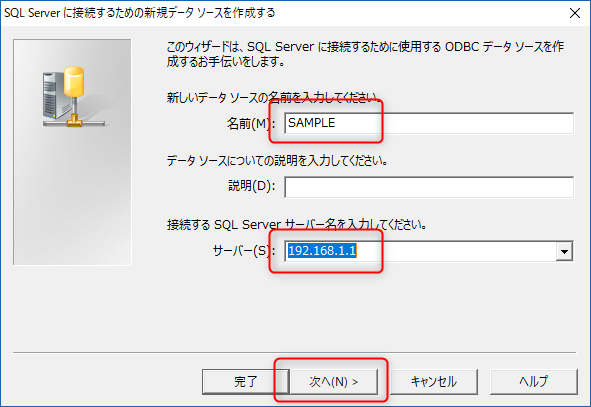
3.Selecting a Data Source
Select the target database from the list. In this example, select "SQL Server" and set it as follows.
Note that the setting items may differ depending on the type of database selected. Please register according to the contents of the ODBC driver setting screen for each database.
Enter the new data source name and specify the database to connect to. In this example, we use "SAMPLE".
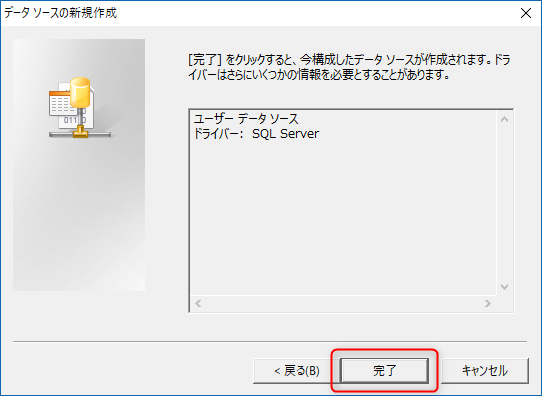
4.Select the data source you created
Select the data source you created above from the list and click OK.

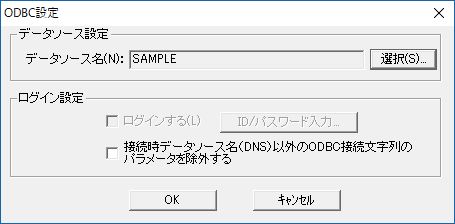
Make sure the data source name is selected.
|
If you check "Exclude ODBC connection string parameters other than data source name (DNS) when connecting", the destination database name and destination server information will not be passed to the ODBC driver, and you can connect using the information pre-configured in the OS's ODBC settings. By matching the data source name in the ODBC settings on the OS side of each PC, there is no need to configure the FA-Server configuration file individually for each PC you install it on.
*Whether this function is available or not depends on the specifications of the database (or ODBC driver).
|
|---|

Specifying the schema
If you want to refer to tables in a schema other than the default, please make the following settings.
|
When connecting to MySQL, do not specify the schema name in the various settings explained on this page. Since MySQL recognizes the schema name as the DB name, specifying the DB name in the ODBC driver settings will connect to the desired schema (DB). Therefore, when using MySQL, there is no need to specify the schema name when specifying a table name from various actions, etc. |
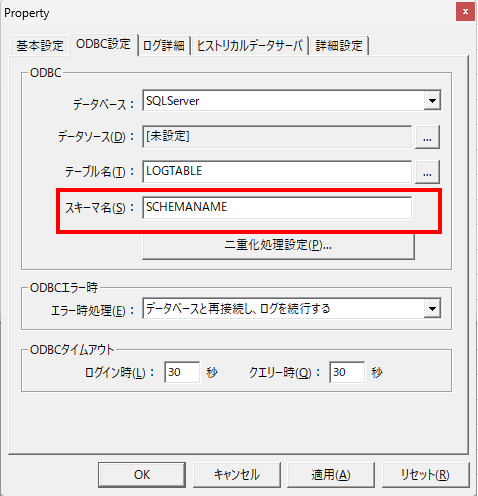
1.Ability to specify table names (e.g. logger actions)
Specify the referenced schema in the "Schema Name" of the
ODBC settings.
Example) Logger action example
2.Summary Actions
If you want to specify a schema in a summary action, define the OdbcSchema parameter in the common properties section of the summary master and specify the schema name.
OdbcDatabaseType=SQLSERVER OdbcSchema=The name of the schema you want to connect to |
3.Ability to directly specify and use SQL statements
For the functions below, the user writes the SQL statement directly. When using these functions, specify the schema before the table name, separated by a "." (dot).
([schema name].[table name])
・Execute SQLAction
- Script Ver2 (when using direct query control)
・Direct Query Control
・Remote Query Control
(Execute SQL action example)