overview
This is a setting example for connecting the FX2 series to RS-232C. In this setting example, an RS-422 conversion adapter is used to connect to the RS-232C.
Model used
item |
Model etc. |
PLC |
FX2-16MR |
Communication Unit |
FX-485ADP + FX-485PC-IF (RS-422 → RS-232C conversion) |
Configuration environment
item |
environment |
OS |
Windows7 Professional 64Bit |
Configuration details
item |
setting |
Setting items |
Configuration Example |
PLC side settings |
Set with tools |
Transmission speed |
19200bps |
Byte Size |
7-bit |
||
Stop bits |
1 bit |
||
Odd/Even Parity |
Even |
||
Sum Check Code |
can be |
||
protocol |
MC Protocol (Format 1) |
||
Area code |
0 |
||
PC settings |
Unit Settings |
COMPort |
Communication port number to connect to |
Transmission speed |
19200bps |
||
Byte Size |
7bits |
||
Stop bits |
1bits |
||
parity |
Even |
||
Sum Check |
can be |
||
Folder and communication test settings |
PC Number |
FF |
|
Area code |
00 |
* Most of the settings on the computer will be adjusted to match the settings on the unit.
PLC side settings
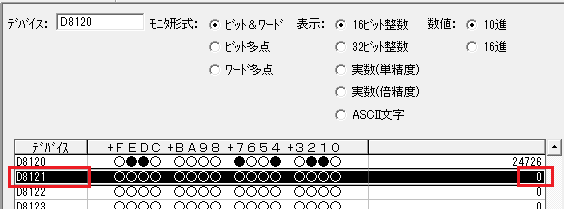
The transmission control procedure for "FX-485ADP" is set using the special register "D8120". In this case, set it to "24726" in decimal. The station number is set in the special register "D8121". Set the value using GX-Developer or similar.
1.Verify that you can connect to the PLC using GX-Developer
2.From the device batch monitoring screen, write "24726" to "D8120"
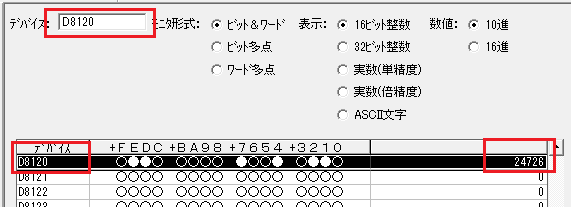
The settings for the values to be written are as follows:
D8120 bits |
explanation |
Setting contents |
0th bit |
Data Length ※The setting on the right is "7Bit" |
0 |
1st bit |
parity ※The setting on the right is "Even" |
1 |
2nd bit |
1 |
|
3rd bit |
Stop bits ※The setting on the right is "1Bit" |
0 |
4th bit |
Porate *The setting on the right is "19200bps" |
1 |
5th bit |
0 |
|
6th bit |
0 |
|
7th bit |
1 |
|
8th bit |
header * Set to "None" on the right |
0 |
9th bit |
terminator * Set to "None" on the right |
0 |
10th bit |
Control Line *The setting on the right is "Use computer link RS-232C" |
0 |
11th bit |
0 |
|
12th bit |
Not available |
0 |
13th bit |
Sum Check ※Select "Add" in the settings on the right |
1 |
14th bit |
protocol * Select "Use" in the settings on the right |
1 |
15th bit |
Control Procedure *Settings on the right are "Format 1" |
0 |
*The setting value in the table above, "0110 0000 1001 0110", becomes "24726" when converted to a decimal number.
3.Write "0" to "D8121" from the device batch monitoring screen.
|
For details on the settings, etc., please refer to the Mitsubishi Electric "FX Series Micro Sequencer" User's Manual. |
PC settings
Use the Server application to connect to the PLC for which you have set up communications.
1.Right-click "Application" - "Driver" in the tree and select Add Driver.
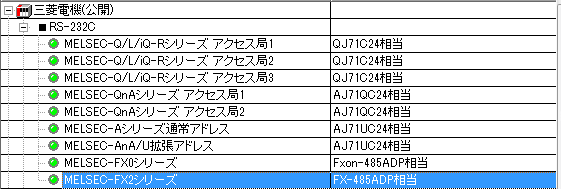
2.Select the following units from the displayed driver list and add them:
When connecting to the
FX0 series, select the "MELSEC-FX0 series" driver.
3.Open the properties of the added unit (U01) and click Communication Settings.
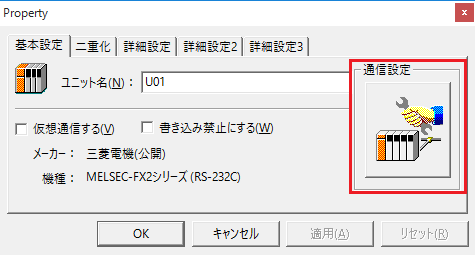
4.Set "Communication Settings" as follows:
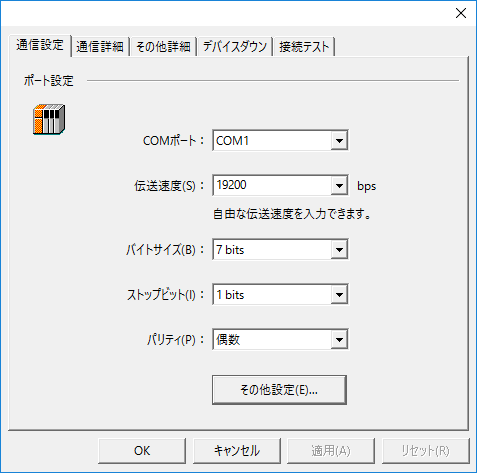
setting |
Setting contents |
COMPort |
Communication port number to connect to |
Transmission speed |
19200 |
Byte Size |
7bits |
Stop bits |
1bits |
parity |
Even |
5.Open "Other settings" and set it as follows:
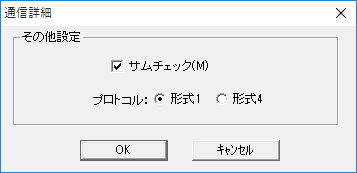
setting |
Setting contents |
Sum Check |
Check it |
protocol |
Format 1 |
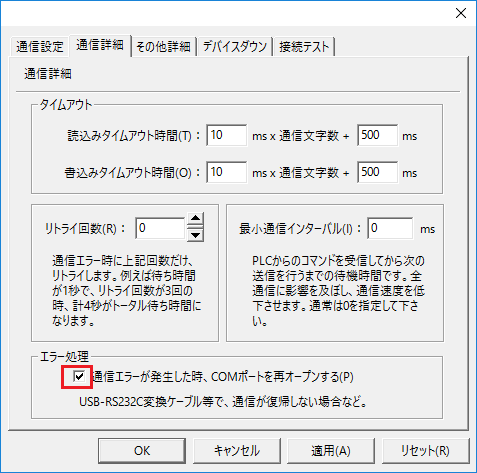
6.USB-RS-If you are using a 232C conversion cable, the COM port may be locked in the event of a communication error, so check the reopen setting.
7.Perform a connection test to check the connection
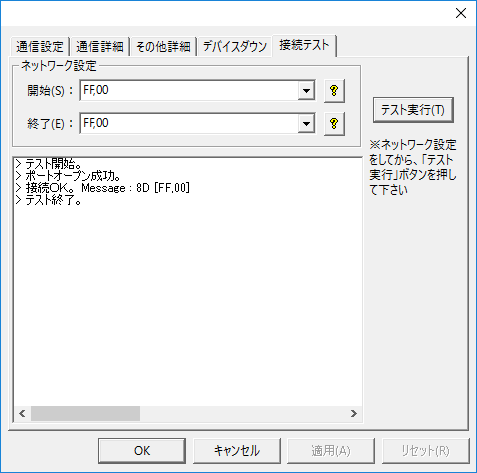
If a message such as "Connection OK" is displayed, the connection is confirmed to be OK.