overview
This section explains how to use the logger action to log to a CSV file.
Download the sample
The creation examples shown on this page are provided with samples.
The sample can be downloaded from below.
Setup Procedure
■ Tag settings
1.Register tags for data collection.
As an example, let's assume that eight SD tags, U01.F01.SD0008 to U01.F01.SD0015, are registered as SD tags for a virtual device.
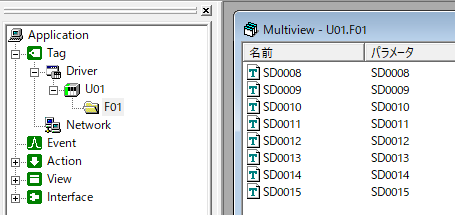
Unit: Virtual device "U01"
Create folder: "F01"
Tag: Register "SD0008" to "SD0015"
■Action settings
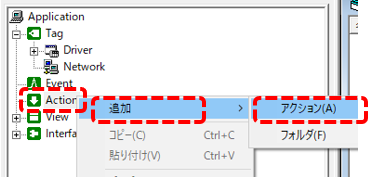
1.Add a logger (CSV) action
Right-click Action in the left tree of FA-Server to display the menu, then select "Add" and "Action".
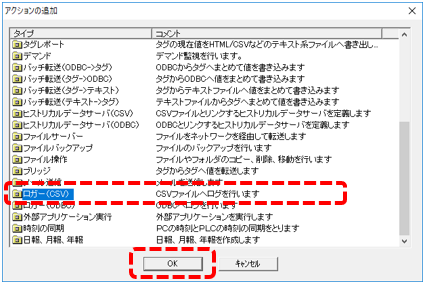
The Add Action dialog will appear, so select "Logger (CSV)" and click the OK button.
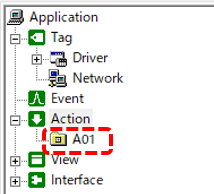
A new Logger (CSV) action has been added under Action as "A01". You can change the name, but for this example we will leave it as is.
2.Logger (CSV) action settings
Open the properties of the Logger (CSV) action "A01" and configure it.
|
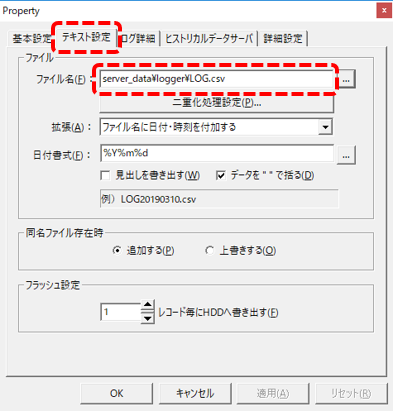
Shown on the left is the Text Settings tab.
In the file name, specify the folder and file name for the log data to be output. The following is an example setting.
server_data\logger\LOG.csv
Specifying a date format will allow the date to be added to the generated filename. In this example, we will leave it at the default. With the above settings, files will actually be generated one per day, and the date will be added to the file name.
Furthermore, if you check the "Export headers" box on the left, the header row will be output as the first line of the CSV file.
|
|
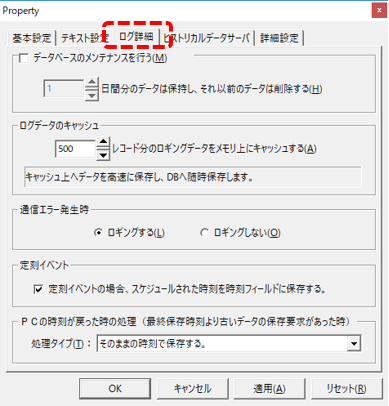
Shown on the left is the Log Details tab.
In the Log Details tab, you can configure detailed settings such as the automatic deletion of old log data, how to handle errors, and how to handle when the PC clock is set back.
Leave the default settings and click "OK" to save the settings.
|
3.Define the fields of the logger (CSV)
Next, define the fields for the logger (CSV) action. A field is information that corresponds to a "column" in the generated CSV file.
Right-click "A01" in the tree on the left and select "Add" and "Time Field".
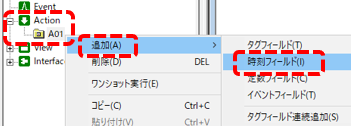
A field called "F01" has been added to A01.
Try opening the properties of the F01 field.
|
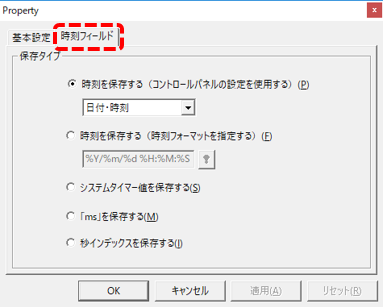
The Time Field tab allows you to further define the date-time format for this field.
Leave the default settings and click the "OK" button to close.
|
Next, define a field to store the tag value.
There are several ways to define tag fields, but you can easily register fields by dragging and dropping the target tag.
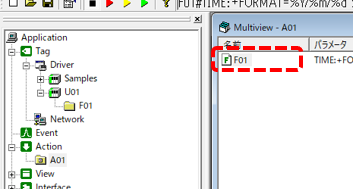
First, with the "A01" action displayed, select the F01 folder in the U01 unit of the tag to display the tag in the multiview.
Then, select multiple tags for which you want to perform logging, and drag and drop them onto "A01".
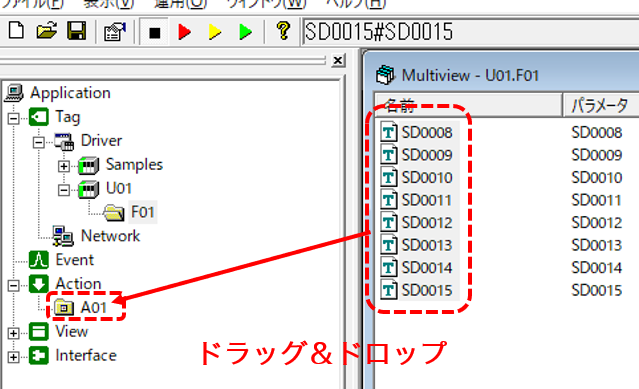
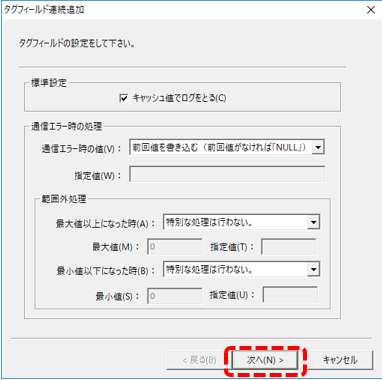
The Add Tag Fields dialog box will then appear.
|
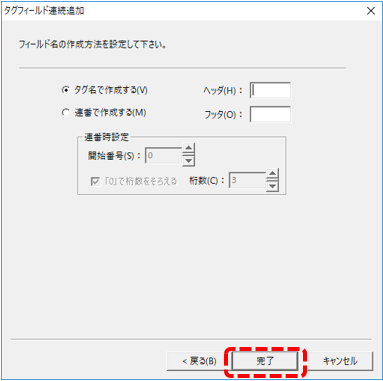
In this example, leave the default settings and click Next.
|
|
Keep the default settings and click "Finish".
|
When you display the contents of the A01 action in multiview, you can see that the following fields are registered:
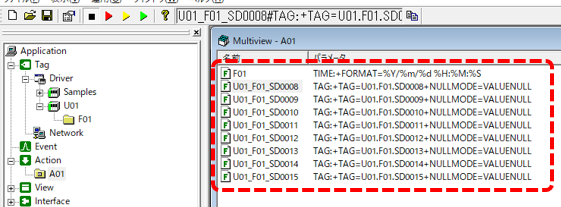
Based on the above, the format of the CSV file of the log data that is generated will be such that the first column contains the date and time, and the second and subsequent columns contain the tag values from SD0008 to SD0015.
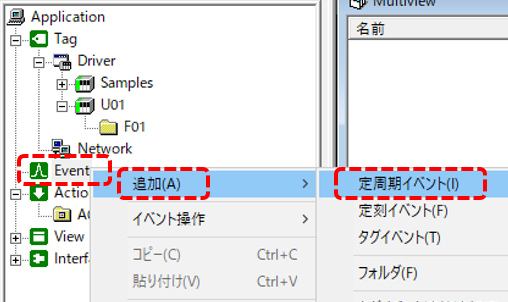
4.Define Periodic event
Next, add Periodic event, which calls the logger (CSV) action added above. The call cycle from this event will be the logging cycle for the log data.
Right-click on the event in the left tree of FA-Server and select "Add" "Periodic event".
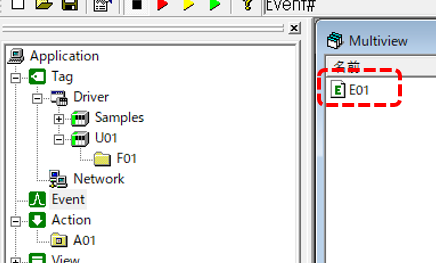
This will add an Periodic event called E01. You can change the name, but for this example we will leave it as is.
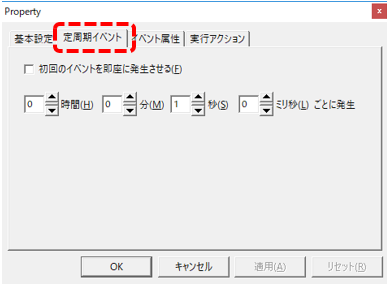
Open the properties of E01 and configure it.
|
The Periodic event tab allows you to set the frequency at which the event will occur.
For now, leave it at the default setting of 1 second.
|
|
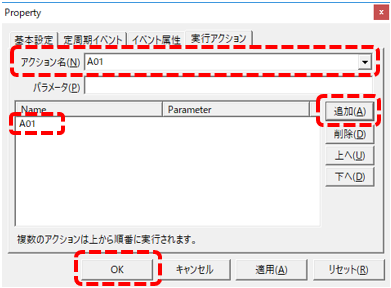
Open the Execution Action tab, select "A01" from the action name combo box, and click the "Add" button.
Verify that A01 appears in the list at the bottom, then close by clicking the "OK" button.
|
Operation check
Now let's check how it works.
Click on Online (yellow arrow) at the top of the FA-Server screen.
![]()
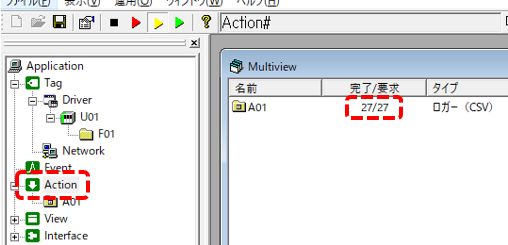
When you select Action from the left tree of FA-Server, "A01" will be displayed in the multiview. Confirm that the number of completed and requested items has increased.
After a few seconds, we will take FA-Server offline.
![]()
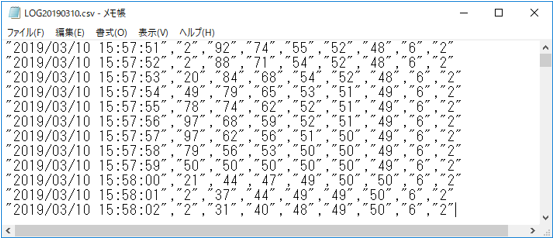
Let's check the CSV file that was actually created.
Please open the following folder using Explorer etc.
(Project Folder)\server_data\logger
The CSV file will then be stored with the date the log was created included in the file name.
Below is an example opened in Notepad.
If FA-Server is running online, the CSV file for the day cannot be displayed in Excel because the log data is being written continuously. If you want to open the file in Excel, you must first copy it to another file and then open it, or take FA-Server offline.