Character input 2
|
Character Input 2 is a component for writing a character string entered on the screen to a tag. After editing the value, click the Confirm button to write the value to the input/output tag.
|
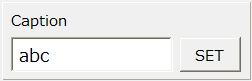
Specify the tag to be input/output as the input/output tag (_TagInOut). The value is only displayed initially, and is not dynamically updated even if the tag value changes.
When editing a value, only the number of characters specified in the Character Length field will be accepted. After editing, click the Confirm button to write the value to the I/O tag.
In addition, by specifying a tag for fault identification in the fault identification tag (_TagFault) separate from the input tag, a fault can be displayed based on signals such as equipment abnormalities received from downstream.
Custom Properties
Tag configuration |
Input/Output Tags |
_TagInOut |
Specifies the tag path of the input/output tag. |
Fault Identification Tag |
_TagFault |
Specifies the tag path of the fault identification tag. |
|
Display settings |
caption |
_Caption |
Specify a caption. |
Confirm button |
_Label |
Specifies the label for the confirm button. |
|
Character length |
_Length |
Specify the length of characters that can be entered (number of characters). Full-width and half-width characters are not distinguished. |
|
Value Text Color |
_ValueTextColor |
Specifies the color of the value text. |
|
Value Background Color |
_ValueFillColor |
Specifies the background color of the value. |
|
Caption Color |
_CaptionColor |
Specifies the color of the caption. |
|
Background Panel |
_BackPanelColor |
Specifies the color of the background panel. |
|
Input assistance settings |
cursor |
_StartCursor |
Specifies the initial cursor state when focused. •NONE - Do not select •MOUSE - Set cursor to mouse position •LEFT ・・・Sets the cursor to the left of the input value •RIGHT ・・・Set the right cursor of the input value •SELECTALL ・・・Select all the entered values |
Keyboard display |
_ShowKeyboard |
If enabled, the keyboard dialog will be displayed on focus. |
|
Confirmation screen display |
_IsConfirm |
When enabled, a confirmation dialog will be displayed when you click the Confirm button. |
|
Confirmation message |
_ConfirmMsg |
Specify the confirmation message to be displayed on the confirmation screen. |
|
Error Message |
_ErrorMsg |
Specifies the error message to be sent when a write error occurs. |
|
Operation history output |
_Log |
If enabled, the operation history will be output when a value is written. If you want to output the operation history in a standard project that uses the standard framework, enable the operation history setting from the system administration settings screen. For details, see "Operation History Settings". If you want to output the operation history in an original project that does not use the standard framework, define Alarm server to record the operation history and set the root DefaultFireAlarm property appropriately. |
|
Operation Message |
_LogMsg |
Specify the message to be output to the operation history. |
Usage Example
1) Input/output tag specified/no fault identification tag
|
The value of the input/output tag is displayed as is as a string. This component does not automatically update the display even if the tag value changes.
|
|
When the item is focused by clicking the mouse, the value can be edited. In the example on the left, all items are selected using the cursor setting "SELECTALL". |
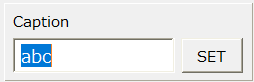
|
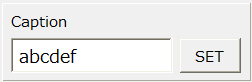
Enter a string from the keyboard. You can enter a string up to the number of characters set in the character length. Here, the input will be confirmed when you lose focus by pressing the Enter key or clicking on another object. |
|
The input has been confirmed. Clicking the Confirm button (SET) will write the value to the tag. |
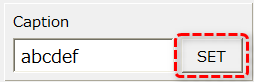
When the quality flag of the input/output tag is BAD, a fault is displayed.
|
The part will be framed in yellow and will flash. When the fault is displayed, both the input box and the Confirm button are disabled and editing is not possible. |
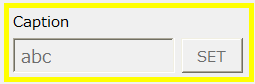
|
By setting the "FocusHover" property of the form to which the component is attached to True, a focus frame will be displayed when you move the mouse cursor over the component to be operated. |

2) Input/output tag specified/fault identification tag
If you specify a fault identification tag, you can receive the fault status of the device via the tag. For example, if you can receive a fault status (such as a sensor abnormality) from the downstream side as a signal separate from the device's measurement value, you can specify the tag path of that signal as the fault identification tag to display the fault along with the state of the quality flag of the input tag.
|
When the fault identification tag is False, the value received by the input/output tag is displayed and can be edited as usual.
|
|
A fault is displayed when the fault identification tag is true or when the quality flag of the input/output tag is bad. When a fault is displayed, the input frame is disabled and editing is not possible. |
3) Confirmation screen display
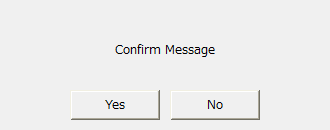
If you enable the confirmation screen display (_IsConfirm), a confirmation dialog (Yes/No) will be displayed when you perform a write operation.
|
If Yes is selected in the dialog, the value will be written to the tag.
|
4) Keyboard display
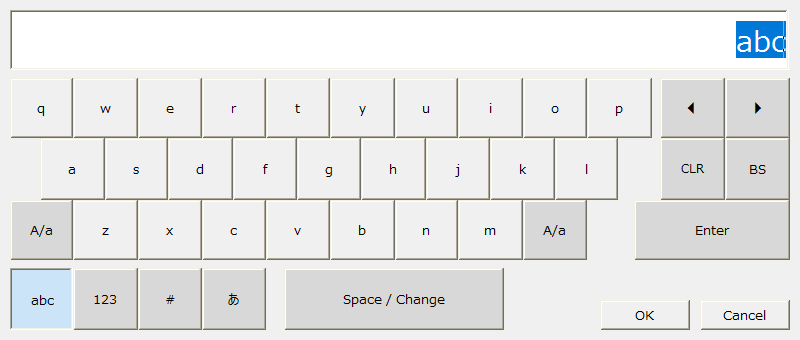
If you enable keyboard display (_ShowKeyboard), the keyboard dialog will be displayed when the control is focused.
|
You can edit the value using the keyboard on the dialog. After confirming your input with the Enter button, click the OK button to close the dialog and reflect the edited value in the input box.
Furthermore, writing to the tag will not take place until you press the Confirm button.
|
5) Confirmation screen display
If you enable the confirmation screen display (_IsConfirm), a confirmation dialog (Yes/No) will be displayed when you press the Confirm button.
|
If Yes is selected in the dialog, the value will be written to the tag.
|