overview
This section explains how to manually import the Panel Server side settings from the sample of the energy management screen library.
In addition, for projects generated using the standard framework, the summary action (Summary) settings are usually pre-built in, so there is no need to import each setting manually.
The steps introduced here should be performed in the following cases:
•For your own projects that do not use standard frameworks.
•When you are using the standard framework, but the summary action settings have been deleted (for example, when you add a logging aggregation function later after implementation).
|
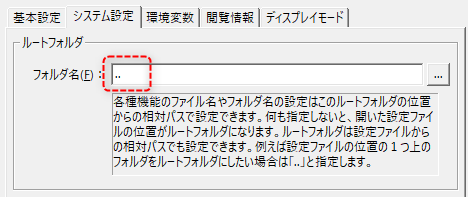
The steps introduced on this page assume that the root folder of the Panel Server application settings/system settings is set as follows. Also, when importing actions from a sample, the settings for each action are set with a relative path. This setting allows the project to continue working even if the folder name or folder hierarchy of the project folder changes. If you do not specify a root folder, such as when importing a screen library into your own project, make adjustments according to the project environment, such as making sure the relative path reference locations match, or defining the reference destination of each file with an absolute path. For details, see "System Settings" in the Panel Server application settings.
(system settings root folder)
|

Manually importing server settings
Below are the steps to manually import the Panel Server side settings from the screen library sample.
■ Work procedure
1.Open Panel Server
With the project you are currently working on open, right-click "server.txt" in the Panel Editor tree to display the menu, and select "Open Server" from the menu.
This will start Panel Server with the target server configuration file open.
2.Open the Screen Library sample
Select the Library tab of the Panel Editor you are currently working on and select the "Energy Management" thumbnail from the Screens Library.
|
When you select a thumbnail, a description of the screen library's functions will be displayed, so click the "Sample" button at the bottom.
|
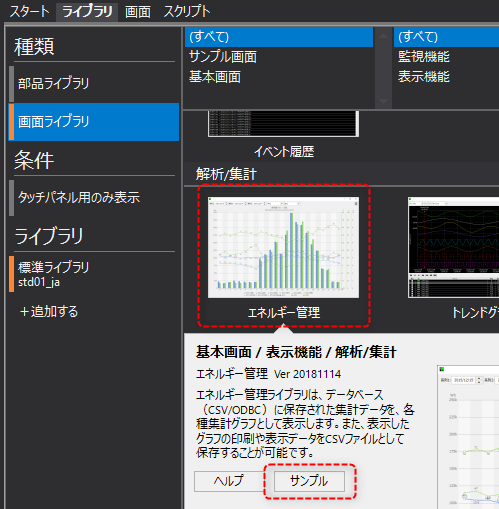
This will start a new Panel Editor separate from the Panel Editor you are currently using, with the sample project open.
3.Open the sample project's server configuration file in edit mode
Right-click on "server.txt" in the left tree of the newly opened Panel Editor to display the menu and select "Open Server (Edit Mode)."
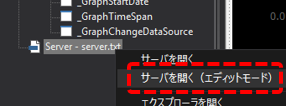
This will start another Panel Server in edit mode with the sample server configuration file open.
|
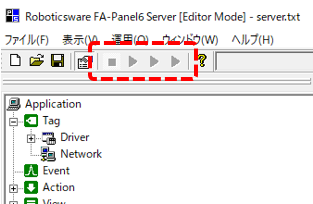
In edit mode on Panel Server, the various icons for online operations are in a dim state as shown on the left, and online operation cannot be performed.
By opening a sample server configuration file in this mode, you can copy settings such as actions and events between Panel Server.
|
|
Panel Server cannot be started multiple times at the same time in normal mode. You can start another one only if you open it in edit mode. |
4.Import the "Summary" action from the sample
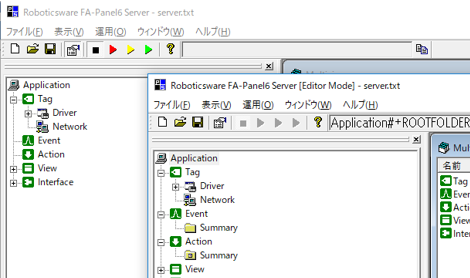
First, arrange the windows so that both the Panel Server you are currently working on and the Panel Server with the sample open in edit mode are visible, as shown in the image below.
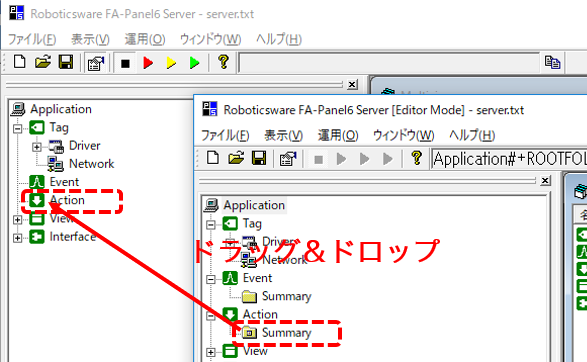
In this state, drag and drop the "Summary" action registered under the Action of the sample Panel Server onto the "Action" of the Panel Server you are currently working on.
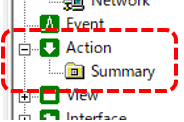
The Summary will then be copied under Action on the Panel Server side you are currently working on.
5.Capture "Summary" related events from the sample
Next, we'll import the events we need.
First, click and open "Event" on the sample's Panel Server side. You will see several Scheduled event registered under the "Summary" folder registered under the event. These Scheduled event are events that call the Summary action.
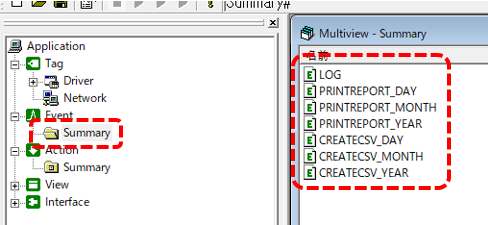
Similar to the procedure for importing the action, drag and drop the "Summary" folder registered in Event of the sample Panel Server onto the "Event" of the Panel Server you are currently working on.
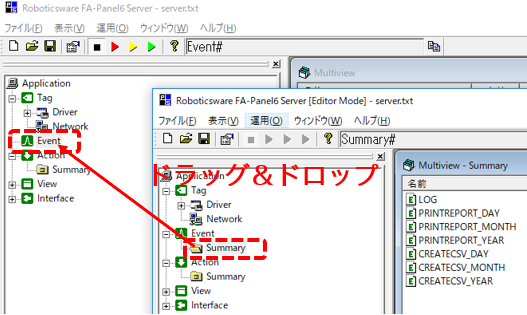
The "Summary" folder was then copied along with the event to the Panel Server event you were currently working on.
6.Import the necessary folders from the sample
Next, copy the necessary files and folders from the sample project. In the Panel Editor where the sample project is open, right-click "server.txt" in the tree on the left to display the menu, and select "Open Explorer".
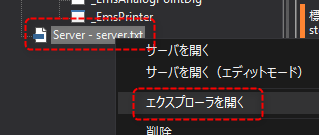
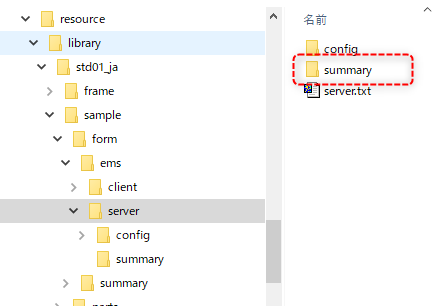
This will launch Explorer with the location where the sample server configuration file is stored.
From Explorer,Copy the "summary" folder under the server folder of the sample project into the server folder of the project you are currently working on.
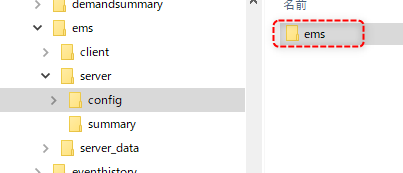
Similarly, copy the entire "ems" folder under the server\config folder of the sample project to the server\config folder of the project folder you are currently working on.
7.Set up the public folder for Panel-Interface
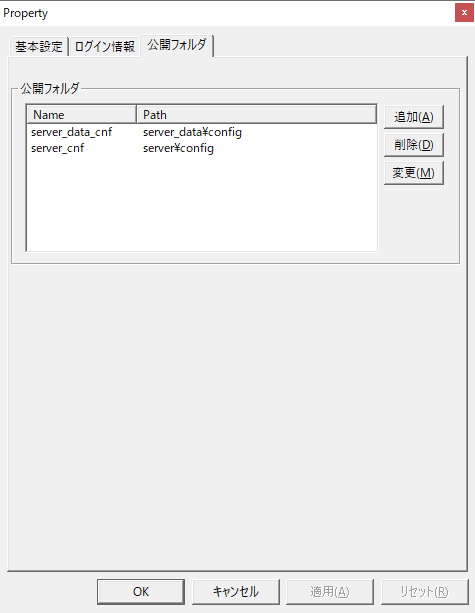
Next, go to the Panel Server's Panel-Interface settings and set up the public folder required for this screen library.If the necessary public folders are already registered in this library, no further configuration is required.
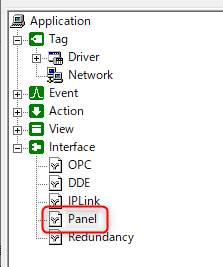
In the left tree of the Panel Server you are currently working on, right-click on Interface "Panel" and display its properties.
Select the "Public Folders" tab in the Properties dialog and click the "Add" button.
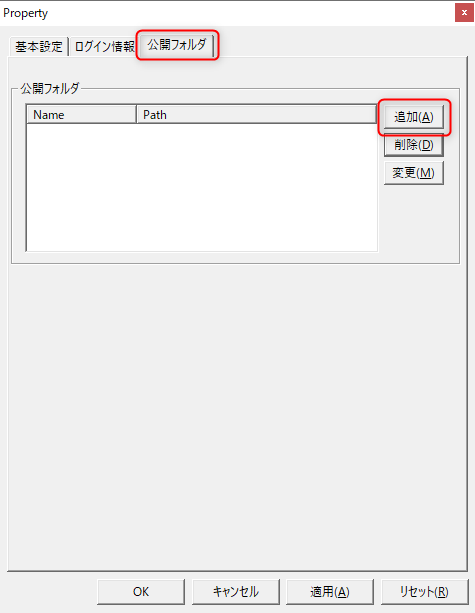
From the public folder settings screen, add the following two public folders.
(Public folder: server_data_cnf)
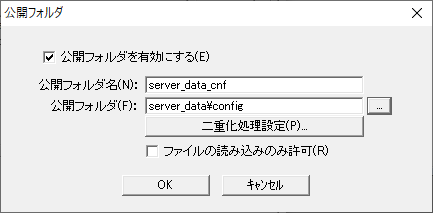
•Enable public folder: Check
•Public Folder Name: server_data_cnf
•Public folder: server_data\config
•Allow file reading only: Uncheck
(Public folder: server_cnf)
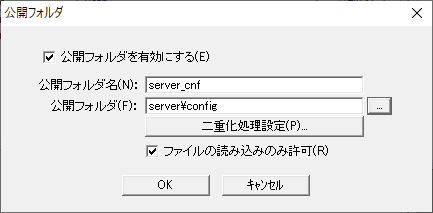
•Enable public folder: Check
•Public Folder Name: server_cnf
•Public folder: server\config
•Allow reading of files only: Check
Verify that the contents you added are reflected in the public folder list, and then click the OK button in the Properties dialog to save the settings.
This completes the import of the necessary settings.
It is necessary to make appropriate settings for the various master files of the summary actions taken from the sample.
For details on each step, see the following content in Building the Daily Report Function.
•Editing calculated field master