Installing in a development environment
When installing on a PC for development, follow the "Standard installation procedure" to install. A license key is required for development. However, if you develop in Limited mode (up to 2 hours of continuous online time), a license key is not required.
Standard Installation Procedure
Please perform the installation with administrator privileges.
1.Run the installer downloaded from the download site.
|
The installer is available in 32-bit and 64-bit versions. We recommend that you use the 64-bit version of the product. However, if the following conditions apply to you, please use the 32-bit version.
•Uses a communication driver that uses Mitsubishi's private protocol (*1)(*2) •Run on 32-bit OS
(*1) This function is only available in the 32-bit version. (*2) A Mitsubishi Electric driver that mainly communicates via the MELSECNET/CCLINK/CPU direct port.
*You can use the 32-bit version of the product on a 64-bit OS. In that case, it will run under WOW64. *The 32-bit and 64-bit versions can both be installed in the same environment. However, please note that the 64-bit version cannot be installed on a 32-bit OS. |
|
When developing a user application that incorporates the IPLink client library, please note the following points.
1) When using Visual Studio 2010 ~ 2019 - If you have only the 64-bit version of each product installed, you will also need to install the 32-bit version. - If you have only the 32-bit version of each product installed and you want to compile an application in 64-bit, you will also need to install the 64-bit version.
2) When using Visual Studio 2022 - If you have only the 32-bit version of each product installed, you will need to install the 64-bit version as well. - If you have only the 64-bit version of a product installed and you want to compile an application in 32-bit, you will also need to install the 32-bit version.
If you are running it on a PC different from the development environment, please set it up according to the compilation contents. ・If compiled as 32-bit: Only the 32-bit version setup is required for the execution environment. ・If compiled as 64-bit: Only the 64-bit version setup is required for the execution environment. |
2.Select the language you want to use for the installation and click Next.
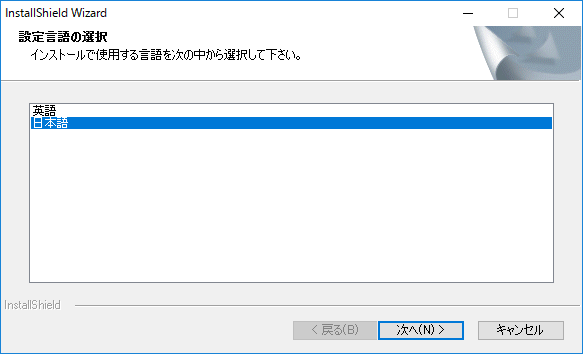
*Whether you select Japanese or English, the same files will be installed.
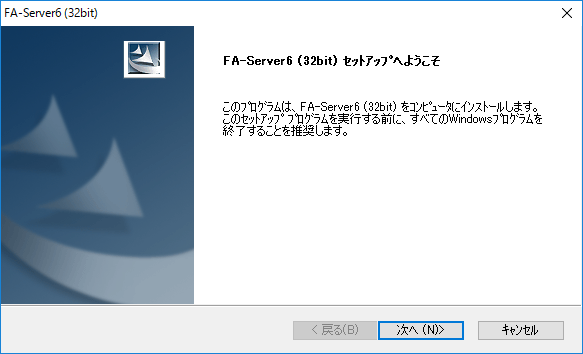
3.Click Next.
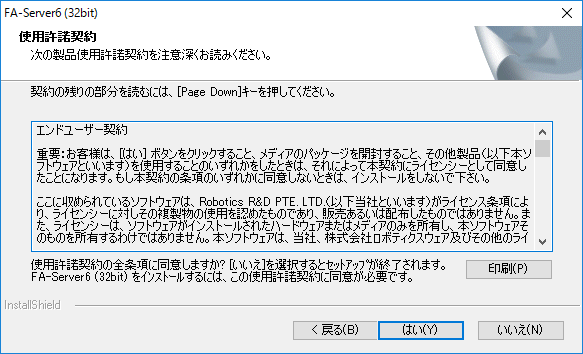
4.Confirm that you accept the license agreement.
If you agree, click "Yes" to proceed. If you do not agree to the license agreement, please contact us.
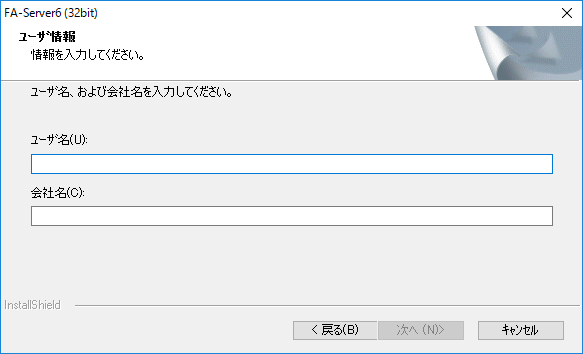
5.Enter your name and company name and click "Next".
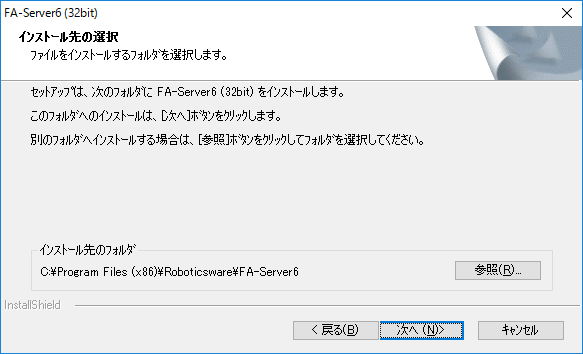
6.Check the installation destination and click "Next".
If you want to change the installation location, click "Browse" and specify the desired location.
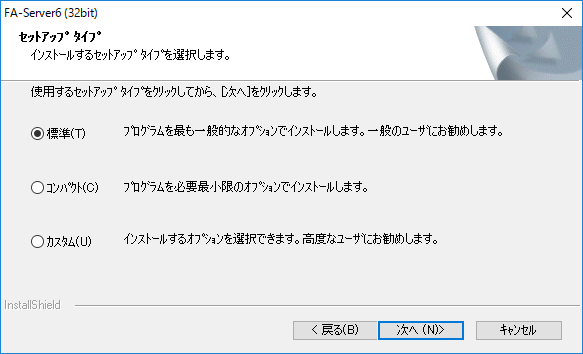
7.Select "Typical" and click "Next".
8.Click “Next”.
9.Click Finish.
When all steps are completed, the following dialog box will be displayed. Depending on the condition of your computer, you may need to restart it. If this happens, please follow the instructions on the screen to restart the computer. If you are unable to install the software properly, please contact us.

|
|
|
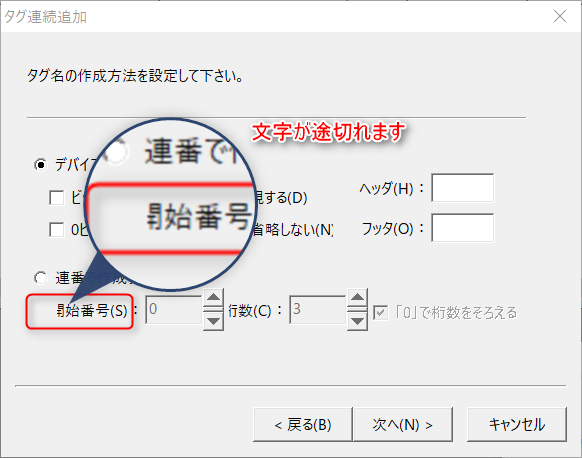
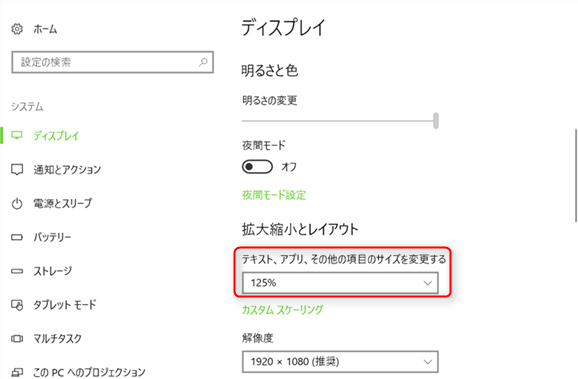
Windows If the "Scaling and layout" setting in the OS display settings is not set to 100%, characters displayed in applications may be cut off.
To avoid this issue, set "Scale and layout" to 100%, or display the properties of the application in question, such as FA-Server, check "Override high DPI scaling behavior" under "Compatibility", and select "System" as the "Scaling source" setting.
|

Custom installation
If you select "Custom" as the setup method, you can specify the details of the installation. Also, if you select "Compact" as the setup method, files other than "Mitsubishi Option Library" will be installed.

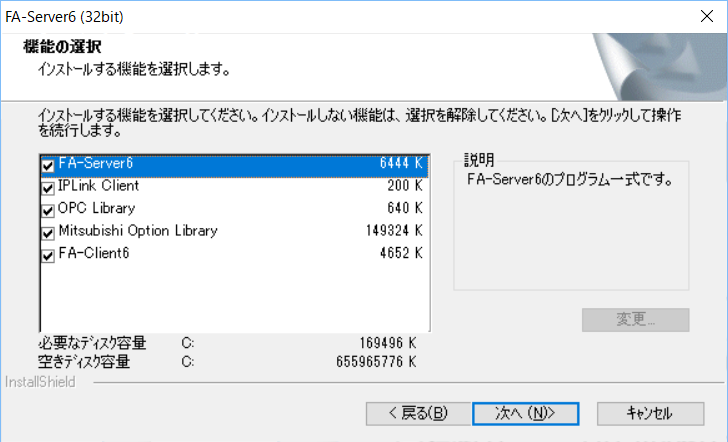
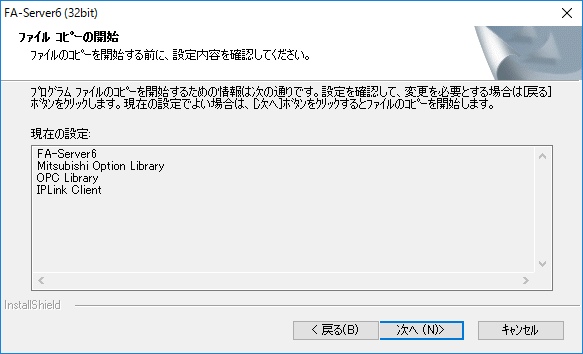
FA-Server6 |
FA-Server6Complete program. |
IPLink Client |
Set up the IPLink client ActiveX library. |
OPC Client |
Set up the OPC test client and OPC related libraries. |
Mitsubishi Option Library |
This is a Mitsubishi optional library. It is necessary if you want to communicate using a communication method (private protocol) other than RS-232C/Ethernet. |
FA-Client6 |
Set up FA-Client6. FA-Client6 is a client application for FA-Server6, and is used to display the report screen and trend graph screen. |
|
If you want to run FA-Client6 on a PC other than the one running FA-Server6, select FA-Client6 only during custom installation. |
|
Approximately 146MB of space is required to install "Mitsubishi Option Library". |
|
If you are installing the 64-bit version of FA-Server, you cannot select "Mitsubishi Option Library". |
|
If you want to compile a user application that incorporates the IPLink client library in 64-bit, you need to have both 32-bit and 64-bit versions in your development environment.Install bothIf you want to run a 64-bit compiled application on a PC other than the development environment, you only need to set up the 64-bit version of IPLink Client. |
Manual setup of the IPLink client library
Executable applications created using the KActiveX library for KIPLink clients can be freely distributed (see H15ace029 for more information about KIPLink).
Normally, the IPLink client is installed by selecting "Custom" and "IPLink Client" in the installer and installing it on each client PC, but you can also create your own installer and set it up manually without using our installer.
The ActiveX for the IPLink client is the following file.
ClientIPLink6.ocx
"ClientIPLink6.ocx" is located in the application installation folder (the default is "\Roboticsware\FA-Server6"). Copy it to the system directory or application folder of the PC where you want to install it, and register it in the registry.
|
ActiveX needs to be registered in the registry. To register it manually, use regsvr32.exe below. 64BitOS: "%systemroot%\System32\regsvr32.exe" 32BitOS: "%systemroot%\SysWoW64\regsvr32.exe"
example) When registering a 64-bit version of OCX %systemroot%\System32\regsvr32.exe "C:\Program Files (x86)\Roboticsware\FA-Server6\ClientIPLink6.ocx"
When registering a 32-bit OCX %systemroot%\SysWoW64\regsvr32.exe "C:\Program Files\Roboticsware\FA-Server6\ClientIPLink6.ocx"
|
Run with administrator privileges
If the application is not running with administrator privileges, the following functions will be restricted:
•Registry registration when using the OPC interface
•Time setting related functions (time synchronization action)
•Registry modification functions (SetRegistoryValue root method)
To get around these limitations, you must start the application in administrator mode.
How to start an application in administrator mode
If you want to set it up by starting it in administrator mode, follow the steps below.
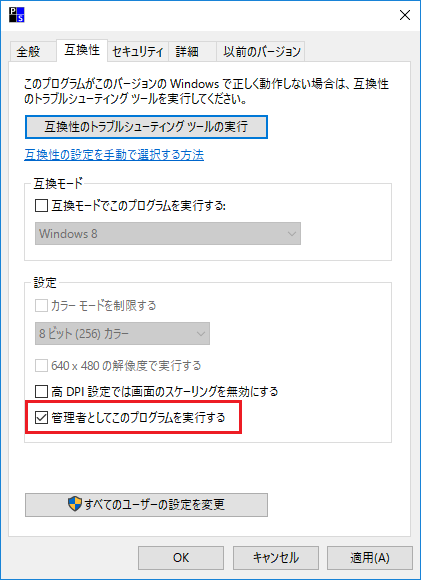
1.Display the properties of FAServer6.exe and check "Run this program as administrator" under "Compatibility."
|
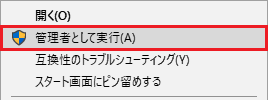
If you want to run the application as an administrator only temporarily, right-click on the application's EXE and select "Run as administrator."
|
2.When starting in administrator mode, a dialog box to confirm whether you want to elevate to administrator may be displayed. To hide this dialog box, use the following settings.
Open the Control Panel, click "System and Security", click "Administrative Tools", and then click "Local Security Policy".
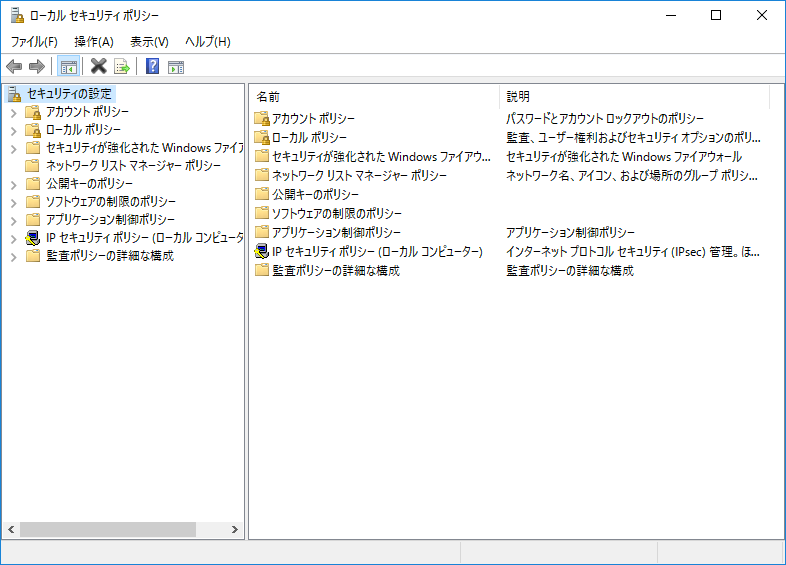
3.From the tree on the left side of the window, open "Security Settings" - "Local Policies" - "Security Options".
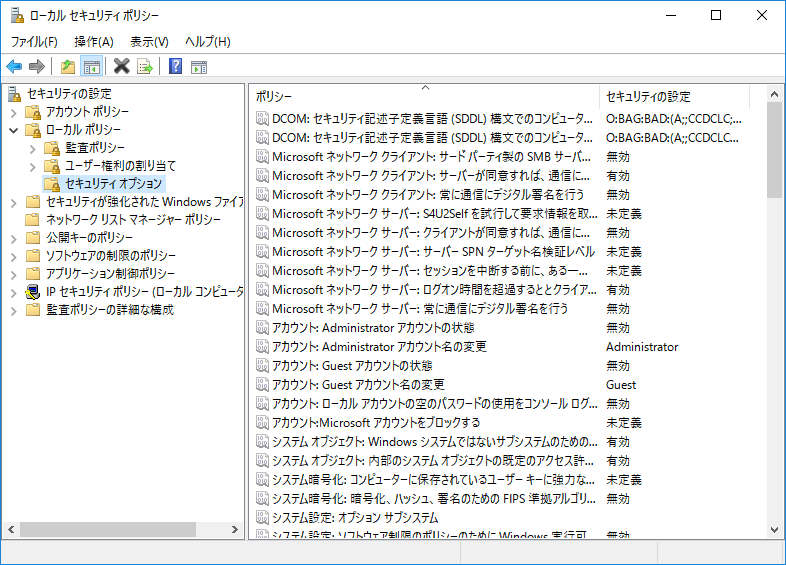
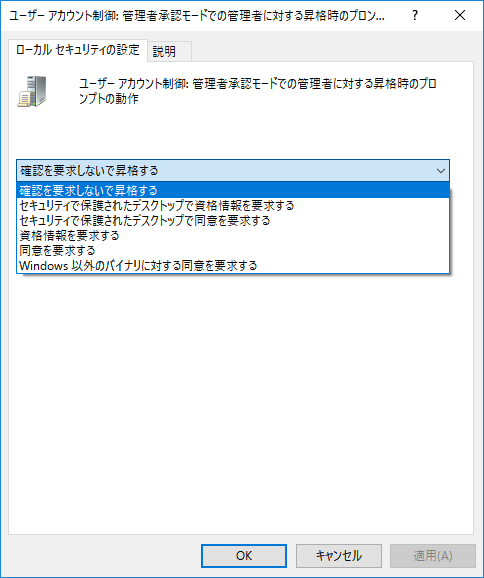
4.Select "User Account Control: Elevation prompt behavior for administrators in Admin Approval Mode" and double-click it.
On the Local Security Settings tab, the drop-down list will default to "Prompt for consent," but change this to "Elevate without prompting."
|
When using the OPC interface (OPC server function), if FA-Server is run with administrator privileges, the function that automatically starts the OPC server in response to a request from a client may not work properly. If you want to enable automatic startup of the OPC server, please do not run it with administrator privileges. |
|
When an application is run in administrator mode, it may not be possible to access network drives correctly. This is a phenomenon that depends on the UAC (User Account Control) mechanism that has been installed in OSs since WindowsVista, and occurs because the connection state of network drives is not shared between administrator privileges and user privileges (before elevation). Specifically, even if it appears that you can connect to the network drive without any problems from Explorer, the network drive may be recognized as disconnected from an application run with administrator privileges.
This issue can be avoided by changing the settings on the OS side (it cannot be controlled from the application side). If this problem occurs when referencing a network drive in redundant operation or with File operation actions, please take the following measures.
*Please be careful when performing the following as it changes the registry settings. If you accidentally change anything other than the following, the OS may not function properly. [Solution]
By configuring the registry value "EnableLinkedConnections", the network share mapping settings will be shared between the two tokens. This setting allows access to network shares even when the application is run with administrator privileges.
1.Enter "regedit" in "Run" or "Search" and run regedit.exe 2.Once the Registry Editor is open, go to the following key: 3.Create the following new value and set its value data:
4.Exit Registry Editor and restart your computer.
|