Editing Bezier Curves
The lines (or borders) of the following controls can be drawn as Bézier curves rather than simply connecting points with straight lines.
•Polygon control
•Polyline control
|
Example of a Bezier curve using Polyline control
|
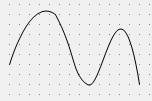
Here, we will explain how to edit Bezier curves using Polyline control as an example.
1.Paste Polyline control
From the "Shape" control in the control tab, select the "Continuous Line" control.
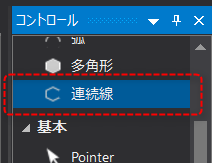
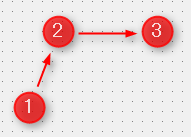
On the form, click the mouse one by one at the locations that will become the vertices of the continuous line.
|
As an example, click on 1, 2, and 3 in that order on the left.
|
|
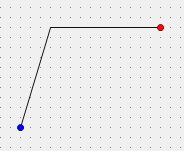
Then, it will look like the picture on the left. The starting point is displayed in blue, and the end point is displayed in red.
If you don't need to add any more vertices, double-click the mouse on the end point (red circle).
|
|
The edit has been confirmed and a continuous line like the one shown on the left has been drawn.
|
2.Move a vertex
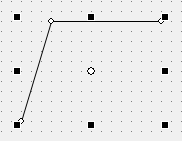
The vertices of the continuous line can be moved freely with the mouse.
|
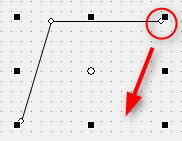
To move a vertex of a polyline, drag the vertex point (white circle) with the mouse.
As an example, try moving the top right vertex downward with the mouse.
|
|
The vertices of the polyline have moved, changing the shape of the object.
|
3.Adding/Deleting Vertices
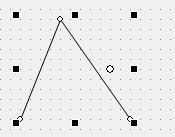
Continuous lines can be freely edited by switching to "Edit Mode".
|
To put a continuous line into "edit mode",Ctrl keyDouble-click the object you want to edit.
|
|
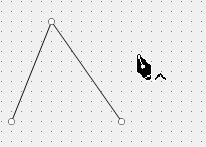
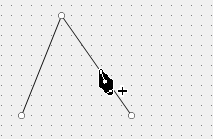
The continuous line will then be displayed as shown on the left, and the mouse cursor will take on a pen-like shape. Also, a "^" mark will be displayed to the right of the mouse cursor pen.
This is the "edit mode."
|
|
As an example, let's add one more vertex between the second and third vertices. To add a vertex,Ctrl key, place the mouse cursor where you want to add a vertex (i.e. on the line).
The mouse cursor will then change from a "^" mark to a "+" mark, and in this state click the mouse once.
|
|
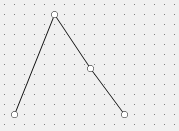
A new vertex is added where you clicked the mouse.
You can add any number of vertices consecutively.
|
|
Then, delete the vertex.
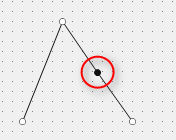
In edit mode, click the vertex you want to edit with the mouse (do not press any keys at this time). The points of the selected vertices will then turn black.
If you press the DEL key in this state, the vertex of the selected point will be deleted.
|
|
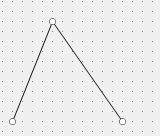
The vertex has been deleted.
To exit edit mode, double-click the mouse anywhere on the form except on an object.
|
4.Edit vertices to make a Bezier curve
|
For the target objectCtrl keyDouble-click with your mouse to enter edit mode.
|
|
In edit mode, click the vertex you want to edit with the mouse (do not press any keys at this time). The points of the selected vertices will then turn black.
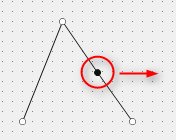
In this state,Ctrl keyDragging a black point with the mouse changes the point into the vertex of a Bézier curve.
As an example, let's drag to the right.
|
|
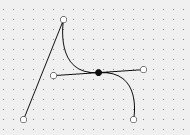
Then, handles like the one shown on the left will appear extending to the left and right from the black point at the center, and the line will change to a curve.
As shown here, the vertices of a Bezier curve are displayed with two handles extending from the vertex at its center.
By editing these handles, you can freely edit the shape of the Bezier curve.
|
5.Editing Bezier Curves
Bezier curves are edited in "Edit Mode".
|
At the beginning of a Bezier curve, each vertex has two handles, so when you move one handle, the other handle moves with it, maintaining an equal distance between them.
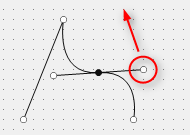
As an example, let's drag the handle on the right side with the mouse to move it upwards (※Do not press any keys at this time).
|
|
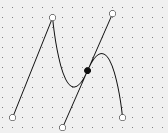
The handle you operated will then move upward while the opposite handle moves diagonally downward, changing the shape of the curve symmetrically.
|
|
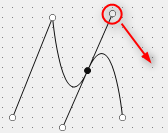
Next, try moving only the handle on one side.
To edit the handles individually,Ctrl keyDrag the handle of the object you want to move with the mouse.
As an example, let's move the handle on the top right diagonally downwards.
|
|
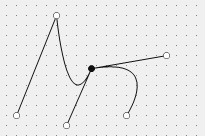
Only the handle on the side you operated moved, changing the shape of the curve.
|
|
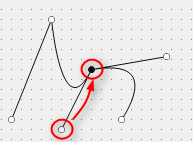
Normally, two handles are displayed, but you can delete any of the handles to draw a straight line. To do this, move the handle to the same position as the selected vertex (black circle), and the moved handle will disappear, and a straight line will be drawn between the point and the adjacent vertex on the side where the handle disappeared.
As an example, let's delete the bottom handle. Ctrl key, and drag the target handle over the vertex with the mouse.
|
|
The lower handle has been removed and the line between the second and third points has been changed to a straight line.
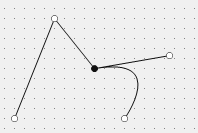
Furthermore, if you delete both handles (i.e., if both handles are placed at the same coordinate position as the black circle at the vertex), the line will revert to linear interpolation. |
|
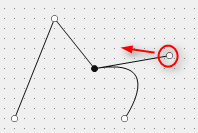
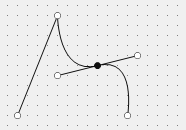
If you want to display the deleted handles again, drag one of the handles with the mouse (do not press any keys at this time).
|
|
Then, the deleted handle reappeared, and two handles were displayed.
|
|
When editing the vertices of a Bezier curve with two asymmetrical handles, including those with only one handle, be sure to hold down the Ctrl key while dragging the mouse when moving the position of a handle. If you move the mouse without holding down the Ctrl key, the other handle will automatically return to a symmetrical state.
|
