overview
The alarm function of a standard project built using the standard framework uses Alarm server (CSV). This section describes the procedure for changing the alarm function of a standard project from CSV to ODBC.
Here, we will make the following customizations to the standard alarm function.
Customization details
•Prepare a database and create a table for alarms.
•Configure the ODBC driver.
•Add the Alarm server (ODBC) action and configure it.
The various alarm functions of the screen library work exactly the same as when Alarm server is ODBC. Therefore, if you want to change the standard alarm function from CSV format to a database, you can continue to use the screen as is by simply changing the Alarm server action to "Alarm server (ODBC)".
As an example, we will introduce a database configuration example using SQLServer2017.
Download the sample
The creation examples shown on this page are provided with samples.
The sample can be downloaded from below.
The above sample includes table creation DDL (alarm.sql) for each DBMS. The sample DDL is stored in the following folder.
(Project Folder) \DDL_sample
\myslq\alarm.sql
\oracle\alarm.sql
\postgresql\alarm.sql
\sqlserver\alarm.sql
Procedure
■Preparing a database for alarm data
First, prepare a database to store alarm data. You can name the database freely, but for this example, we will assume that a database named "ALARMDB" has been created.
Below is an example displayed in Object Explorer for SQLServer Management Studio.
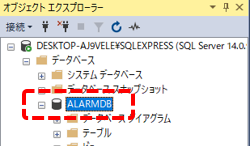
Note that Alarm server (ODBC) actions do not necessarily require a dedicated database for alarm data. There is no problem if the connected database is in an environment where tables other than the table that stores alarm data are mixed.
■ Prepare a table for alarm data in the database
Next, prepare a table in the above database to store alarm data.
You can name the table freely, but as an example, we will assume that a table named "ALARM" has been created in the ALARMDB database.
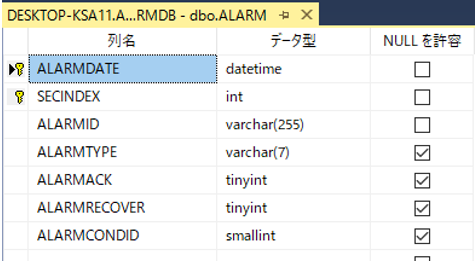
Please create the following fields in the ALARM table. You can also create the table using the table creation DDL (alarm.sql) included in the sample (*The following is an example for SQL Server).
Field Name |
Data Types |
Key Settings |
NULL Tolerance |
supplement |
ALARMDATE |
datetime |
PRIMARY KEY |
do not |
|
SECINDEX |
int |
PRIMARY KEY |
do not |
If multiple alarms occur at the same time, an index number starting from 0 is assigned to the SECINDEX field. If you are using a database, be sure to define this field. |
ALARMID |
varchar(255) |
(none) |
do not |
|
ALARMTYPE |
varchar(7) |
(none) |
do |
|
ALARMACK |
tinyiny |
(none) |
do |
|
ALARMRECOVER |
tinyiny |
(none) |
do |
|
ALARMCONDID |
smallint |
(none) |
do |
Below is an example displayed on SQLServer.
|
This sample includes table creation DDL (alarm.sql) for DBMS other than SQLServer. Please use it as a reference when defining tables in the DBMS you actually use. |

|
The names of data types of fields defined in the table on the database side (for example, "INT", "INTEGER", "NUMBER", "FLOAT", "DOUBLE", etc.) vary depending on the type of DBMS. For actions that require you to manually create a table in advance, such as Alarm server (ODBC), you must define the table appropriately on the connected DBMS side. For recommended data types for each connectable DBMS, see "Setting up a connection to the database" in the Appendix. |
|
When connecting to a database that uses PostgreSQL, the table names and field names in the tables prepared in the database must all be defined in lowercase. |

■ Alarm server (ODBC) action settings
Next, add the Alarm server (ODBC) action to Panel Server and configure it to connect to the database. As an example, we will introduce the settings for connecting to a SQL Server 2017 database in a Windows 10 environment.
In addition, in the server configuration file of the standard project, a Alarm server (CSV) action named "Alarm" that is included by default in the standard framework is registered, and this action is set to be called periodically from Periodic event "Alarm". Therefore, the simple procedure for changing from CSV to ODBC is to delete the originally registered "Alarm" action and add a new Alarm server (ODBC) action named "Alarm", which will allow you to use other events and client-side settings without making any changes.
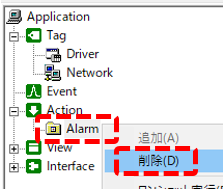
1.Delete the "Alarm" action
Right-click Alarm of Action in the tree on the left of Panel Server and select "Delete" from the menu. A confirmation screen will appear, so select "Yes" to delete it.
2.Add a Alarm server (ODBC) action
Right-click Action in the left tree of Panel Server and select Add > Action.
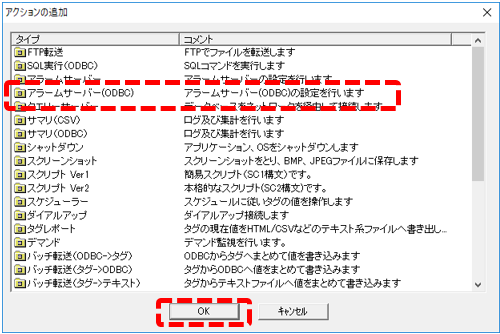
The Add Action screen will appear, so select “Alarm server (ODBC)” and click OK.
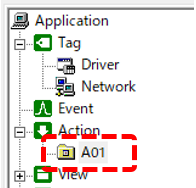
Action "A01" has been added.
3.Set up the Alarm server (ODBC) action
Display the properties of A01 and configure various settings.
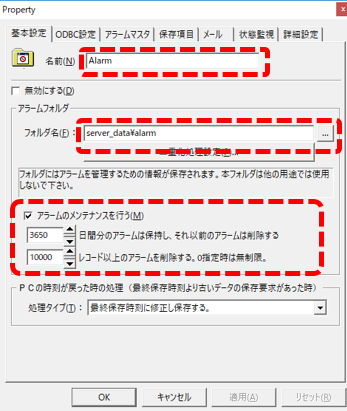
First, configure the following settings from the Basic Settings tab.
|
Change the name to “Alarm” (note: use the same name as the Alarm server CSV action you deleted earlier).
Please specify the alarm folder that was set in Alarm serverCSV as the alarm folder. The following is an example of the settings.
server_data\alarm
Check Perform alarm maintenance and specify the number of days. As an example, we have set it to 3650 days and 10,000 records (please set appropriate values for the actual environment for the number of days to store, etc.).
|
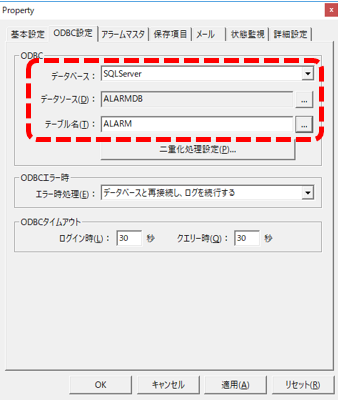
Next, configure the following from the ODBC Settings tab.
|
From the database selection, select the DBMS to connect to. In this example, select "SQLServer".
For the data source, set the ODBC data source to connect to the database "ALARMDB" that you prepared in advance. The data source setting procedure can be done by common operations for each DBMS. For ODBC settings, please refer to the description in "ODBC Settings" in the common settings for actions.
For the table name, specify the table to be used for the alarm. Here, it is "ALARM".
|
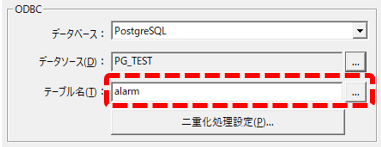
Next, configure the following settings from the Alarm Master tab.
|
Please specify the alarm master that was set in Alarm serverCSV in the master file. The following is a setting example.
server\alarm\master.csv
|
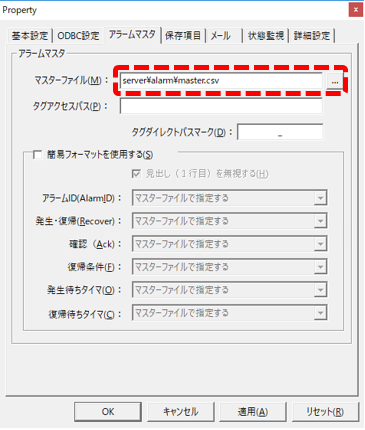
Next, configure the following settings from the Save Items tab.
|
Click the Add button to add a line for a save item.
Set the added line as follows:
DB Field... SECINDEX Alarm ・・・ [SECINDEX]
The SECINDEX field added above stores alarms that occur within the same second and is automatically assigned a sequential number starting from 0. Use of this field is optional, but if you are storing alarm data in a database, we strongly recommend using the SECINDEX field.
The field names created in the database table must match the definitions in this setting. Specifically, the names displayed in the "DB Field" column must match the field names in the table. Note that the order of the field definitions in the database and the above definitions does not have to match.
|
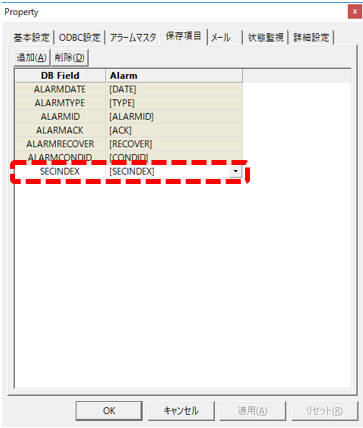
No changes need to be made to the other tabs. Click the OK button to save the settings.
|
When connecting to a database using PostgreSQL, the table names and field names in the tables prepared on the database side must be defined in lowercase. Therefore,The field name specified in the DBField on the Save Items tab must be in lowercase.Please do so.
(Example of settings for saving items when connecting to PostgreSQL)
In addition, when setting the saved items, the field names displayed by default (gray areas) can be edited by double-clicking them.
|
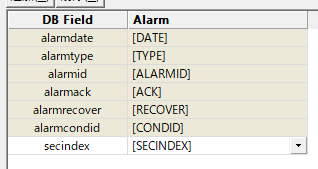

Operation check
Now let's check how it works.
Once the database for storing alarm data has been prepared and the ODBC settings have been completed, click Online (yellow arrow) at the top of the Panel Server screen.
Next, click the browser run icon (green arrow) at the top of the Panel Editor screen to call up Panel Browser.
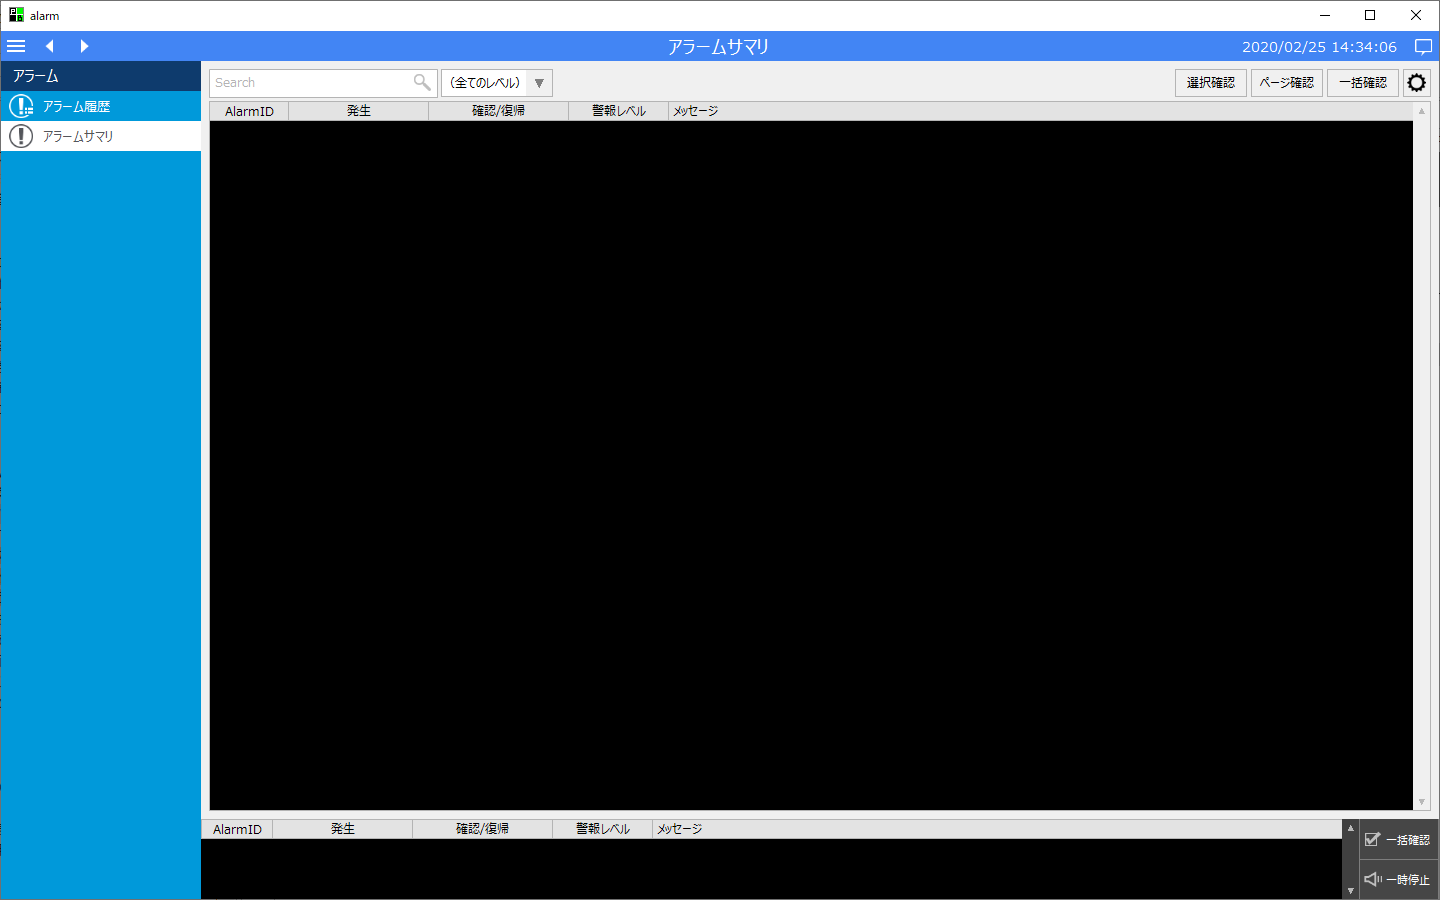
Panel Browser has started.
Currently, the following alarms are set in the alarm master:
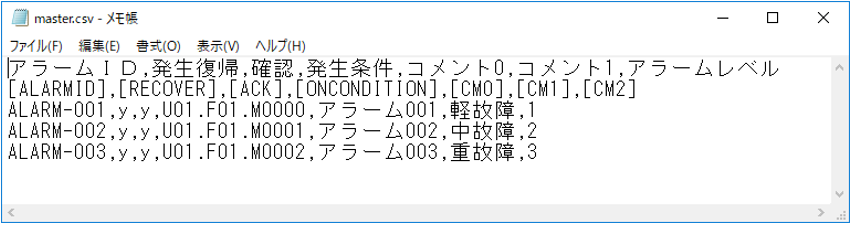
Please write True to U01.F01.M0000 from Panel Server.
The alarm M0000 was displayed in the alarm summary.

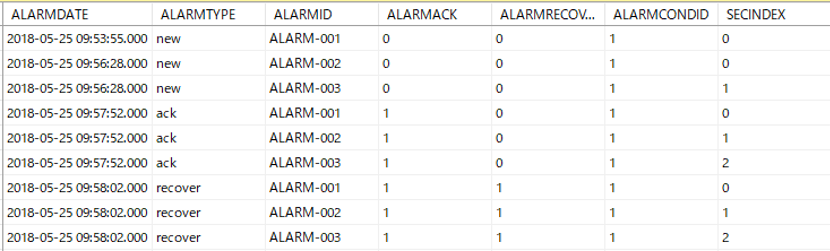
Please confirm that the following records are saved in the table on the SQLServer side.

Next, write True from Panel Server to U01.F01.M0001 and M0002.
Alarms M0001 and M0002 were displayed in the alarm summary.

The table on the SQL Server side contains records like the following:

Please perform a bulk check on the screen and change U01.F01.M0000, M0001, and M0002 from Panel Server back to False.
The alarm display has disappeared from the alarm summary.

Display the alarm history screen and verify that the alarm history data is displayed correctly.
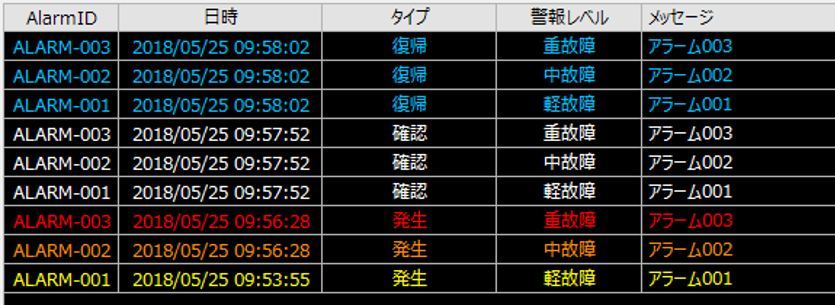
The following records are now saved in the table on the SQLServer side.