What is a recorder?
Video recorders have an important concept called "recorder." A recorder is a concept like a group that logically bundles together network cameras in the video recorder's recording process, and the client PC that records performs the recording process on a recorder basis. Multiple recorders can be registered, and cameras that record with the video recorder must belong to one of the recorders.
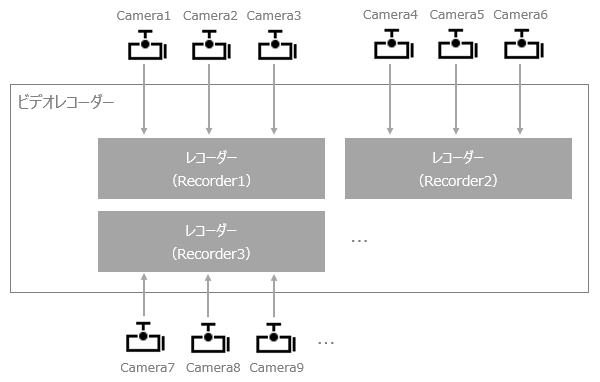
In the recorder settings, you define the recording destination, viewing destination, and transfer destination of the recorded data file. To record with a video recorder, you must first register the recorder, then define the connection settings with the desired network camera by registering the camera, and select the recorder to which the camera will belong and assign it. By doing this, when the video recorder executes the recording process, the recorded data will be saved in the desired location according to the recording destination defined in the recorder to which the camera belongs. In addition, when viewing and playing recorded data from a video player, the recorded data will be retrieved from the viewing destination defined in the recorder and played.
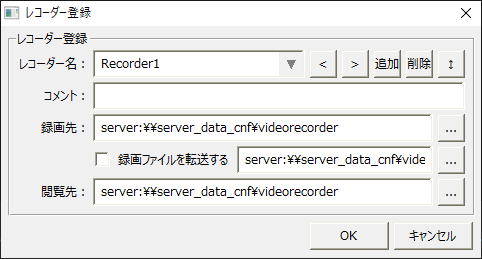
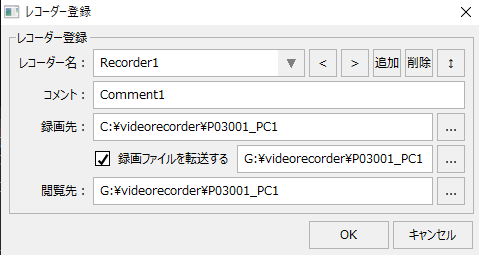
Below is the recorder registration settings screen.
(Example of recorder registration dialog settings)
|
In the recorder settings, you can specify the destination for recording data files, where they will be recorded, viewed, and transferred.
First, in the Recording Destination, specify the folder where the video data files recorded by the video recorder will be saved. Next, in the View Destination, specify the folder where the recorded data files will be referenced when playing back the recorded data from a video player, etc. Then, if necessary, you can set it to automatically transfer the recorded files to the Transfer Destination folder.
The example on the left is an example where the settings are Save on Server / No Transfer / View on Server. |
For each setting of recording destination, transfer destination, and viewing destination, you can choose whether to set it on the server PC side or the local PC side (client PC side).
(Example of folder selection: Save on server PC)
|
If you select the server PC, you can save and view recording data files under the public folder defined on the Panel Server side.
|
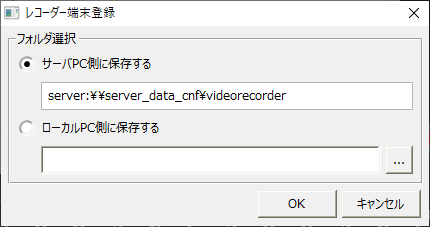
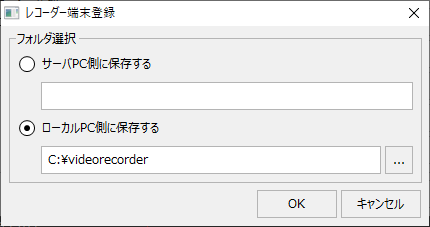
If you select Local PC, you can directly specify a folder on each drive connected to the client PC that is performing the recording process.
(Example of folder selection: Save on local PC)
|
If you select Local PC, you can specify a HDD drive (such as C drive) that is directly connected to the PC, as well as a network drive such as NAS.
|
(Example of recorder registration dialog settings)
|
In the example on the left, the NAS drive is shared on the network as the G drive, and is specified as the transfer and viewing destination. By setting it up like this, the recorder's recordings are temporarily saved locally and then transferred to NAS, and when viewing, the NAS is referenced. |
In this way, by combining the recording destination, viewing destination, and transfer settings effectively, you can support various system configurations. These settings must be set appropriately depending on the number of cameras you actually connect, the recording quality (fps), your system configuration, etc.
|
The settings for the recorder's recording destination, transfer settings, and viewing destination must be carefully configured to suit the actual operation. For ideas on the recorder's recording settings, please refer to "Video Recorder System Configuration and Operation". |

What is a recorder terminal?
The client PC that actually performs the recording process is called the "recorder terminal." The recorder terminal records the cameras that belong to the recorder that it is processing, according to the recorder definition defined in the video recorder.
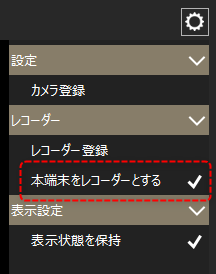
Below is the video recorder settings menu.
|
If you select "Use this device as a recorder" from the menu on the left, the following dialog will be displayed.When you select the desired recorder name from the dialog and register it, the client PC on which you performed this setting operation will become the recorder terminal for that recorder.
|
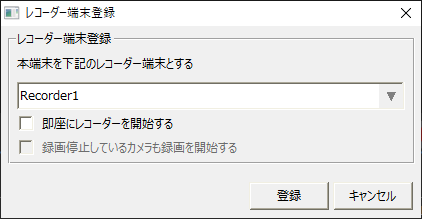
Here, the important rule is:You can define multiple recorders for the video recorder, but each client PC can only be a terminal for one recorder.Therefore, if you want to register multiple recorders and record, you will need multiple client PCs.
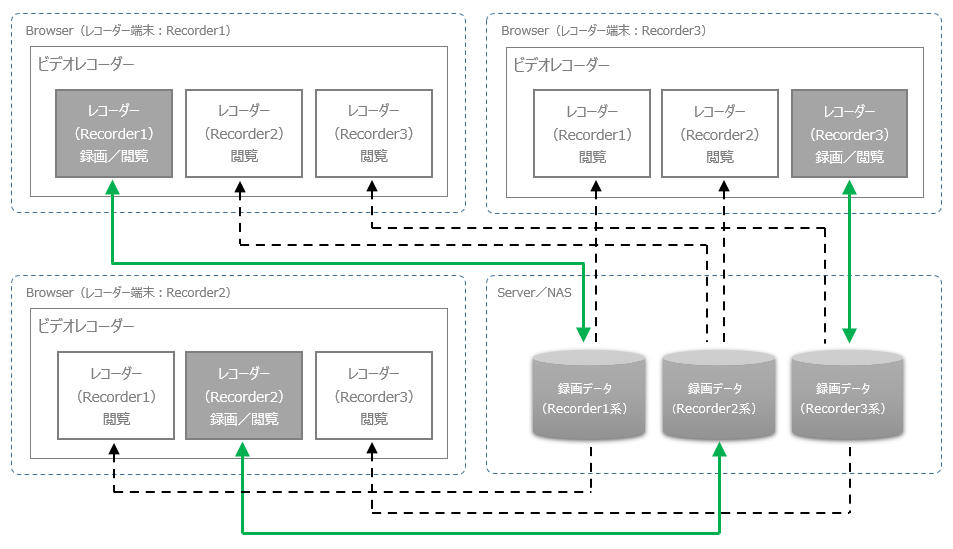
Furthermore, by configuring the recorder terminal with multiple client PCs, the recording processing load can be distributed.
Below is an example of configuring a recorder terminal with multiple client PCs.
|
When multiple recorders are registered and the recorder terminals are distributed, the recording destination and viewing destination of the recorded data must be set to match. For example, by setting the recording destination of each recorder to the server and the viewing destination to the server as well, all recorded data can be commonly viewed from the video recorder running on each client PC. Alternatively, when using a network shared drive such as NAS, the recording destination can be set to the local, the transfer destination to the NAS drive, and the viewing destination to the NAS drive, allowing each client to commonly access the NAS drive. Note that the recorder's recording destination, transfer settings, and viewing destination settings must be carefully set according to the actual operation. For ideas regarding the recorder's recording settings, please refer to "Video Recorder System Configuration and Operation". |