Preparation for connection (all PCs)
This section explains the preparations required when connecting with OPC.
Workgroup Settings
When connecting to the OPC server, the "Workgroup Name" of all PCs that connect to OPC must be the same. The "Workgroup Name" can be confirmed from the Windows OS "Control Panel" - "System". If it is different for each PC, change it from "Change Settings".

Registering a user account
All PCs connecting to OPC must have the same "user account." When creating a user account, follow the steps below to grant Administrator (administrator) privileges.
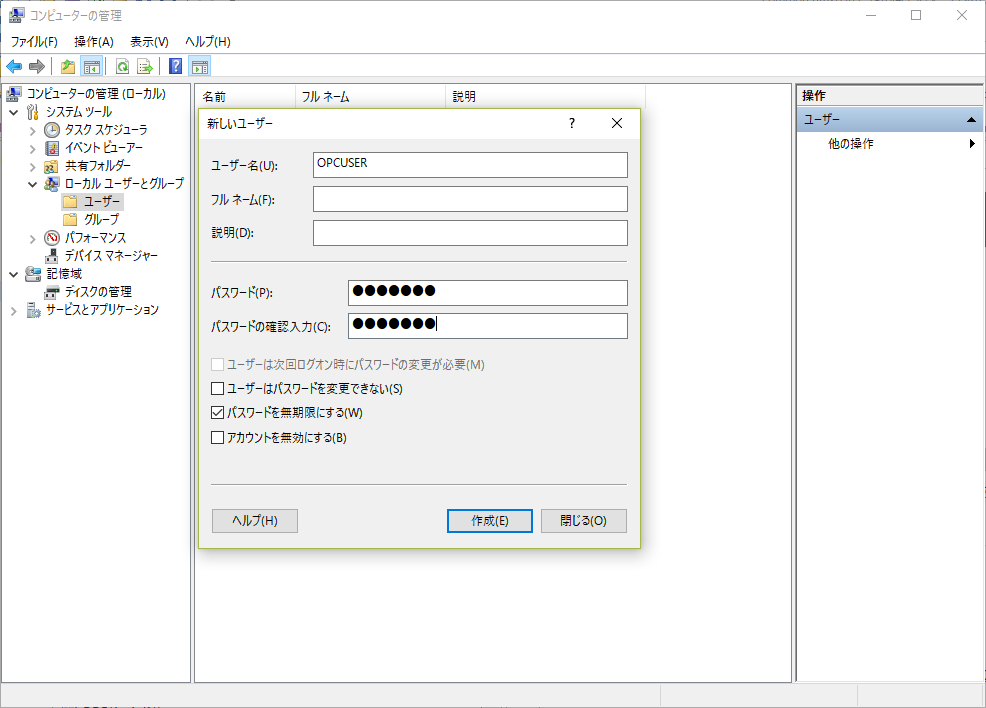
1.Windows Launch the OS's "Control Panel" - "Administrative Tools" - "Computer Management", open "Local Users and Groups" - "Users", right-click and select "New User".
Enter the user name and password (make sure to create the same user name and password on all PCs), and click "Create" with only "Password never expires" checked.
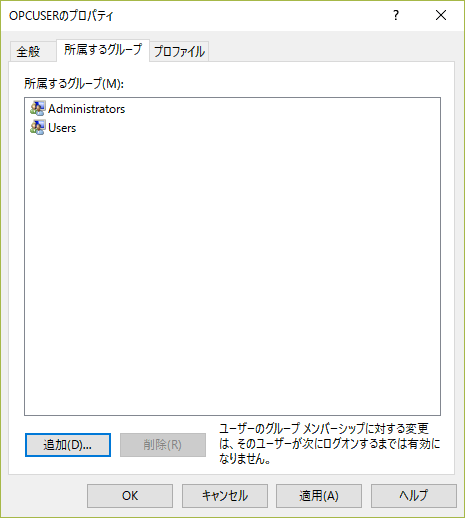
2.Right-click the created user and select "Properties." In "Member of" click the "Add" button and add "Administrators."
Registering the OPC library
Register the libraries required for the
OPC remote connection. Start "Command Prompt (Administrator)" and enter the following command.
*The following is an example of input when the OS is installed on the C drive.
>cd C:\Program Files (x86)\Common Files\Roboticsware\Ver6\opc >opcenum /service
|
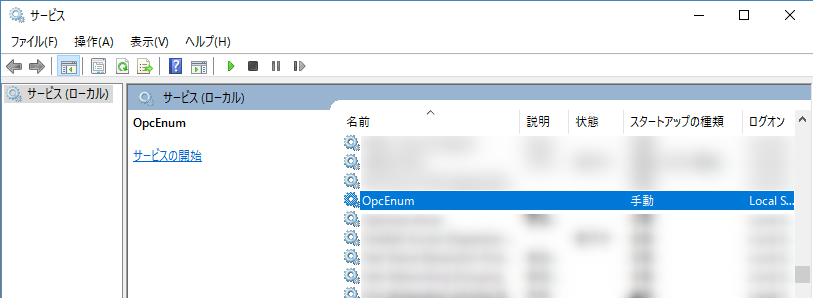
After executing the "opcenum" command, please check whether "opcenum" is correctly registered in the services. Windows Start the OS's "Control Panel" - "Administrative Tools" - "Services", and if "OpcEnum" is registered, it is correctly registered. The service startup type can remain manual and no changes are required.
|
Be sure to start the command prompt with administrator privileges.
|