Settings on the OPC server (FA-Server)
This section explains how to configure the PC that will run the OPC server (FA-Server).
Registering a OPC server
OPC Register the information of the application that will be the server in the Windows OS registry. There are two ways to register the information in the registry:
Method 1)
After installing FA-Server, launch FA-Server once with administrator privileges.
*Our package automatically registers necessary information in the registry when launched.
*If you do not start the program with administrator privileges, it will not be possible to register it in the registry. To run the program as an administrator, right-click FA-Server registered in the start menu and select "Run as administrator."
Method 2)
If you are unable to perform Method 1, launch Command Prompt (Administrator) and enter the following command:
>cd "Application installation folder" >faserver6.exe /regserver
|
DCOM settings
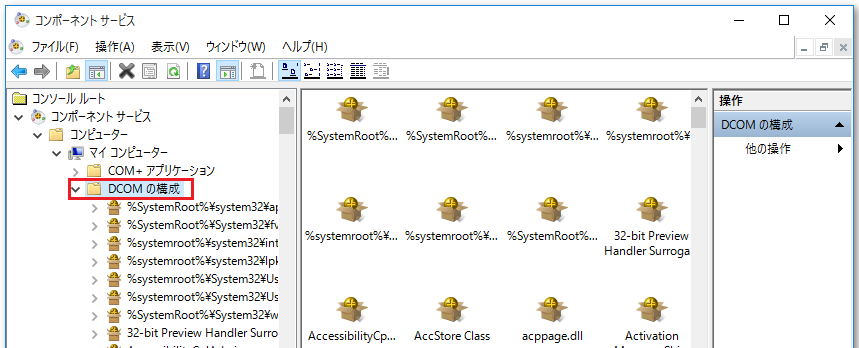
1.Start "Component Services"
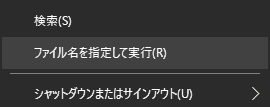
Windows Launch the OS's "Run", enter "dcomcnfg", and click the "OK" button to launch "Component Services".
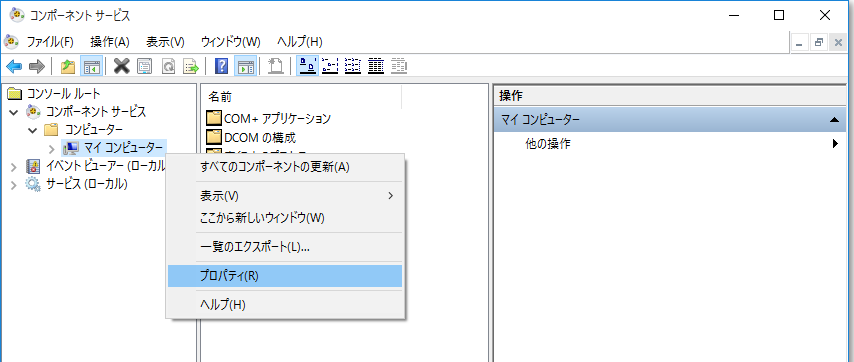
2.From the launched "Component Services," select My Computer, right-click and select "Properties" from the menu that appears to display the properties.
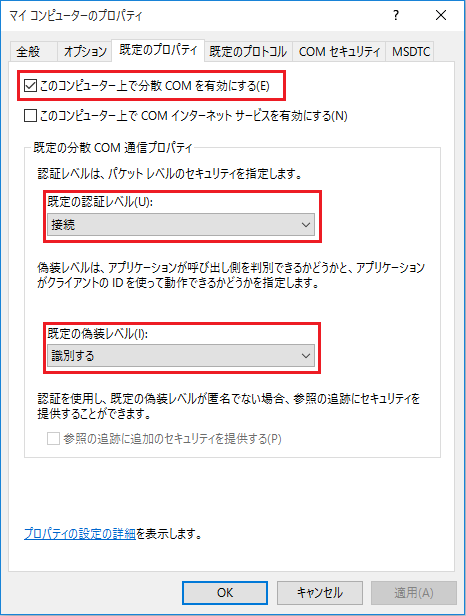
3.On the Default Properties tab, check "Enable Distributed COM on this computer", set "Default authentication level" to "Connect" and set "Default impersonation level" to "Identify".
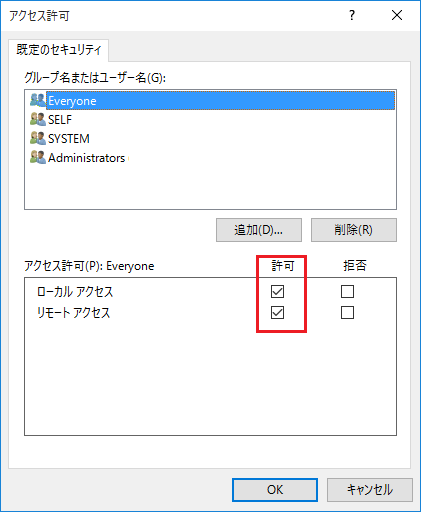
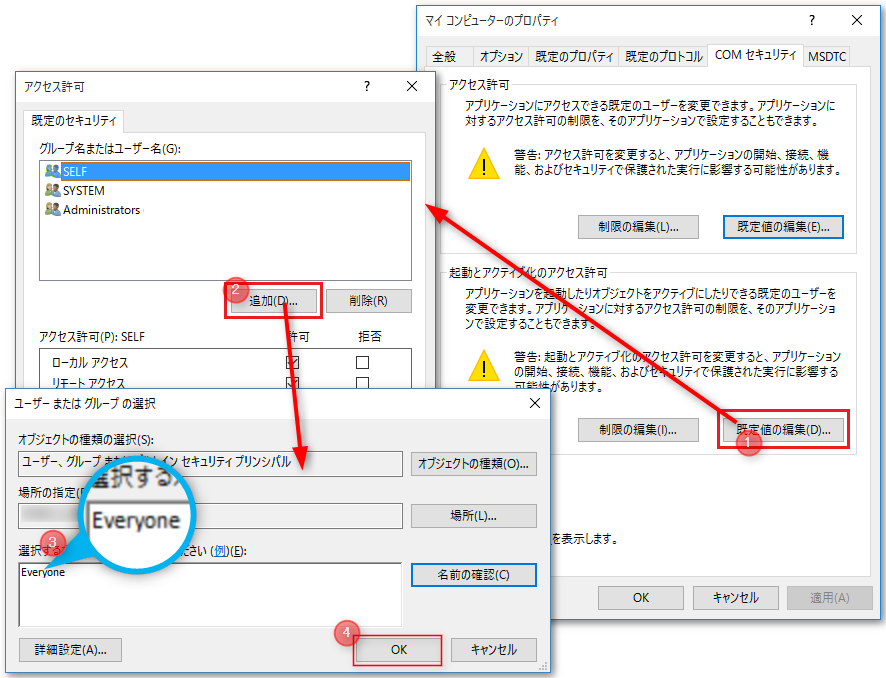
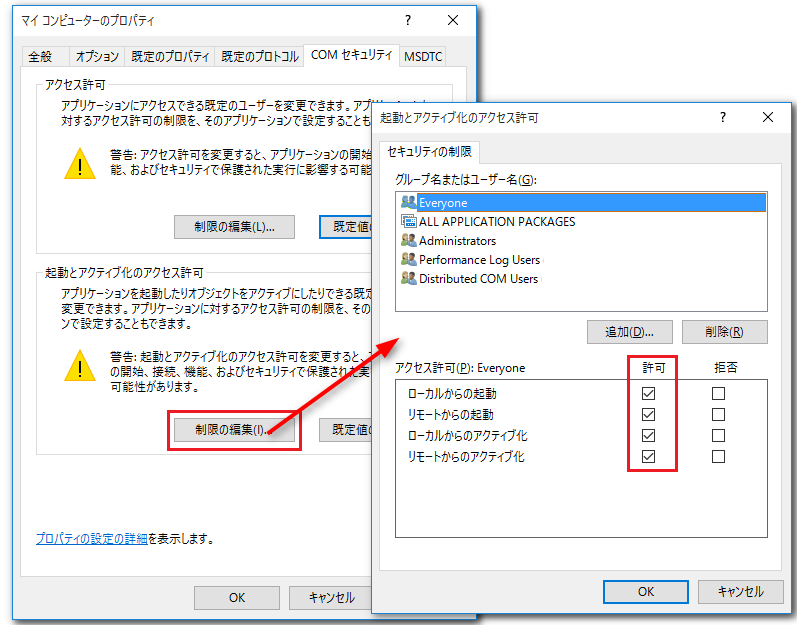
4.COM Click the "Edit Defaults" button in "Access Permissions" on the Security tab.and add "Everyone" as the permission.
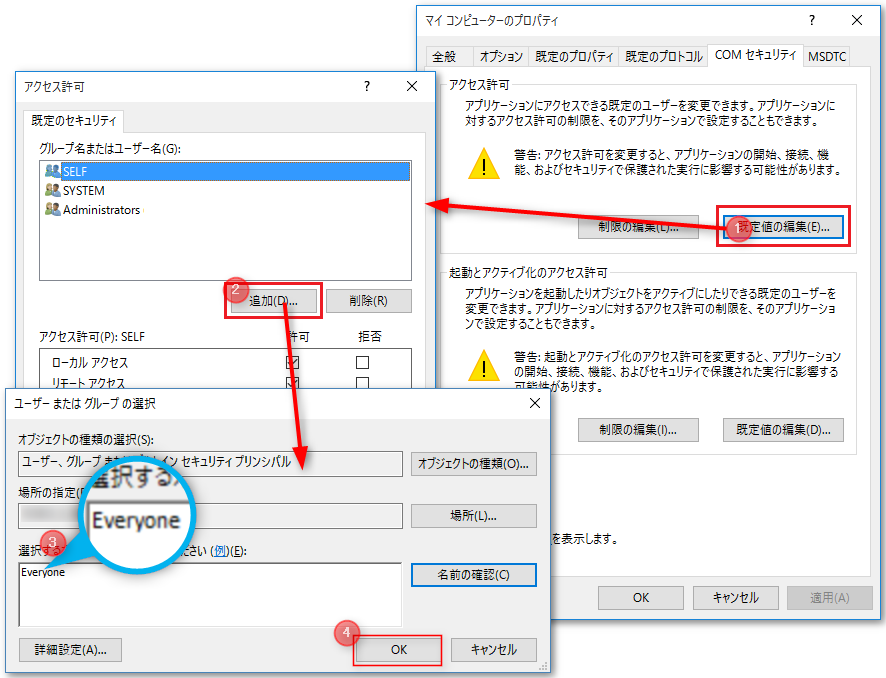
After adding, check all of the permissions for "Everyone" and press "OK".
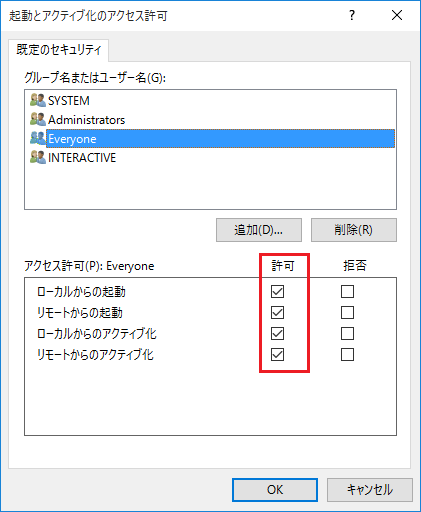
5.COMSecurity tab"Launch and Activation Permissions" - "Edit Defaults"Press the buttonand add "Everyone" as the permission.
After adding, check all of the permissions for "Everyone" and press "OK".
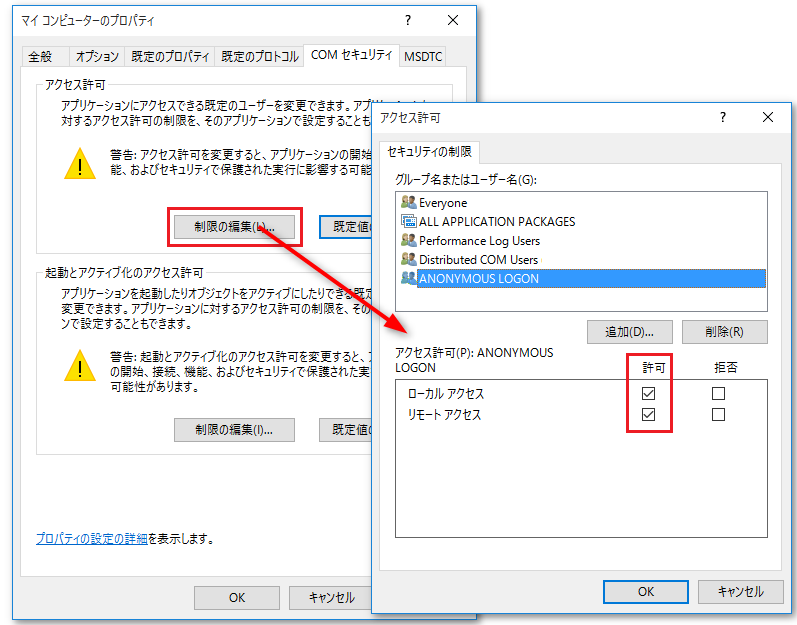
6.COMSecurity tabClick the "Edit Limits" button under "Access Permissions" and check all access permissions for "ANONYMOUS LOGON".
7.Click the "Edit Limits" button under "Launch and Activation Permissions" and check all permissions for "Everyone".
8.Return to Component Services and open "KDCOM Configuration".
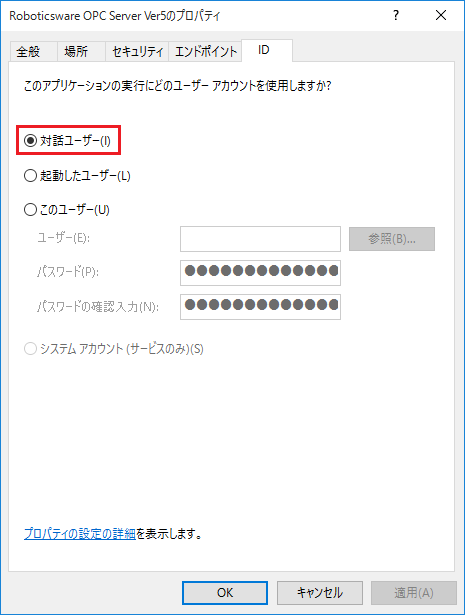
9.The OPC server is "RoboticswareSelect "OPC Server" and right-click to display the properties. On the "Identity" tab, select "Interactive User".
Network Security Settings
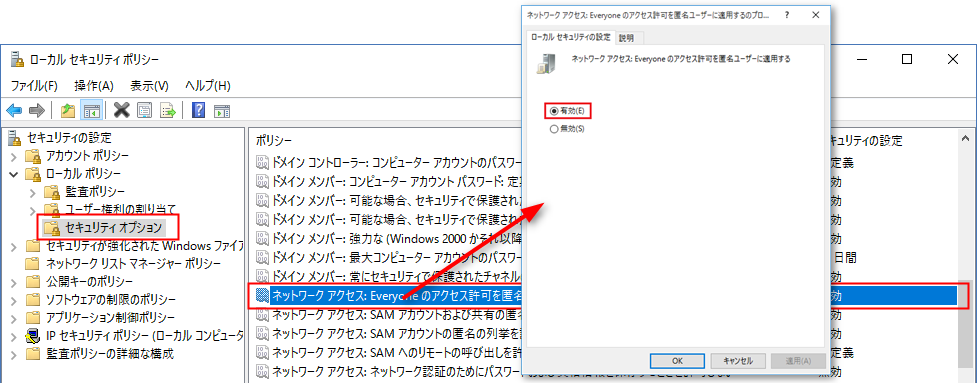
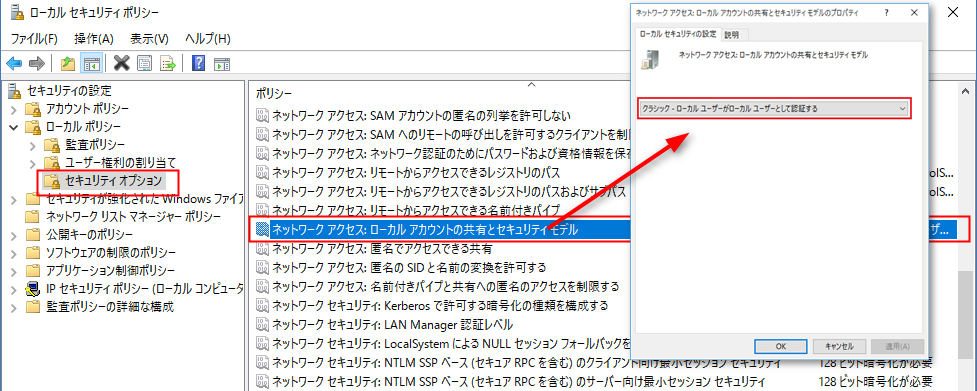
1.Launch "Local Security Policy"
Windows Launch the OS's "Run", enter "secpol.msc" and click the "OK" button to launch "Local Security Policy".
2.Select "Local Policies" - "Security Options", right-click "Network access: Let Everyone permissions apply to anonymous users" and display the properties. Select "Enabled" from the properties.
3.Select "Classic..." from the properties "Network access: Sharing and security model for local accounts".
4.Restart your PC to make the settings effective.