Communication setting method
There are two connection points:
Physical Connection
To connect to
Ethernet, use either 10BASE-T, 10BASE-5, or 10BASE-2. Connection examples are clearly stated in the manuals issued by the manufacturers for each model, so please refer to them.
•In the case of 10BASE-T, a cross cable is used when connecting directly between a PC and a PLC without using a hub or other device.
(Bands above 100BASE are also referred to as 10BASE-T here)
•For 10BASE-2, be sure to attach terminators (termination resistors) to both ends of the network.
Network settings (IP address, port number, etc.)
Make sure that
TCP/IP is installed in the OS, and assign IP addresses to the PC and PLC. The method for setting up the PLC Ethernet varies depending on the manufacturer and model, with some setting it with dip switches and others with a ladder program.
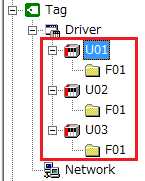
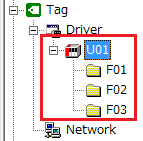
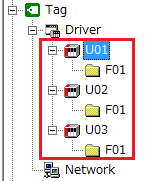
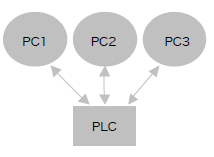
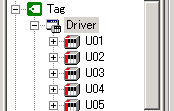
In addition, there are two cases when connecting to multiple PLCs:
|
Each PLC communicates independently.
|
|||
|
||||
|
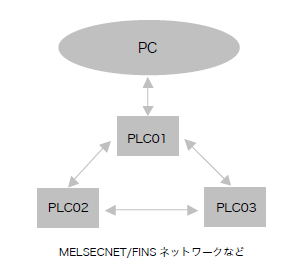
For models that can communicate with other PLCs via a connected PLC, you can communicate with remote PLCs by configuring the folder network. If you want to connect to multiple remote devices, you may be able to communicate faster by setting multiple ports for one PLC and communicating in parallel, rather than creating multiple folders and communicating through them.
|

Ethernet Common Dialog
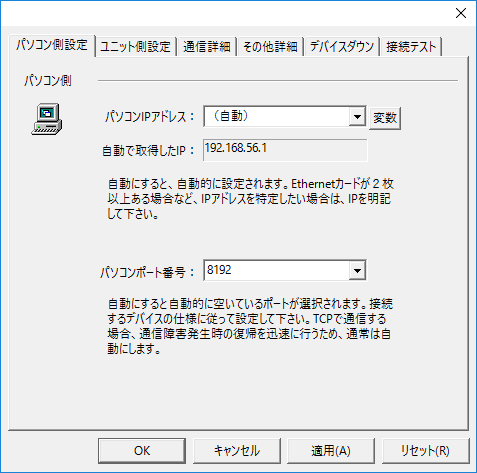
PC settings
|
•Computer IP address
•Computer port number
|
Unit side settings
|
•Unit IP Address
•Ping test
•Unit Port Number
|
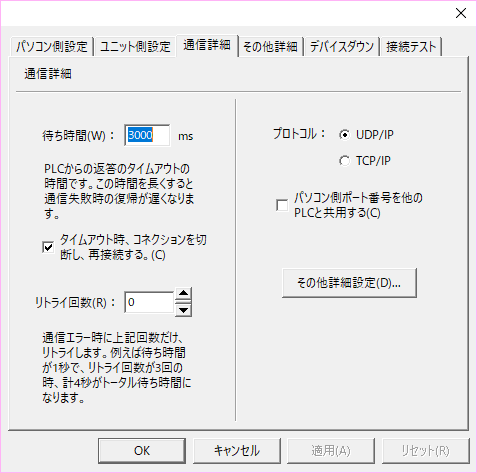
Communication details
|
•Waiting time
•Retry count
•protocol
•Share the PC port number with other PLCs
•Other detailed settings |

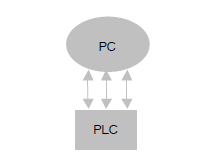
Parallel Connections
If faster communication with a PLC is required, a parallel connection is recommended.
Most PLCs allow multiple computers and applications to connect to one Ethernet module at the same time, so communication can be performed in the following configuration. For example, the Mitsubishi Q series allows up to 16 connections to be connected at the same time. For details, please refer to the manual of each manufacturer.
Using this function, multiple connections are established and each connection communicates in parallel, allowing for even faster communication.
|
Five connection examples
Normally, communication is performed with one PLC via one connection, but if high-speed communication with a large number of tags is required, the connections are separated. By distributing and defining tags for each connection, communication can be performed faster.
|
|
Parallel connections are a configuration method intended to maximize performance. If you believe that one connection will provide sufficient performance, we recommend using one connection. For information on performance, please refer to the "Communication Performance" section.
|
Wait time settings
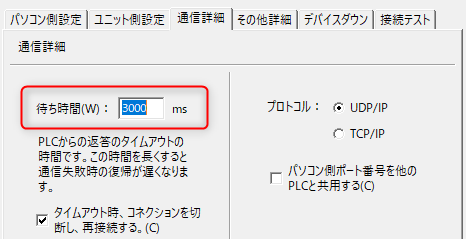
When communicating via Ethernet, the "Wait Time" setting in the image above is very important. Depending on the network environment, you may need to set a longer timeout time. If you experience the following symptoms, set a longer timeout time.
•A communication error occurs occasionally for "irregular length".
•The value changes even though the value has not changed
About UDP/IP and TCP/IP
Depending on the model, you can choose between "UDP/IP" and "TCP/IP". When using "TCP/IP", please note the following:
1)PLC side settings
Please set it so that port numbers from unspecified PCs can be accepted.
2)PC settings
Set the protocol to be used to TCP/IP and the port number on the PC side to "Automatic" (a new port number will be issued each time you reconnect).
|
UDP is connectionless, so even if communication is lost for some reason, it will immediately resume. In the case of TCP/IP, recovery will occur immediately, but depending on the situation, the recovery process may be delayed slightly (from a few seconds to a few tens of seconds).
|
|
With TCP/IP, the same port number cannot be used immediately when reconnecting, so the port number on the PC side must be set to "Automatic" and a new port number must be issued for each reconnection.
|
About IP addresses
If the PC's IP address is obtained automatically by DHCP, set the PC's IP address to "Automatic." In that case, however, the PLC must be set to accept connections from any IP address.