Start communication with PLC
By switching the application online, the tag becomes ready for communication.
There are three communication switching states: offline + online.
situation |
name |
Contents |
|
off-line
|
Stop communication. |
|
Online (debug)
|
It communicates virtually (it does not communicate with PLC). It is used when PLC is not available. |
|
Online (Monitor)
|
It communicates with PLC. This package allows you to check and write current values. |
|
Online (fastest)
|
It communicates with PLC. This package is minimized and displayed as an icon in the task tray. This reduces the resources related to drawing this package.
You can also double-click the taskbar icon to display the online (monitor) mode. In that case, communication with PLC will not be interrupted. |
About the tag lamp color
In the multi-view, the state of the round lamp displayed to the left of the tag will change depending on the tag's communication status.
When the application goes online, it first connects to the PLC. However, unless there is a communication request to the tag, the lamp remains black and in standby.
When a communication request is made to the tag, the lamp changes to a color other than black.
There are various cases where this is required.
・Communication requests from clients (OPC/DDE/IPLink, etc.)
- When tags are used from each action
・When referenced from a tag monitor view, etc.
The type of request each tag is receiving can be determined by the color state of its lamp.
・![]() (green)
(green)
It is connected to the tag from inside with "Automatic Update". "Inside" here means when monitoring is requested by "Tag Operation" or "Start Monitoring". When "Monitoring Ends", it will return to black again.
・![]() (yellow)
(yellow)
It is connected to the tag from outside with "no auto update".
・![]() (red)
(red)
It is connected to a tag from outside with "Automatic Update".
If "Automatic Update" is enabled, communication with the PLC will occur at the update interval set for the folder. This automatic update (polling) is performed on a folder-by-folder basis, and only tags with "Automatic Update" enabled will be subject to communication.
For example, even if a folder has 10,000 defined tags, if there is only one tag with "Auto Update On", only that one tag will be communicated.
icon |
color |
Communication Request |
Requested by |
Automatic Updates |
|
black |
none |
- |
- |
|
green |
Yes |
internal※ |
do |
|
yellow |
Yes |
external※ |
do not |
|
red |
Yes |
external※ |
do |
* "Internal" refers to when a monitoring request is made by "tag operation" or "start monitoring". Any other request is an external request.
|
▪OPC
▪action
|
Tag quality flags
Each tag has status information called "quality flags".
The quality flag is also called the "quality flag". The state of the quality flag can be seen in the "Quality" column of the FA-Server multiview.
(Example of quality flag display in multi-view)
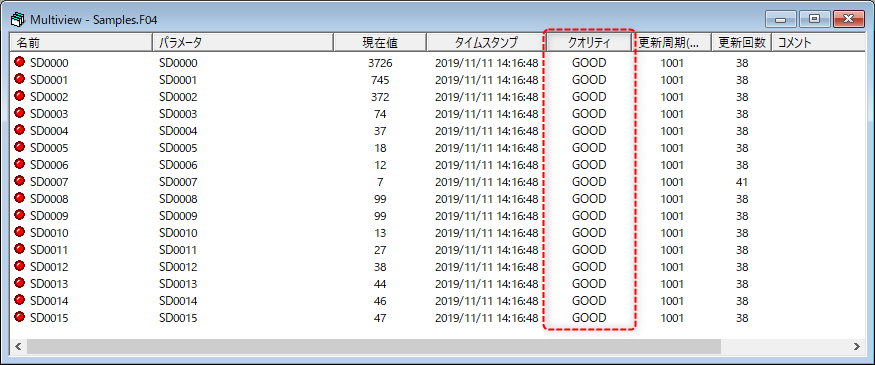
The quality flag indicates one of the following three states depending on the tag's communication status.
situation |
Contents |
GOOD |
"GOOD" indicates that communication is proceeding normally.
|
BAD |
"BAD" means that some kind of communication error has occurred.
|
UNCERTAIN |
"UNCERTAIN" means that no communication has occurred since FA-Server went online.
|
Monitoring values
Even if the online state has started, if there is no communication request to the tag, the lamp will remain black (communication has not started, standby state).
If you want to check the PLC value in this state, you can force start communication and check the value by performing the following operation.
1.Go online (monitor)
2.Right-click on the tag list and select "Tag Operations" and "Start All Tag Monitoring" from the menu.
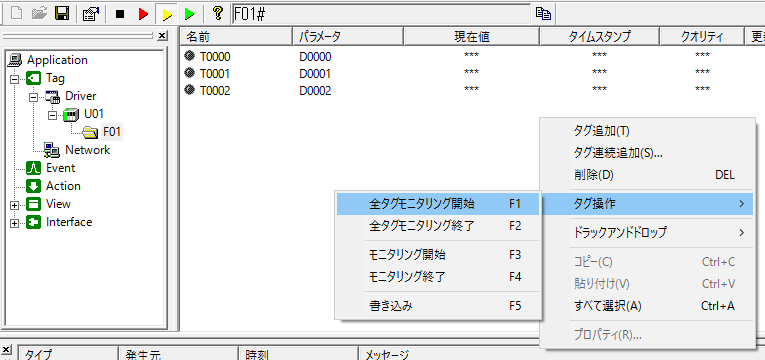
When the light turns green, communication is taking place.
Write a value
If you want to forcibly change a PLC value from the multiview, you can write it using the following procedure.
1.Check that the tag light is red or green
For any other color, start monitoring the value using the procedure above.
2.Right-click on the tag you want to write to and select "Tag Operations" and "Write" from the menu.
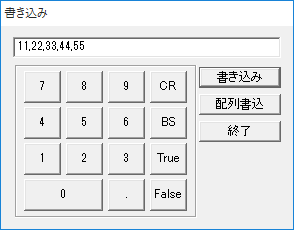
Then, the write dialog box like the one below will be displayed.
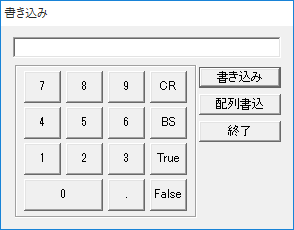
3.Execute the write
To write a value, enter the value you want to write in the input box of the Write dialog and click the Write button.
Here, if you select multiple tags and execute the write as shown below, you can write the same value to multiple tags at once.
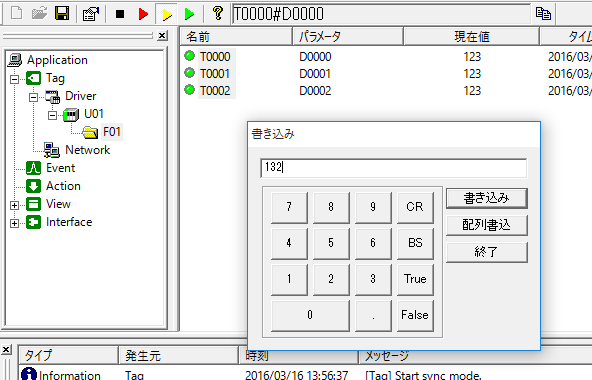
The tag to be written to from the write dialog is the tag currently selected in the multi-view. If you change the selected tag in the multi-view while the dialog is displayed, the tag to be written to will also change.
|
If you want to write values to an array tag, specify the values separated by commas (,) such as "11,22,33,44,55".
|
|
In addition to the above methods, you can also use the tag monitor view to monitor tags on the FA-Server screen. For details on how to use the tag monitor, see "Checking tag values (tag monitor)". |