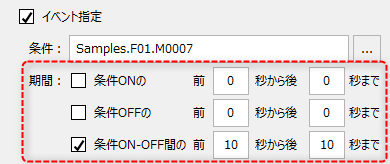
Camera registration settings screen
The camera registration screen is broadly divided into "viewing" and "recording" settings.
|
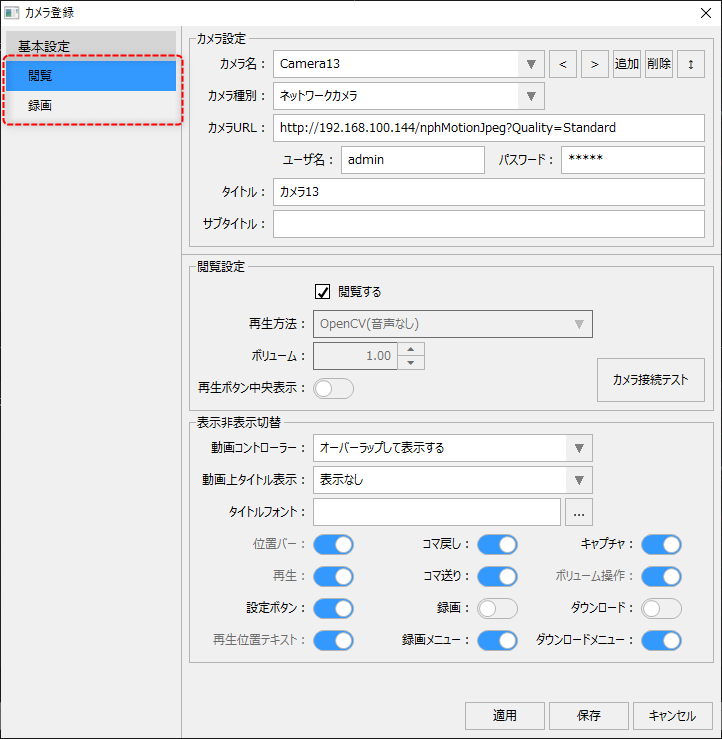
Viewing and recording settings can be changed from the menu on the left side of the settings screen.
|
|
The "Camera Settings" section on the left has the same settings for both viewing and recording.
|
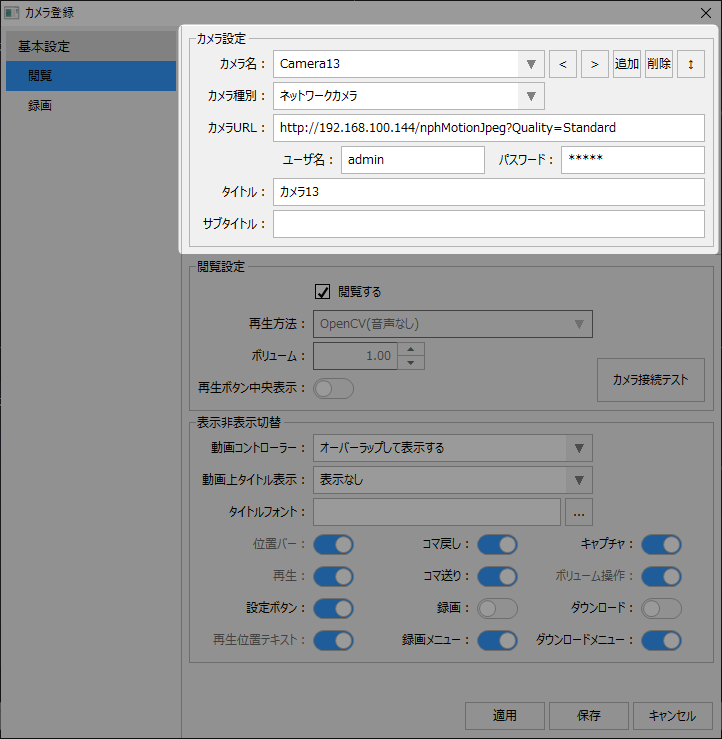
Camera settings (settings common to viewing and recording)
The "Camera Settings" settings are common to both viewing and recording.
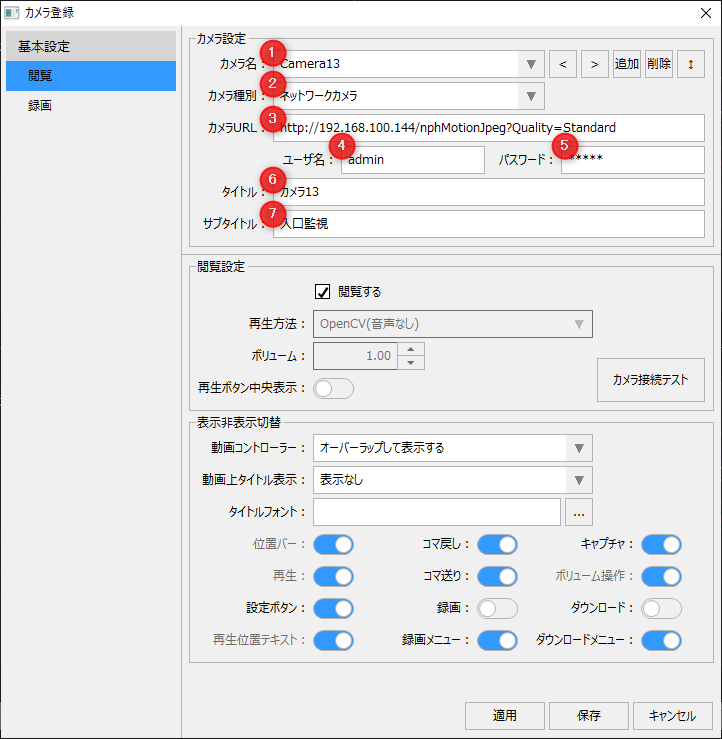
# |
name |
explanation |
||||||||||||
|---|---|---|---|---|---|---|---|---|---|---|---|---|---|---|
1 |
Camera Name
|
Register and edit camera names. You can register new camera names and delete camera names using the Add and Delete buttons. If a camera is already registered, select the camera to be edited from the combo box. You can also edit the camera name directly from the combo box. |
||||||||||||
2 |
Camera Type
|
Select the camera type.
|
||||||||||||
3 |
Connection information etc.
|
For network cameras
If the camera type is a network camera, specify the URL of the reference.
In the case of Nekaroku
If the camera type is Necarok, specify the connection information with Necarok.
For video or image files
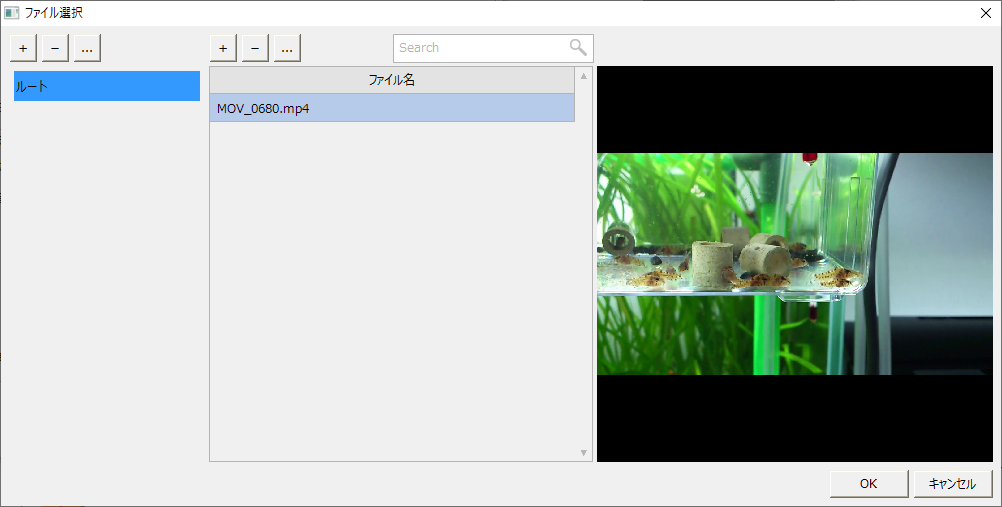
If the camera type is a video file or image file, specify the file name to reference. When specifying a file, you can import the target file into the system resource folder and reference it in common. If you do not want to import it into the resource folder and reference it, specify the path directly using an absolute path or relative path.
|
||||||||||||
4 |
Username
|
Specify the user name to log in to the network camera. If the user name is included in the URL parameter due to the camera specifications, there is no need to specify this parameter. |
||||||||||||
5 |
password
|
Specify the password above. |
||||||||||||
6 |
title
|
Specify the string to display as the video title. |
||||||||||||
7 |
subtitle
|
Specify the subtitle string. If you specify a subtitle, it will be displayed in parentheses at the end of the title string. |






Viewing/Viewing Settings
Settings for video playback, volume, etc.
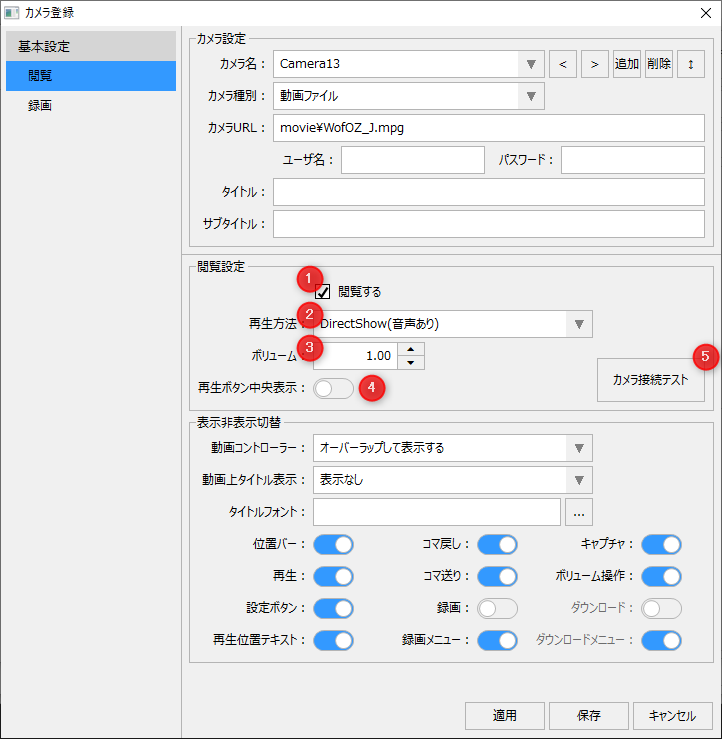
# |
name |
explanation |
||||
|---|---|---|---|---|---|---|
1 |
Browse
|
Enable viewing of this camera. |
||||
2 |
How to play
|
Select the video playback method. This setting is only available when the camera type is "Video File", and is fixed to OpenCV for other types.
|
||||
3 |
volume
|
Specifies the initial volume setting for video playback. Specify a value between 0.0 and 1.0. This setting is only valid when the playback method is DirectShow.
|
||||
4 |
Play button centered
|
When this setting is enabled, the video play button will be displayed in the center of the video playback area. |
||||
5 |
Camera connection test
|
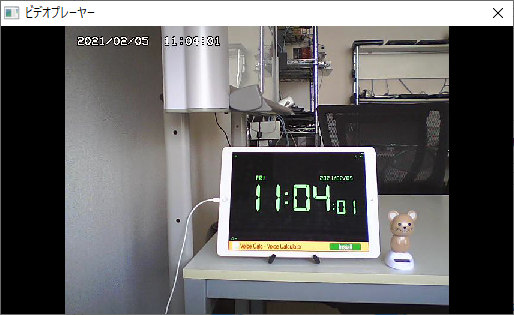
You can test whether you can actually connect to the camera with the current settings. If the connection is successful, a pop-up video will appear.
(Example of camera test pop-up display)
|
View/display/hide switch
This setting allows you to show or hide the video player controller, title, etc.
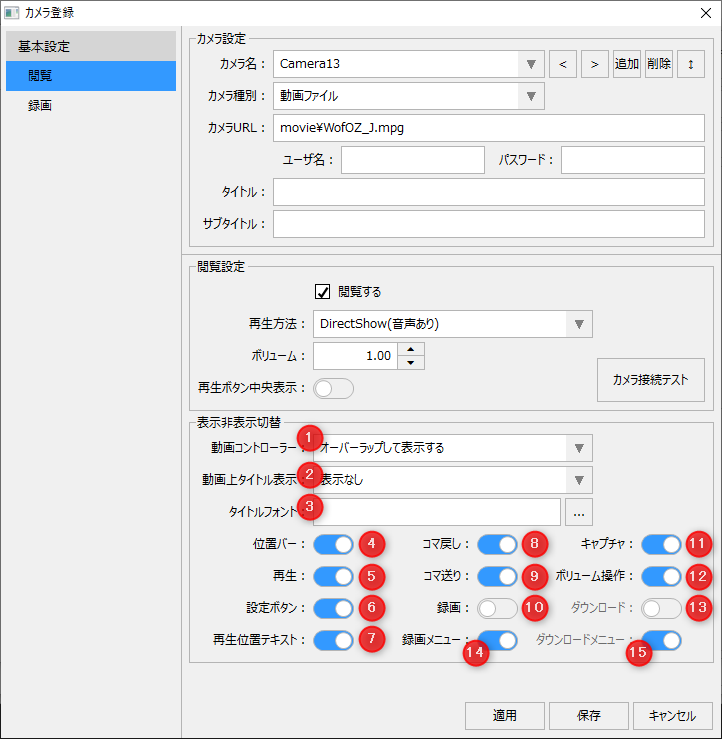
# |
name |
explanation |
||||||||||
|---|---|---|---|---|---|---|---|---|---|---|---|---|
1 |
Video Controller
|
This is the display setting for the video controller. The video controller is displayed at the bottom of the video display area.
|
||||||||||
2 |
Display title on video
|
This is the display setting for the title on the video.
|
||||||||||
3 |
Title Font
|
Set the font for the title displayed on the video. |
||||||||||
4 |
Position Bar
|
Sets whether or not to display the position bar (playbar) at the top of the video controller. |
||||||||||
5 |
reproduction
|
Sets whether or not to display the play icon on the video controller. |
||||||||||
6 |
Settings button
|
Sets whether or not to display the settings icon on the video controller. |
||||||||||
7 |
Playback position text
|
Set whether to display information about the current playback position (such as the time being played) on the video controller. The playback position text is only displayed when playing a recording or a video file. |
||||||||||
8 |
Frame forward
|
Sets whether or not to display the frame advance icon on the video controller. |
||||||||||
9 |
Frame Rewind
|
Sets whether or not to display the frame-reverse icon on the video controller. |
||||||||||
10 |
Recording
|
Set whether or not to display the recording icon on the video controller. |
||||||||||
11 |
Capture
|
Sets whether or not to display the capture icon on the video controller. |
||||||||||
12 |
Volume Control
|
Set whether or not to display the volume control icon on the video controller. |
||||||||||
13 |
download
|
Set whether to display the download icon on the video controller. |
||||||||||
14 |
Recording Menu
|
Set whether to display the menu item for the recording function in the menu displayed by the setting icon. This menu item is displayed only when the playback method is OpenCV. |
||||||||||
15 |
Download Menu
|
Set whether to display the menu item for the download function in the menu displayed by the setting icon. This menu item is displayed when the playback method is OpenCV and when recording and playback is in progress. |
Recording/Recording Settings
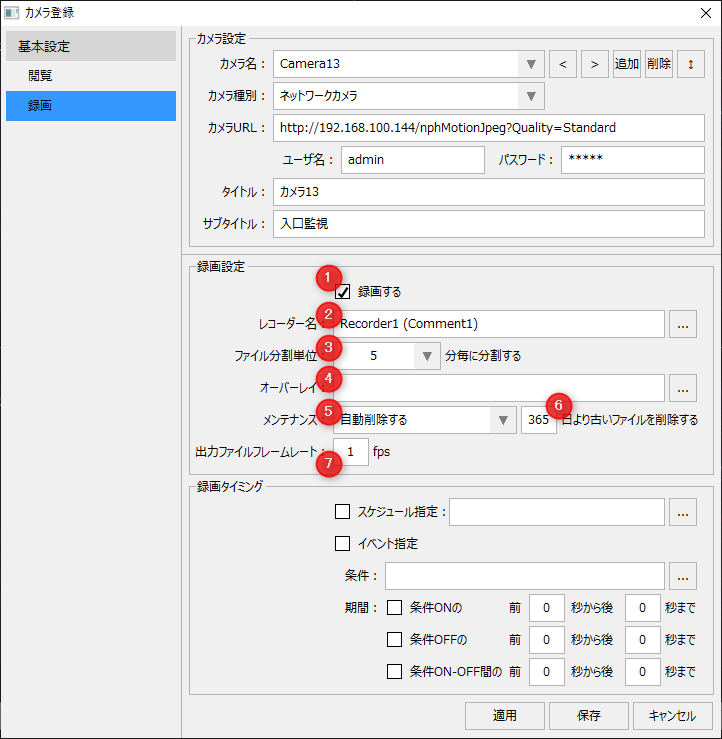
# |
name |
explanation |
||||||||||||||||||||||||||||||||||||||||
|---|---|---|---|---|---|---|---|---|---|---|---|---|---|---|---|---|---|---|---|---|---|---|---|---|---|---|---|---|---|---|---|---|---|---|---|---|---|---|---|---|---|---|
1 |
Record
|
Enables recording with this camera. |
||||||||||||||||||||||||||||||||||||||||
2 |
Recorder Name
|
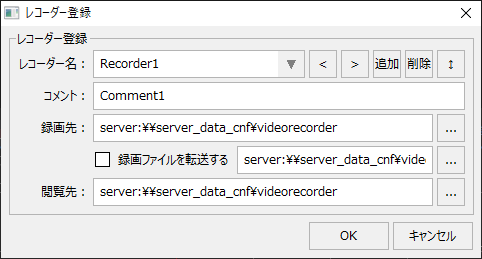
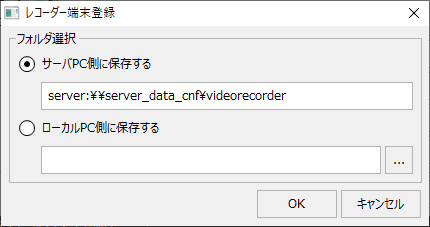
Register/select the recorder to record. Click the button to display the recorder registration screen.
When registering a recorder, you can select the recorder to be assigned to the camera. When registering a new recorder, you can set the recorder name, the location where the recorded files will be saved, the viewing destination, etc.
|
||||||||||||||||||||||||||||||||||||||||
3 |
File division unit
|
The file will be divided and saved at the specified time (minutes). You can select "1", "5", or "10" from the combo box. You can also double-click to edit the value directly. |
||||||||||||||||||||||||||||||||||||||||
4 |
overlay
|
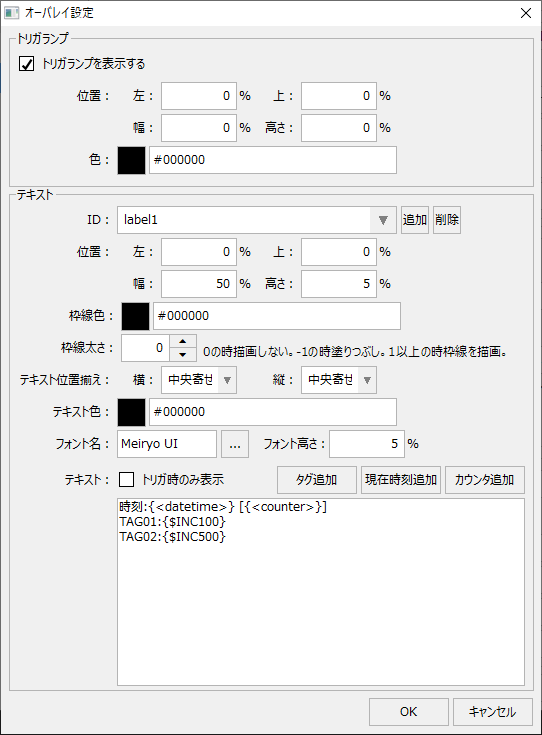
By setting an overlay, you can overlay a lamp shape or any text on the video you are recording. Any string can be specified for the text, and it can also include tag values or the date and time of recording.
Clicking the Settings button to the right of the overlay will display the overlay settings dialog shown below.
|
||||||||||||||||||||||||||||||||||||||||
5 |
maintenance
|
This setting is for automatically deleting video files.
|
||||||||||||||||||||||||||||||||||||||||
6 |
Retention period
|
This is the number of days to store the data for the automatic deletion mentioned above. If you select "Do not automatically delete" in the maintenance settings, this setting will be ignored. |
||||||||||||||||||||||||||||||||||||||||
7 |
Output File Frame Rate
|
The frame rate of the video to be recorded (fps).Frames per second)For example, if you set it to 1 fps, it will record one frame per second. The minimum value that can be set for the recording fps is "0.5". If a value smaller than 0.5 is set, it will be recorded at 0.5 fps. The value specified for the recording fps should be adjusted based on the allowable file size and the performance of the camera itself (frame rate, etc.). For example, if the camera's playback frame rate is 1 fps (once per second), even if you specify a large value such as 25 for the frame rate, the same image will simply be saved repeatedly, resulting in an unnecessarily large file size. |


Recording/Recording Timing
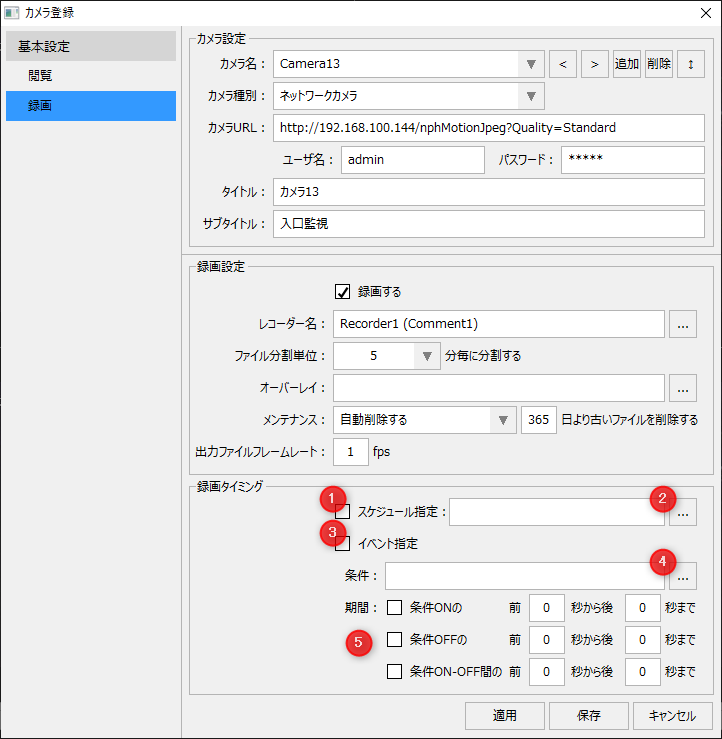
# |
name |
explanation |
||
|---|---|---|---|---|
1 |
Schedule
|
Check this box to enable the schedule specification. By specifying a schedule, you can record based on the time (task) you set for each day of the week. |
||
2 |
Weekly schedule settings
|
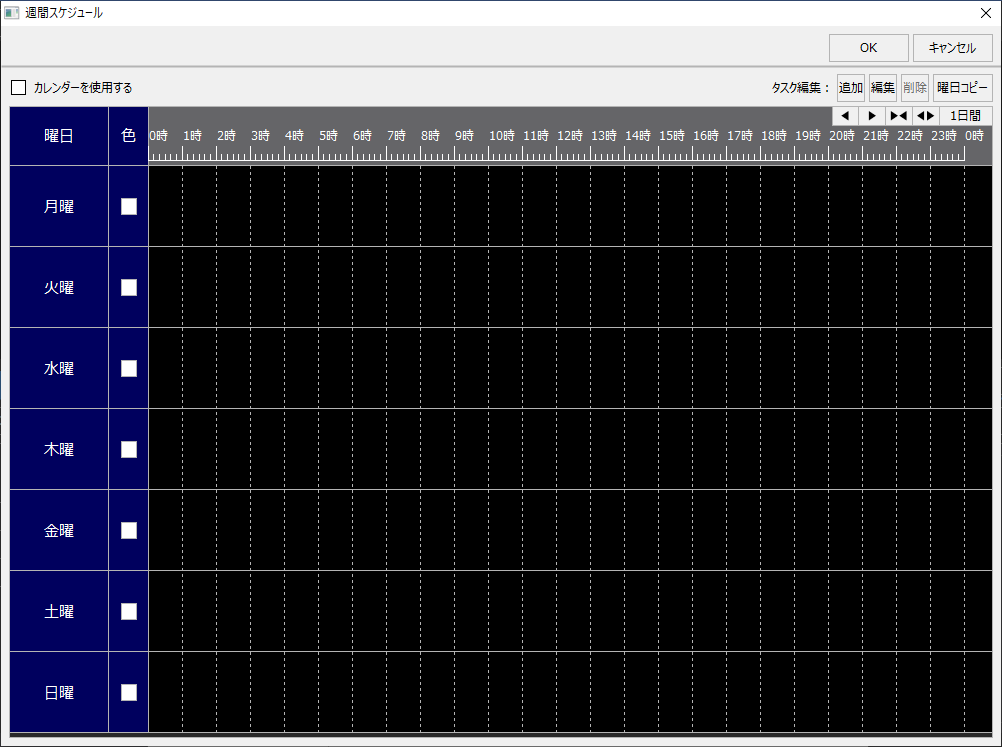
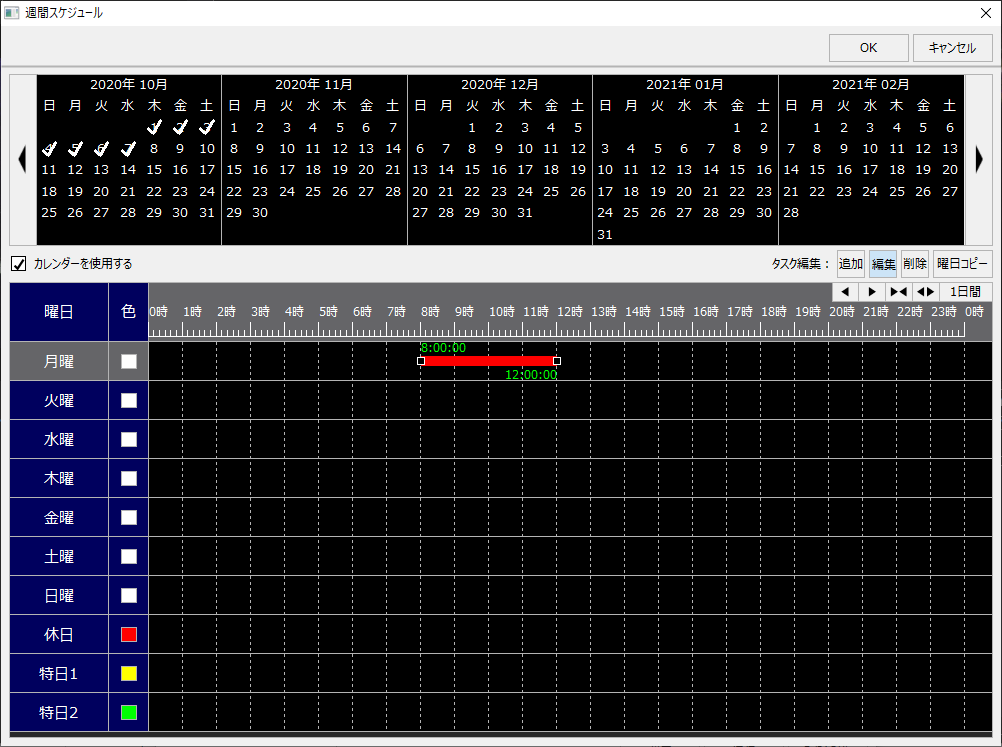
Clicking the Settings button displays the Weekly Schedule Settings dialog.
The weekly schedule allows you to set the schedule for each day of the week from Monday to Sunday.
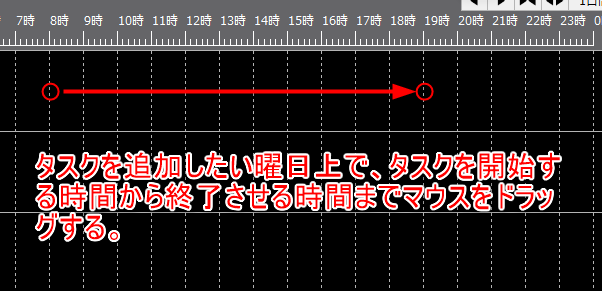
Clicking the "Add" button in the task editor will allow you to add a task to the time chart. This button is a toggle button, and the mode will change each time you click the button.
In the Add mode, you can add a new task by dragging the mouse over the time chart of the day you want to add a schedule to.
Clicking the "Edit" button in Task Editing will allow you to edit the tasks on the time chart. This button is a toggle button, and the mode will change each time you click the button.
In edit mode, when you click on a task, handles will appear on the left and right. You can change the time by dragging these handles left and right with the mouse.
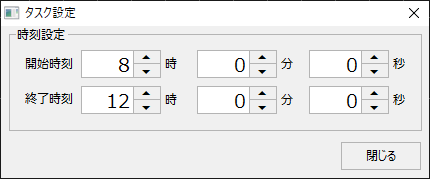
Also, if you double-click the task, the following dialog will appear, allowing you to manually enter the start and end times.
Clicking the "Delete" button with a task selected will delete the selected task.
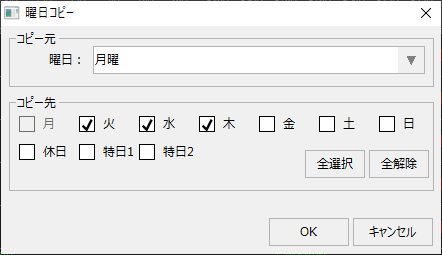
Clicking the Copy Day button displays the Copy Day dialog box.
In the Copy Days of the Week dialog, you can select the schedule to copy from and copy it to the checked days of the week.
■ Calendar settings
In the weekly schedule, you can define a "calendar." Using the calendar, you can set schedules for holidays, special days 1, and special days 2. With the schedules for holidays, special days 1, and special days 2, you can define which dates are holidays, special days 1, and special days 2 separately in the calendar, in addition to controlling each day of the week from Monday to Sunday. By doing so, you can control the days that fall under holidays, special days 1, and special days 2 defined in the calendar according to the schedules for holidays, special days 1, and special days 2.
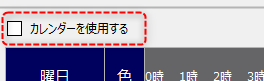
To use the calendar, check the box below.
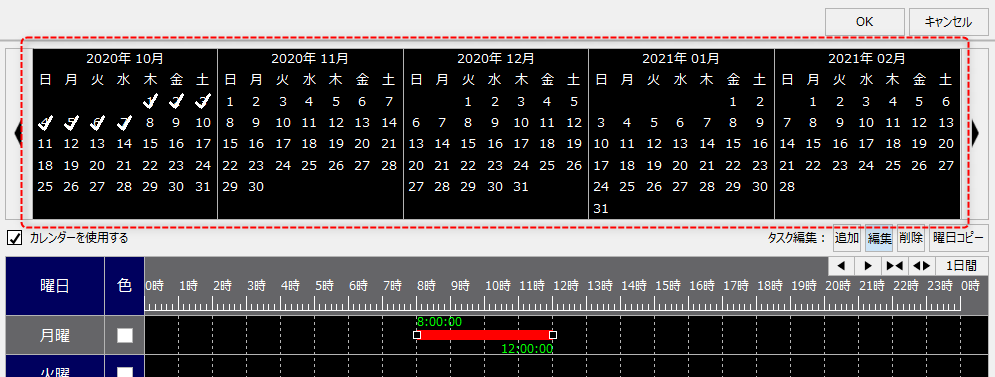
The weekly schedule screen will then change as shown below, with the most recent calendar displayed at the top of the screen and schedule columns for "Holidays," "Special Day 1," and "Special Day 2" displayed at the bottom.
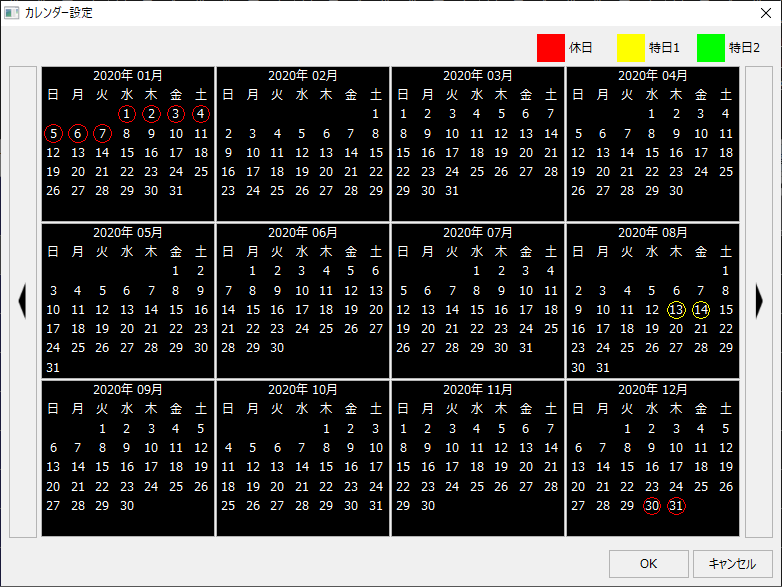
Calendars are defined in the Calendar Settings dialog, which can be displayed by clicking on the calendar area displayed at the top of the screen.
The following dialog will then be displayed:
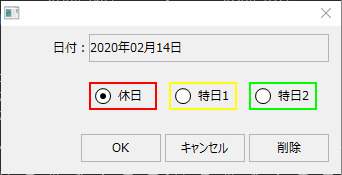
On the calendar, holidays are displayed in red, special days 1 in yellow, and special days 2 in green. Clicking on the date for which you want to change the attributes will display the following dialog:
In the above dialog, select one of the attributes (Holiday, Special Day 1, Special Day 2) and click the OK button to set the attribute for the selected date. You can also click the Delete button to remove the attribute that was set for that date.
|
||
9 |
Event specification
|
Check this box to enable event specification. Event specification allows recording to be performed when the specified conditions are detected. |
||
10 |
Event specification/condition
|
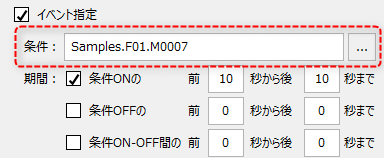
You can define a condition expression that references tags in the event specification conditions.
Clicking the Settings button will display the following settings dialog:
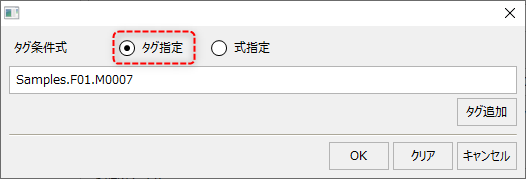
If you select "tag specification", you can specify only the tag path. If you specify only the tag path, the condition will be ON when the tag becomes TRUE (other than 0).
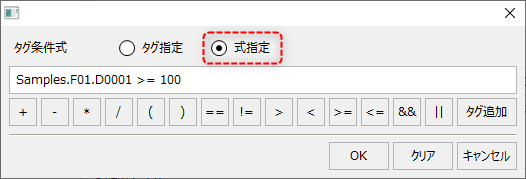
If you select "Specify Expression", you can specify an arithmetic expression. You can specify arithmetic operations, comparison operations, and refer to multiple tags.
|
||
11 |
Event designation/period
|
When a specified event condition is detected, the recording can include a specified number of seconds of video before and after the detection point (each can be specified from 0 to a maximum of 3600 seconds).
"Condition ON" and "Condition OFF" will record a single shot when the condition is met. By specifying the number of seconds before and after, you can include the specified number of seconds of video before and after the timing when the condition ON (or condition OFF) is met in the recording. These two events can be enabled at the same time.
"Between condition ON-OFF" will record continuously from when the specified condition turns ON until it turns OFF. You can also specify the number of seconds before and after this event to include the specified number of seconds of video in the recording. Note that when you enable this event, the above two checks for "Condition ON" and "Condition OFF" will be automatically cleared.
|