What is Alarm Control?
The Alarm Control is used for client-side processing such as displaying alarm summaries and history.
There are two types of alarm control:
1)Remote Alarm Grid (RemoteAlarmGrid)
2)Remote Alarm Client (RemoteAlarmClient)
Remote alarm grid client control is a control for displaying alarm information in a grid. It connects to Alarm server to display alarm information. The Alarm Summary and Alarm History in the Screen Library and the various alarm screens included in the Standard Framework in the Frame Library use the remote alarm grid.
On the other hand, Remote alarm client control is a control that does not include the display function of the remote alarm grid. It does not display the grid, but it can use various functions for sending and receiving alarm information with Alarm server. This control is for advanced users who want to use scripts to perform display and alarm processing (for example, sounding an alarm sound).
|
The various alarm screens and event screens in the screen library are built using Remote alarm grid client control. |

|
For details about the remote alarm grid and remote alarm clients, see "Remote Alarm Grid" and "Remote Alarm Client" in the Control Reference. |
Alarm grid display style
There are three ways to display alarms: summary display, historical display, and real-time display. All display styles can be displayed using the remote alarm grid, and the display style will be selected according to the content of the connection request to Alarm server.
How to display |
Commentary |
Summary View |
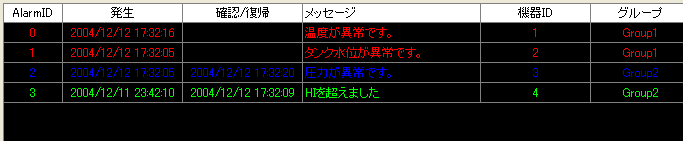
A list of alarms that are currently occurring or not acknowledged is displayed. When an alarm is recovered and acknowledged, it will automatically disappear from the list. The latest alarm status is always displayed.
Display example 1 (if confirmation is required)
Display example 2 (without confirmation)
|
Historical View |
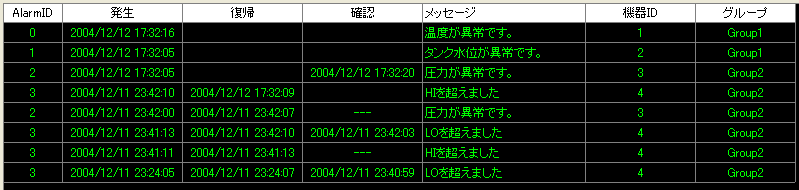
The alarm history for the specified period is displayed. Even if a new alarm occurs after displaying the history, the screen is not automatically updated.
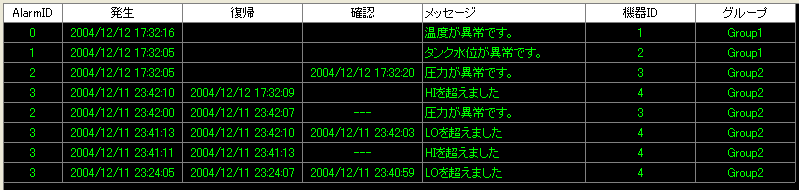
Display example 1 (when occurrence, recovery, and confirmation are displayed in separate records)
Display example 2 (occurrence, recovery, and confirmation all in one record)
Display example 3 (without confirmation)
|
Real-time display |
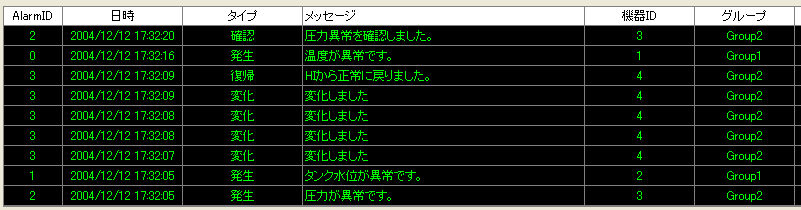
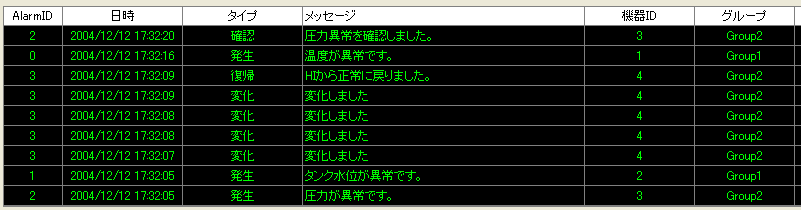
The most recent alarm history is displayed. Each time a new alarm occurs, the screen is automatically updated. Other aspects are the same as the historical display.
Display example 1 (when occurrence, recovery, and confirmation are displayed in separate records)
Display example 2 (occurrence, recovery, and confirmation all in one record)
Display example 3 (without confirmation)
|


Alarm grid layout settings
The layout of the alarm display is set in the AlarmLayout property of the remote alarm grid (RemoteAlarmGrid). The layout format set in the AlarmLayout property is as follows. The AlarmLayout property must be written as multi-line text, and the first column of the layout must be set to [ALARMID].
Alarm layout format)
Field format (the first column must be [ALARMID]) title, width, text display position [, override] Field Format (2nd column) title, width, text display position [, override] : : : Field format (column X) title, width, text display position [, override] |
Example) Display in 4 columns: alarm ID, date and time, type (occurrence/recovery, etc.), and message
[ALARMID] AlarmID, 60,center [DATESTR] Date and time,120,center [TYPEJP] Type,120,center [CM0] & [CM1] Message, 250, left |
The specifications for each definition item in the alarm layout format are as follows:
item |
Commentary |
Field Format |
This is the field you want to display. Specify the field name according to the specifications in "About Field Names". In addition to simply specifying the field name, you can use an arithmetic expression to combine and display multiple fields, or switch the field to be displayed depending on conditions. The operators and functions that can be used in an arithmetic expression are based on "Calculation Expression Syntax".
Example 1) When combining multiple columns [TYPESTR] & ":" & [CM0] & [CM1]
Example 2) Changing the message output depending on conditions {[TYPE] == "new"}{[CM0]},{[TYPE] == "recover"}{[CM1]},{[TYPE] == "ack"}{[CM2]}, {[TYPE] == "change"}{"Changed"},{default}{"---"}
Example 3) When editing the number of digits in the tag value to be output (in this example, it is fixed to two decimal places) NS([CM3],2)
Furthermore, you must set [ALARMID] in the first column of the layout. |
title |
The title to display in the grid. |
width |
This is the column width of the field to display in the grid. It is specified in pixels. Note that you must set [ALARMID] in the first column of the layout, but if you do not want to display the alarm ID on the screen, specify "0" as the width. |
Text display position |
This is the position to display on the grid. Select from the following three types. "left" - Left position "center" - center position "right" - Right position |
Overwrite |
If AlarmClientType is "SUMMARY", " HISTORICAL2", or HISTORICAL3", specify whether to overwrite the contents of the same record when the alarm is recovered or confirmed after an alarm occurs.
T - Overwrite the message each time the alarm state changes. F - Retain the message at the time of occurrence (do not change even if the alarm state changes).
example) {[TYPE] == "new"}{[CM0]},{[TYPE] == "recover"}{[CM1]},{[TYPE] == "ack"}{[CM2]}, {[TYPE] == "change"}{"Changed"},{default}{"---"}
In the above example, the message is switched for each occurrence, recovery, and confirmation. In such cases, you need to set Overwrite to T.
If AlarmClientType is "HISTORICAL1", the recovery, confirmation, and change for one alarm occurrence are displayed in separate records. Therefore, there is no need to set an overwrite. |
|
If you want to change the message every time the alarm state changes, specify "T" for the overwrite option. If you do not specify anything, it will default to "F", and the message at the time of occurrence will be retained and displayed. |
|
As a specification of this control, you must set [ALARMID] in the first column of the layout. If you do not want to display the alarm ID in the alarm grid due to requirements, you can hide it by specifying the width as 0.
[ALARMID] AlarmID, 0,center : : :
|
Processing connection requests to Alarm server
There are three ways to display alarms: summary display, historical display, and real-time display. Depending on the display format you want, you need to call the following connection request methods for Alarm server from the alarm control.
•SubscribeSummary method: Makes a connection request to display the summary.
•SubscribeHistorical method: Makes a connection request for historical display.
•SubscribeRealtime method: Makes a connection request for real-time display.
In most cases, you should call the connection request method in the OnInitialize event of the Remote alarm grid client control that will make the connection. On the other hand, if you want to make a connection taking into account disconnection and reconnection to Panel Server, you should call it in the OnLogin event of the remote alarm grid.
For details on each method, see "Remote Alarm Grid" in the Control Reference.
Alarm filters and date range specifications
When displaying alarms using the SubscribeSummary/SubscribeHistorical/SubscribeRealtime method, you can narrow down the alarms to be displayed by specifying a filter. For example, you can use this to display only alarms with a high priority, or only alarms in group 1.
Example) Display only alarms with comment 1 "Line2" and comment 2 10 or more
[CM1] == "Line2" && [CM2] >= 10 |
Example: Display only alarms that contain the word "abnormal" in comment 1
IsLike([CM1], "%abnormal%") |
The SubscribeHistorical method also allows you to specify a date and time range using StartTime and EndTime. By entering a date and time as a search condition on the screen, you can display the alarm history for the specified range.
|
The operators and functions that can be used in expressions are based on "Expression Syntax". The IsLike method is particularly useful for similarity searches. For IsLike, see Route Methods. |
|
The SubscribeHistorical method and SubscribeRealtime method allow you to specify the maximum number of records to retrieve. However, the number of records specified here is the maximum number of records before the filter is applied. Therefore, if you specify a filter and the number of records at the same time, the number specified and the number of records displayed may differ. |