overview
This article explains how to manually incorporate "Split View" in the Screen Library.
If you are building your own project and want to incorporate split view, you can use these steps as a reference.
|
For standard projects, the split display function is already built in, so there is no need to manually enable it. |

Manually installing the split screen library
Below are the steps to manually incorporate "Split View" in the Screens Library.
■ Work procedure
1.Select Screens Library from the Libraries tab
In Panel Editor, select the Library tab and set the type to "Screen Library".
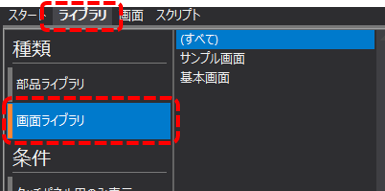
The display in the center of the screen will then switch to the library selection screen.
2.Import "Split View" from Screen Library
Select "Split Screen" from the screen library list and drag and drop it onto "client.xml" in the project tree.
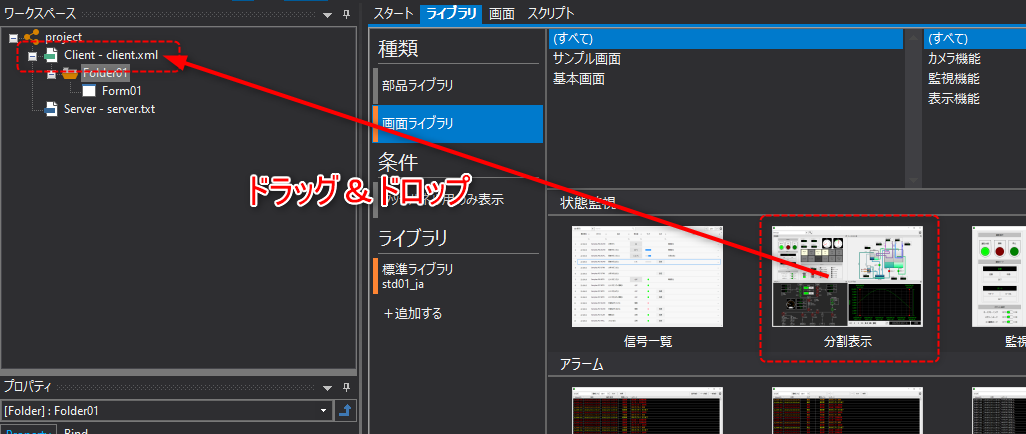
|
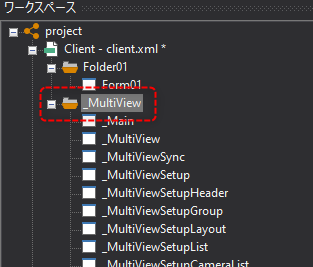
Then, a folder called "_MultiView" was created as shown on the left, and the entire set of forms necessary for the screen library were copied.
_MultiView - A set of split display screens
|
3.Describe the screen call process
After embedding a form from the screen library, implement the process to call the screen from the library.
There are several ways to call up screens from the Screen Library. For details on how to call up screens, please refer to "Calling Screens from the Screen Library" in the Screen Creation Guide.