Save alarm history to a database
To save alarm history to a database, use Alarm server (ODBC).
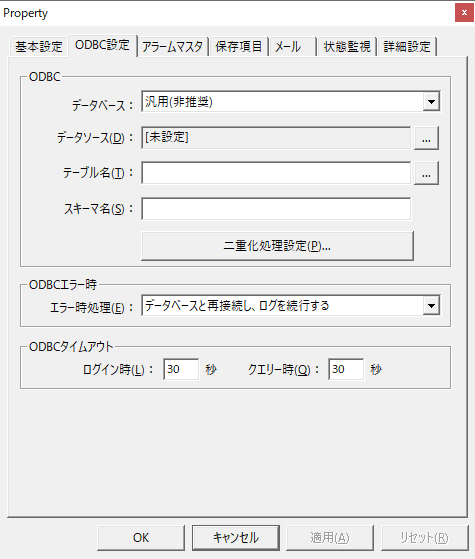
First, in the Alarm server (ODBC) settings, specify the connection data source and table name in the ODBC settings tab.
|
Alarm server (ODBC) uses a table on DBMS that supports ODBC as a data store for alarm history.
The table for alarm history must be created manually in advance on the database side.
For information on setting up ODBC, please refer to "ODBC Settings" in the common settings.
|
Next, you need to configure the Save Items tab to match the fields in the alarm database table with the alarm field names.
|
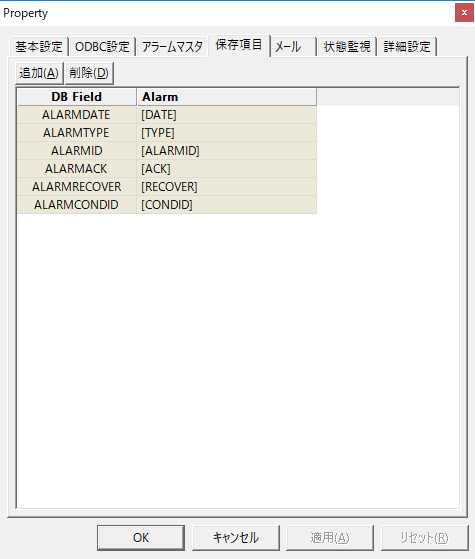
The image on the left shows the settings screen for the Save Items tab.
The settings shown on the left are the default settings for the Alarm server (ODBC) action. The settings for the saved items must be set appropriately according to the field names of the database to be saved and the types of alarm fields to be saved.
Among the above, the name displayed in the "DB Field" column is the field name on the database side. And the field name displayed in the "Alarm" column ([DATE], [TYPE], etc.) is the corresponding alarm field name. When adding or deleting fields in the alarm history, you need to change the settings of the saved items and also change the table layout on the database side accordingly.
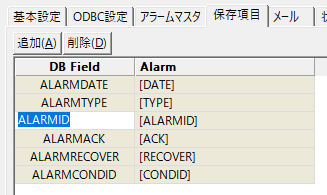
In addition, in the "Saved Items" tab settings,You can freely change the name of the default DB Field by double-clicking the cell of the target field name.If for some reason you cannot use the default field names in your database (for example, if you need the field names to be lower case), you can change the field names to accommodate this.
|
For the default alarm settings, the database table must have at least the following fields created:
■ Fields that must be defined in the table
Field Name |
Data Types |
ALARMDATE |
Date type |
ALARMTYPE |
Text type |
ALARMID |
Text type (*1) |
ALARMACK |
Numeric types |
ALARMRECOVER |
Numeric types |
ALARMCONDID |
Numeric types |
(*1) If the alarm ID uses only numbers, it can be a numeric type.
|
The official name of the data type of the field defined on the database side (for example, "smallint" or "varchar(10)") varies depending on the type of DBMS. Also, depending on the type of DBMS, it may be necessary to distinguish between uppercase and lowercase letters in the field name defined in the table. For recommended settings such as the data type of the field for each DBMS to be connected, see "Database connection settings" in Appendix. For specific methods of building alarm functions using databases, see "Building alarms using DBs". The page on the left provides sample settings for each compatible DBMS. |

■Adding fields to a table
If you want to add fields other than the default settings, you can add them freely from the settings on the "Saved Items" tab.
Fields can be edited using the "Add" and "Delete" buttons for saved items.
The following is an example of adding CM0, CM1, and SECINDEX.
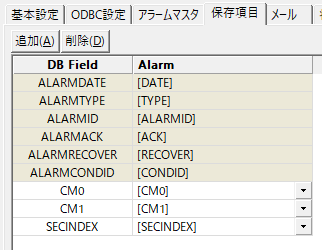
In addition, the alarm field has a field called [SECINDEX]. When alarms occur at the same time, [SECINDEX] is assigned an index number starting from 0 within the same time.In particular, if you are saving alarm information to a database, we recommend that you add a numeric field to the alarm table to store the [SECINDEX] field in order to maintain the order of occurrences at the same time..
|
Adding [SECINDEX] is not required, but we strongly recommend adding it as it is important information when identifying the order of alarms within the same time period. |