Control search and replace operation (object replace)
This article explains the object replacement operation that is part of the control search function of Panel Editor.
The Replace function of the control search (Object Replace) provides a function to replace objects found in the search operation with the contents of the source object by selecting the source object in advance. This function allows you to replace the object itself or only the properties or script code.
Object replacement operations are performed from the following parts (※ The display of the following parts will change by operating the icons for switching the processing target below).

|
Select the source object. Depending on the selection state of the source object, the display will change as follows:
|
|
This icon switches the object to be replaced. To replace an object, select the icon on the right. *Selecting the icon on the left will switch to "Replace properties." |
|
Set the conditions for processing object replacement. Click to display the Replace Conditions dialog.
|
|
Replaces the line selected in the search list with the selected line. After the replacement, the selected line remains.
|
|
Replace all lines displayed in the search list at once.
|
|
Replaces the line selected in the search list with only one line, then moves to the next line. This operation is useful when you want to check the lines to be replaced one by one.
|
|
Moves to the next line from the currently selected line in the search list. No replacement is performed.
|
|
Moves from the currently selected line in the search list to the previous line. No replacement is performed.
|
|
Cancels and undoes the replacement.
|
|
Cancels the undo of a replacement (redo).
|




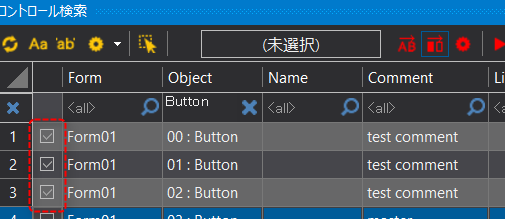
You can also select whether or not to include a line in the replacement by checking the following columns in the search list. Clicking the check mark with the mouse will switch the check between ON/OFF, and unchecking it will exclude it from the replacement process. For example, if the line is unchecked, even if you perform the operation "Replace only one line and move to the next line", the replacement process will not be performed and you will move to the next line.
The following explains how to perform the replace operation.
1.Perform an object search.
As an example, we will use the following search criteria:

•Object... Button
•Search criteria: Search within the selection form
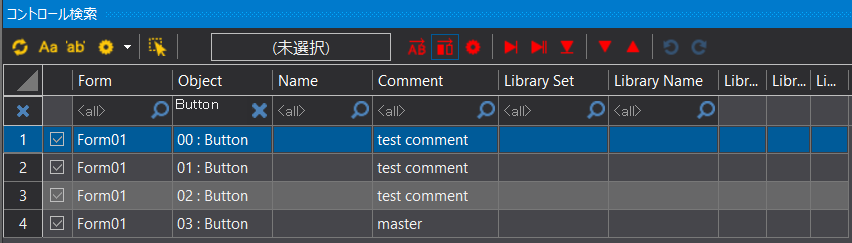
The search results are displayed in a list. The list shows all the button objects placed on Form01.
|
You can freely customize the columns in the search list. For example, you can add any properties other than those displayed by default. To customize the columns, right-click on the column title on the right side of the search list and select the menu that appears. |

2.Set the conditions for the replacement process.
Clicking the replacement condition setting icon (red gear) displays the replacement condition setting dialog.

(Replacement Condition Setting Dialog)
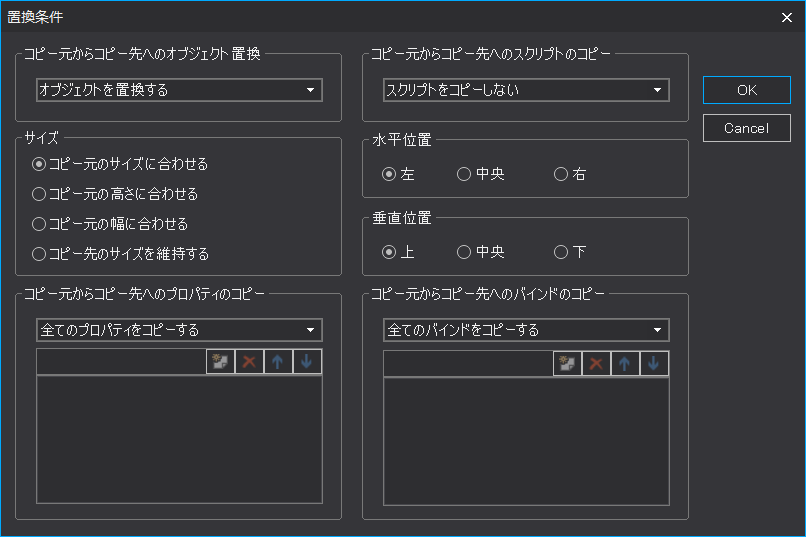
The settings in the above dialog are as follows:
Setting items |
Commentary |
||||||||||
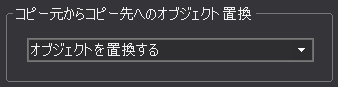
Replace objects from source to destination |
Choose from the following:
|
||||||||||
Copying a script from source to destination |
Choose from the following:
|
||||||||||
size |
Choose from the following:
|
||||||||||
Horizontal Position |
Choose from the following:
|
||||||||||
Vertical Position |
Choose from the following:
|
||||||||||
Copying properties from source to destination |
Choose from the following:
*The Name, Left, Top, Right, and Width properties are automatically excluded from being copied.
|
||||||||||
Copying bindings from source to destination |
Choose from the following:
|
As an example, select "Replace object" and replace the object itself using the steps below.
3.Select the object you want to replace.
On the form, select the object you want to replace. For example, select the button object below.
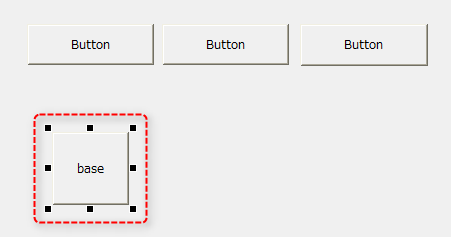
With the button in the image above selected, click on the object selection in the control search (in the case below, the square part that says "Unselected").

The source object has now been selected. Once selected, the display will change to "Source selected" as shown below.

Also, when you hover the mouse cursor over the object selection rectangle, a tooltip will be displayed as shown below.
The display lets you know what the current source object selection is.

4.Replace only one line
To replace only one line, in the search result list,Select the line you want to replace., click the Replace One Line action icon.
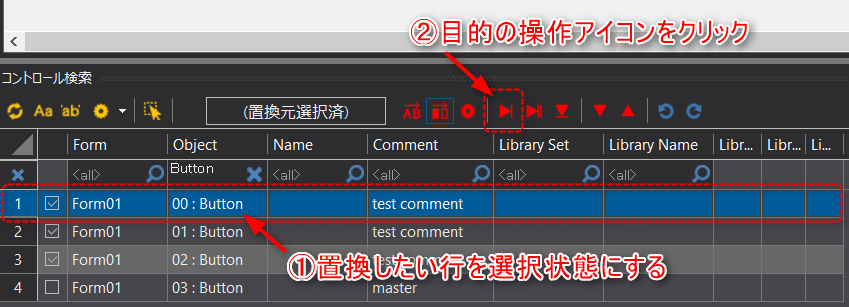
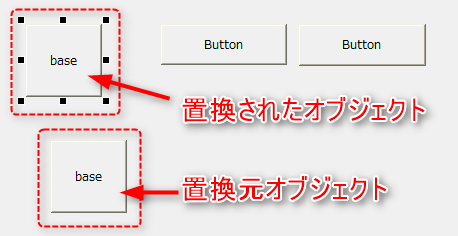
If you look at the objects on the form after performing the above operations, you can see that the target object you replaced has been replaced with the original object you selected.
5.Global Replace
To perform a bulk replace operation, clickSelect any line you want to replace (the position of the line is optional)Click the Bulk Replace action icon.
In the example below, only the button on the fourth line has been unchecked for processing (because it is the object to be copied).
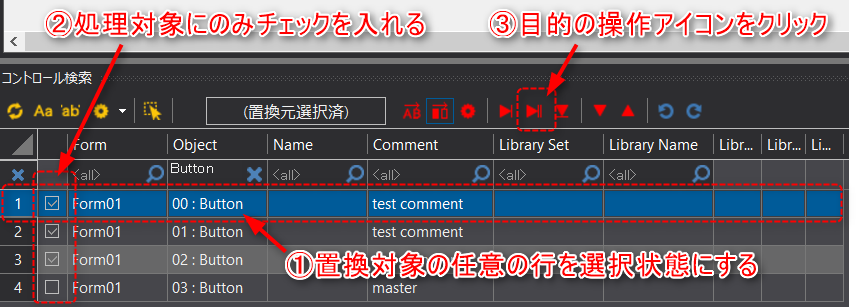
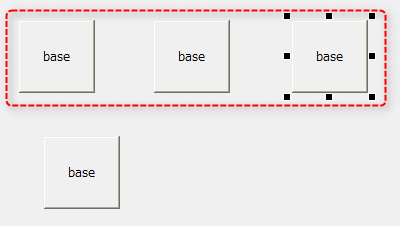
If you look at the objects on the form after performing the above operations, you will see that all the buttons have been replaced with the original object.
6.Cancel (undo) a replacement
To cancel the replacement (revert to the state before replacement), you can undo it by performing the following operations.
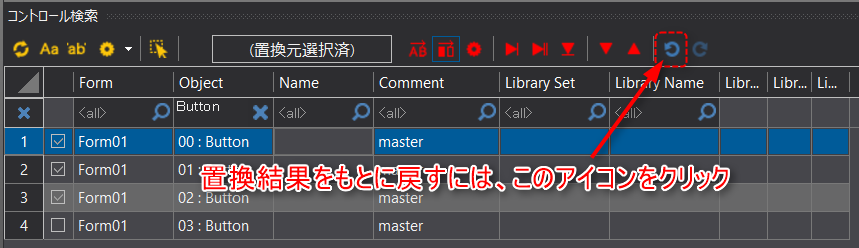
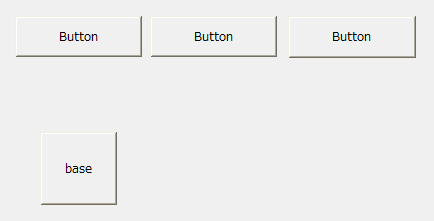
This will cancel the replacement process and revert it to its original state.
|
Please be careful when replacing objects. Always check whether the result is what you intended, and if there is a problem, use the cancel process (undo) in step 6 to return to the original state. |
