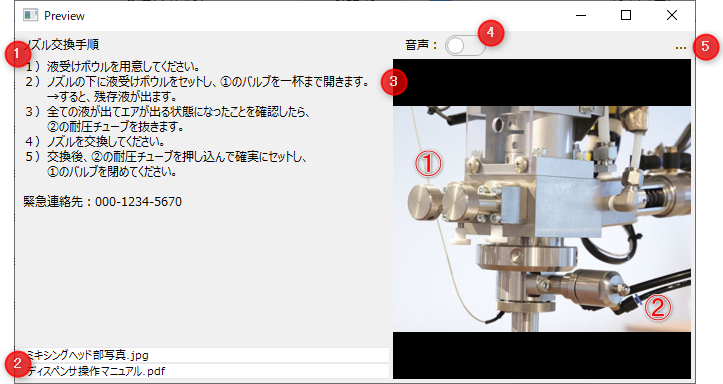
Guidance viewer screen
# |
name |
explanation |
||
|---|---|---|---|---|
1 |
Guidance Text
|
Displays the guidance text information. |
||
2 |
File List
|
Displays a list of files registered in the guidance. Clicking on the list will display the target file in the preview display. |
||
3 |
Preview display
|
Displays a preview of the selected file. When the screen is displayed, the selected file is initially displayed as a representative file. If it is an image file, the image is displayed. If it is any other file, it is displayed as an icon.
Clicking on the preview will open the file. For example, if it is a video file, a video player will pop up and the video will start playing.
|
||
4 |
Audio Switching
|
Enables/disables audio playback of video data.
|
||
5 |
Settings button
|
The guidance editing screen will pop up. |

Guidance registration/addition screen
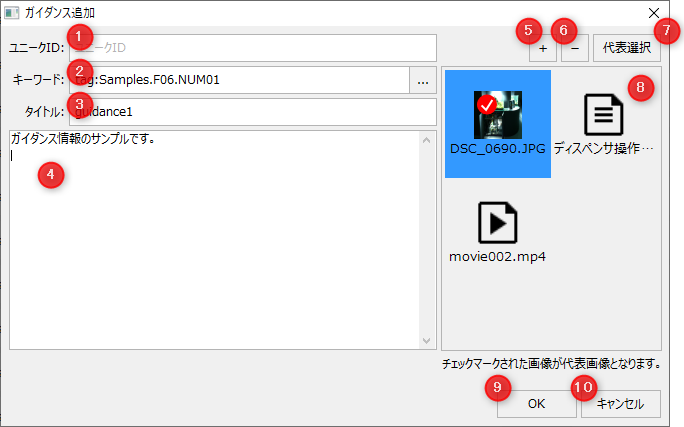
This is the screen that pops up when you add new guidance.
# |
name |
explanation |
||||||||||
|---|---|---|---|---|---|---|---|---|---|---|---|---|
1 |
Unique ID
|
Enter a unique ID. A unique ID is used as an identifier to call up guidance information by specifying the ID from other functions. Setting a unique ID is optional, and you can leave it blank if you do not want to specify one. If you do specify one, please assign a unique ID as a string that does not overlap with other IDs. |
||||||||||
2 |
keyword
|
For the keyword, specify a character string to associate with guidance information, such as a tag path or an alarm ID.
When you click the selection button "...", the following dialog will be displayed.
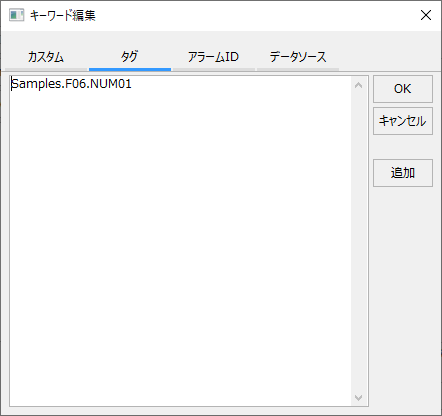
(Keyword Editing Dialog)
The categories that can be set for keywords are "Custom," "Tag," "Alarm ID," and "Data Source," and can be switched using the tabs at the top of the screen.
|
||||||||||
3 |
title
|
Specify the title of the guidance information. |
||||||||||
4 |
Guidance Text
|
Enter the text you want to display as guidance information. You can enter multiple lines by using line breaks. |
||||||||||
5 |
Add files
|
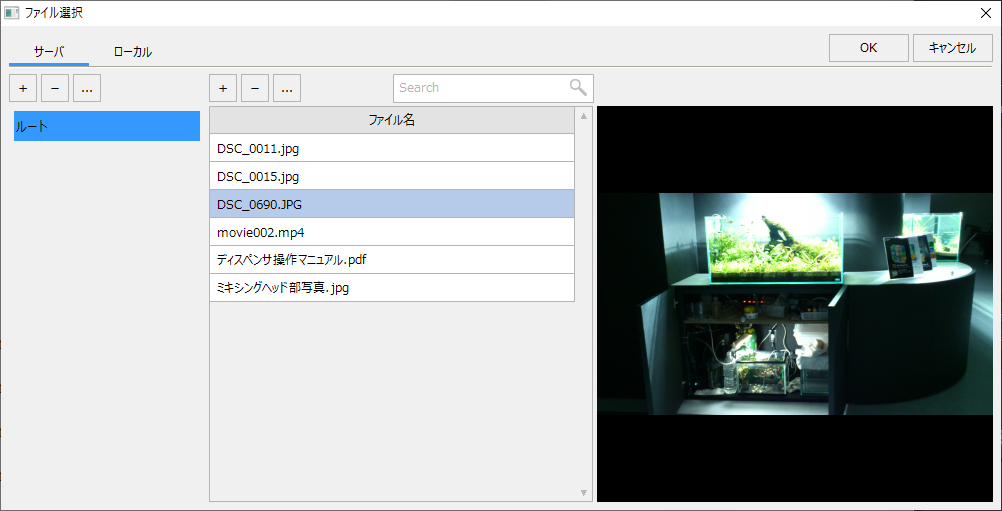
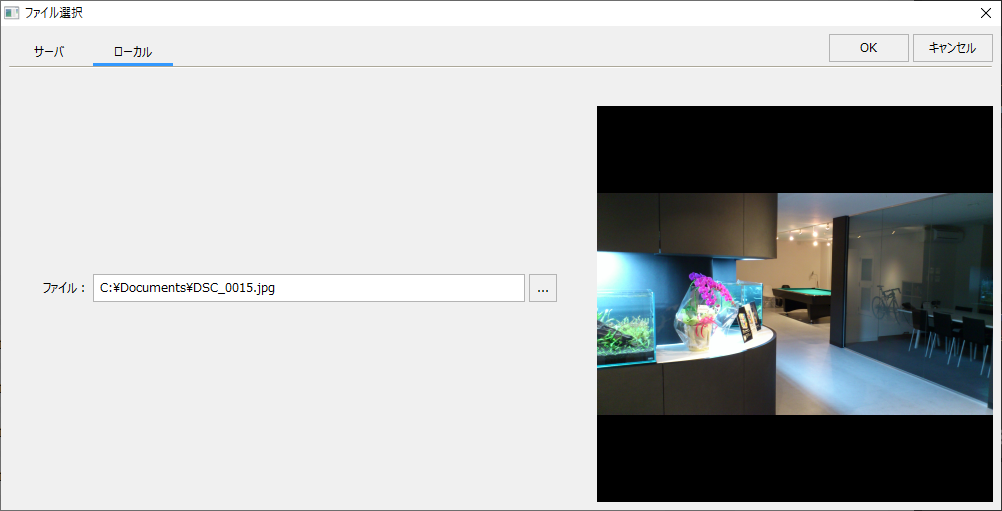
Displays a file selection dialog box, allowing you to add files to be registered in the guidance information.
(File selection/server)
The "Server" tab allows you to save files to the server, where they can be used commonly across the system.
(File selection/local)
The "Local" tab saves files locally on the client PC that currently has the screen open. Use this tab when you want to manage files separately for each client PC.
|
||||||||||
6 |
File Deletion
|
Deletes the selected file. |
||||||||||
7 |
Representative Selection
|
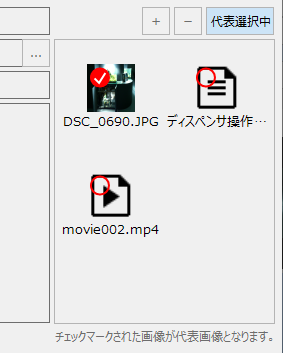
Select the file that you want to represent in the guidance information. Clicking the button will switch to the "Representative Selection" mode as shown below, and clicking the thumbnail will put a check mark on the file. The checked file will be the representative file. Clicking the "Representative Selection" button again will return to normal mode.
|
||||||||||
8 |
Thumbnail View
|
Displays thumbnails of files registered in the guidance information. Files with a check mark are representative files. |
||||||||||
9 |
OK
|
Save the settings and close the window. |
||||||||||
10 |
cancel
|
Cancels the settings and closes the screen. |
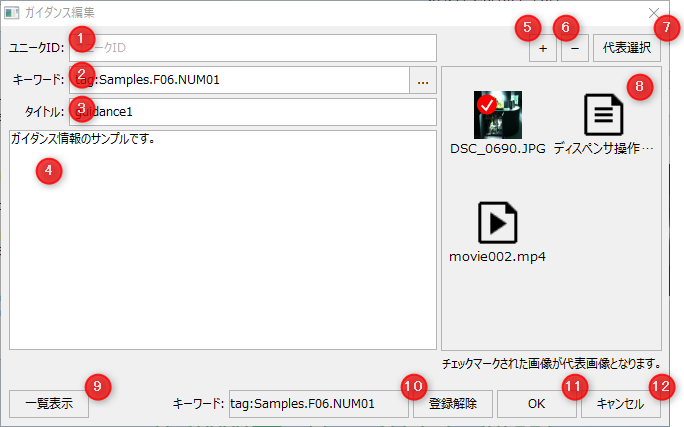
Guidance registration/guidance editing screen
The guidance editing screen can be displayed from the settings button in the guidance viewer or the guidance information settings button on the information bar.
# |
name |
explanation |
|---|---|---|
1 |
Unique ID
|
For details, please refer to the "Add Guidance Screen." |
2 |
keyword
|
For details, please refer to the "Add Guidance Screen." |
3 |
title
|
For details, please refer to the "Add Guidance Screen." |
4 |
Guidance Text
|
For details, please refer to the "Add Guidance Screen." |
5 |
Add files
|
For details, please refer to the "Add Guidance Screen." |
6 |
File Deletion
|
For details, please refer to the "Add Guidance Screen." |
7 |
Representative Selection
|
For details, please refer to the "Add Guidance Screen." |
8 |
Thumbnail View
|
For details, please refer to the "Add Guidance Screen."
|
9 |
List view
|
This screen will close and the guidance list screen will be displayed. |
10 |
Unsubscribe
|
The keywords registered in this guidance information will be removed. |
11 |
OK
|
Save the settings and close the window. |
12 |
cancel
|
Cancels the settings and closes the screen. |
Guidance registration/Guidance list screen
On the Guidance List screen, you can register, edit, and delete guidance information.
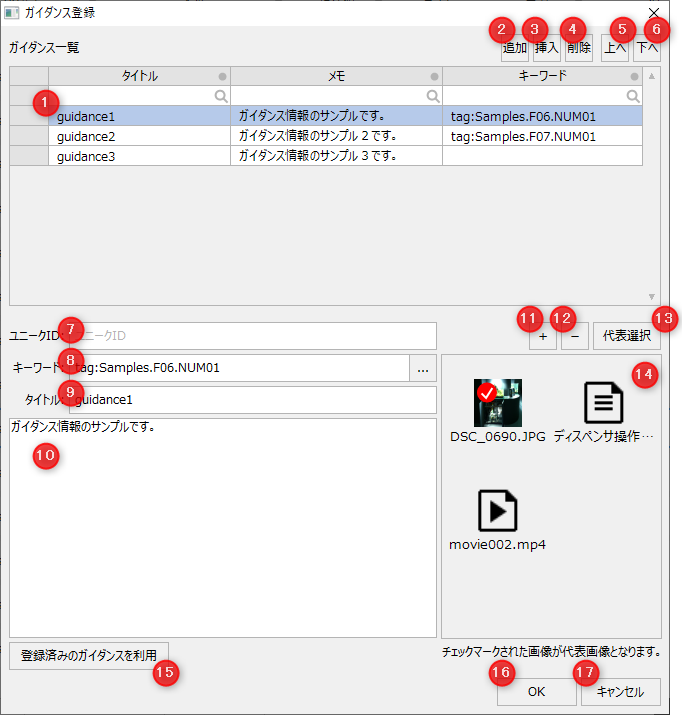
# |
name |
explanation |
|---|---|---|
1 |
Guidance List
|
Displays a list of registered guidance information. When you click on a guidance from the list, the registered guidance information is displayed at the bottom of the screen. Each item displayed at the bottom of the screen can be edited directly. |
2 |
addition
|
Add new guidance information. Newly added guidance information will be added to the end of the list. |
3 |
Insert
|
Inserts new guidance information into the currently selected line position in the guidance list. |
4 |
delete
|
Deletes the currently selected guidance information. |
5 |
Up
|
Moves the currently selected guidance information up one line. |
6 |
Down
|
Moves the currently selected guidance information down one line. |
7 |
Unique ID
|
For details, please refer to the "Add Guidance Screen." |
8 |
keyword
|
For details, please refer to the "Add Guidance Screen." |
9 |
title
|
For details, please refer to the "Add Guidance Screen." |
10 |
Guidance Text
|
For details, please refer to the "Add Guidance Screen." |
11 |
Add files
|
For details, please refer to the "Add Guidance Screen." |
12 |
File Deletion
|
For details, please refer to the "Add Guidance Screen." |
13 |
Representative Selection
|
For details, please refer to the "Add Guidance Screen." |
14 |
Thumbnail View
|
For details, please refer to the "Add Guidance Screen."
|
15 |
Use registered guidance |
Clicking this button allows you to select and copy existing guidance information from the Guidance Selection screen. Select the guidance information you want to copy from the list on the Guidance Selection screen displayed by this button and click the OK button, and each item of the source will be copied to the guidance information currently being edited (however, the unique ID will not be copied). |
16 |
OK
|
Save the settings and close the window. |
17 |
cancel
|
Cancels the settings and closes the screen. |
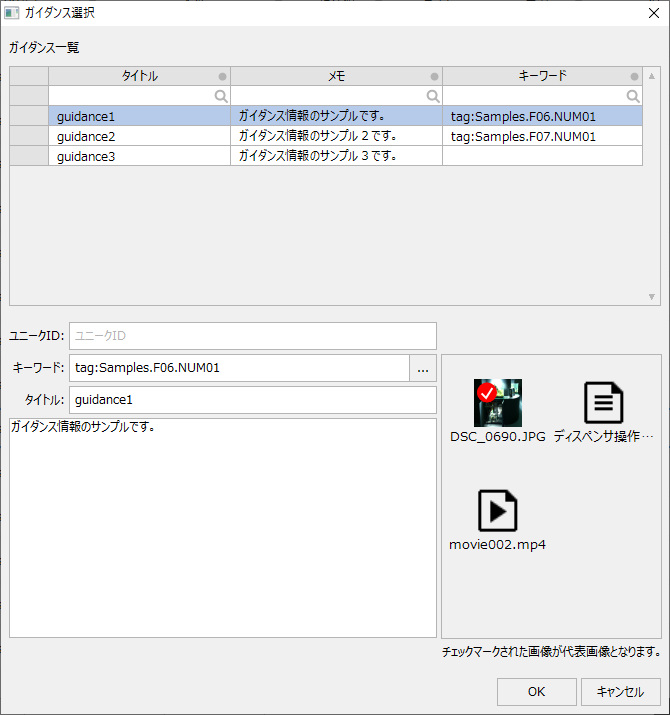
Guidance registration/guidance selection screen
The Guidance Selection screen is displayed when selecting from existing guidance information. This screen displays the same guidance information as the Guidance List screen, but it cannot be edited.
To select guidance, select the desired guidance information from the list and click the OK button.