Video recorder screen explanation
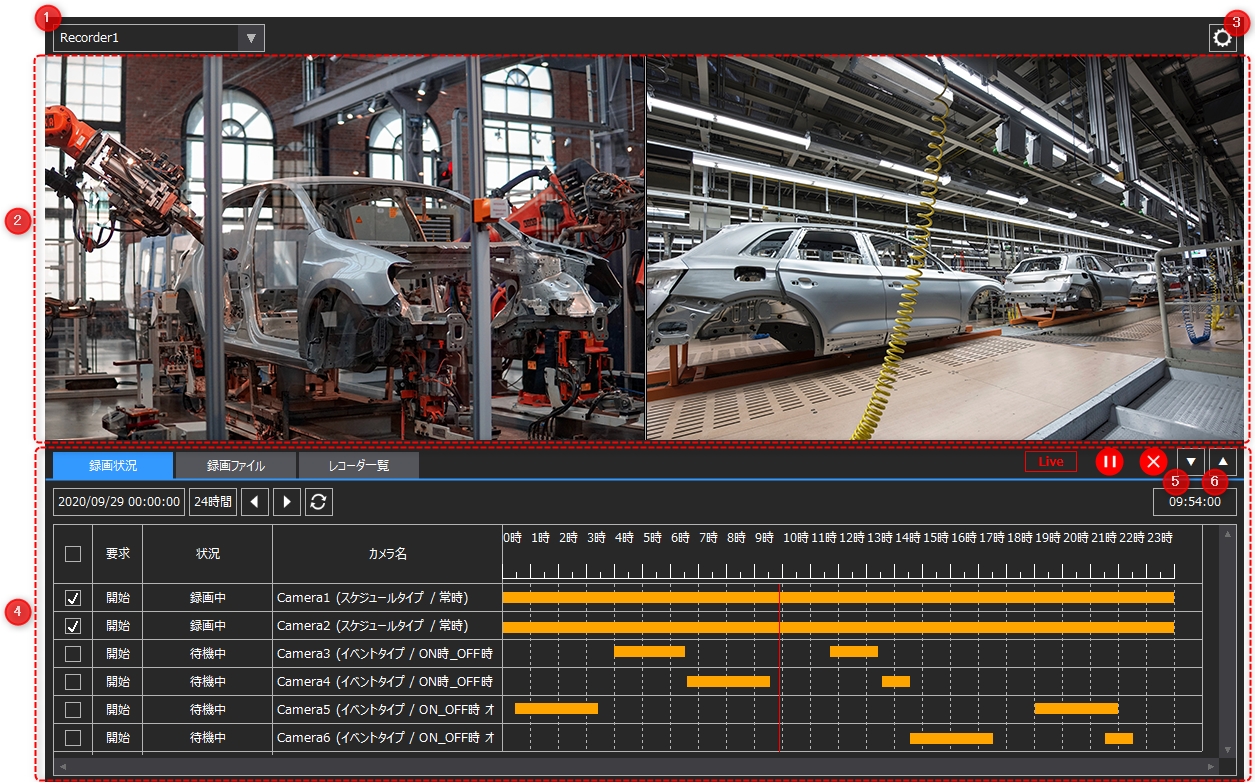
The video recorder screen consists of a "camera display area" at the top of the screen and a "recorder operation area" at the bottom of the screen.
The camera display area displays videos such as live footage and recorded files from the camera selected in the recorder operation area. If multiple display targets are selected at the same time, the videos are automatically displayed side-by-side. The recorder operation area consists of three tabs: "Recording Status," "Recorded Files," and "Recorder List." You can select the recorder, camera, recorded file, etc. to be operated from each tab and perform various operations such as recording, playback, and stopping.
# |
name |
explanation |
|||||||||||||||||||||||||||||||||||||
|---|---|---|---|---|---|---|---|---|---|---|---|---|---|---|---|---|---|---|---|---|---|---|---|---|---|---|---|---|---|---|---|---|---|---|---|---|---|---|---|
1 |
Recorder Selection
|
Select the recorder to operate. The recorder operation area at the bottom of the screen displays a list of cameras registered to the selected recorder. If you select "All", the cameras of all recorders will be displayed in a list.
|
|||||||||||||||||||||||||||||||||||||
2 |
Camera display area
|
The video from the currently selected camera is displayed in the video player. The video displayed will change depending on the selection. If multiple cameras are selected, multiple video players will be displayed side by side, displaying the video from each camera.
|
|||||||||||||||||||||||||||||||||||||
3 |
Settings Menu
|
Opens the settings menu. Each time you click the icon, the settings menu will be displayed/hidden. For information on the settings menu, please refer to "Settings Menu".
|
|||||||||||||||||||||||||||||||||||||
4 |
Recorder operation area/Recording status tab
|
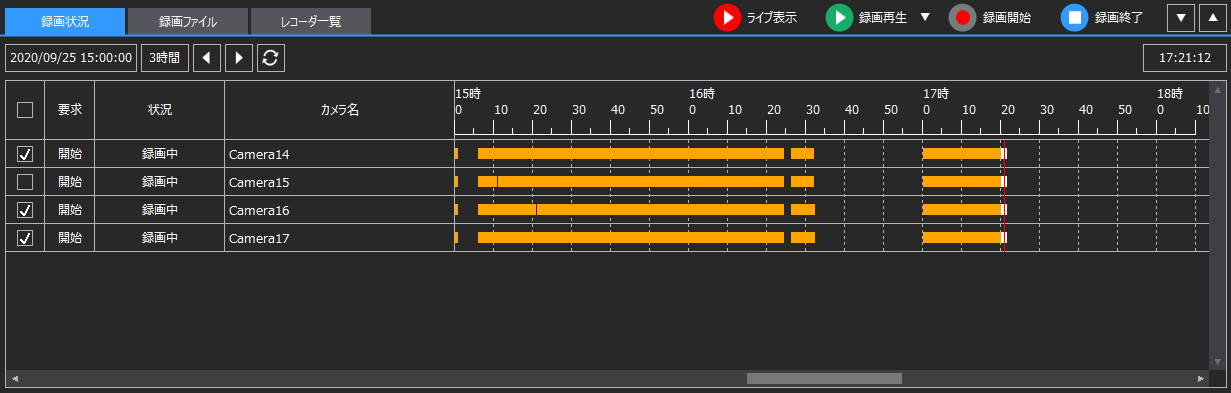
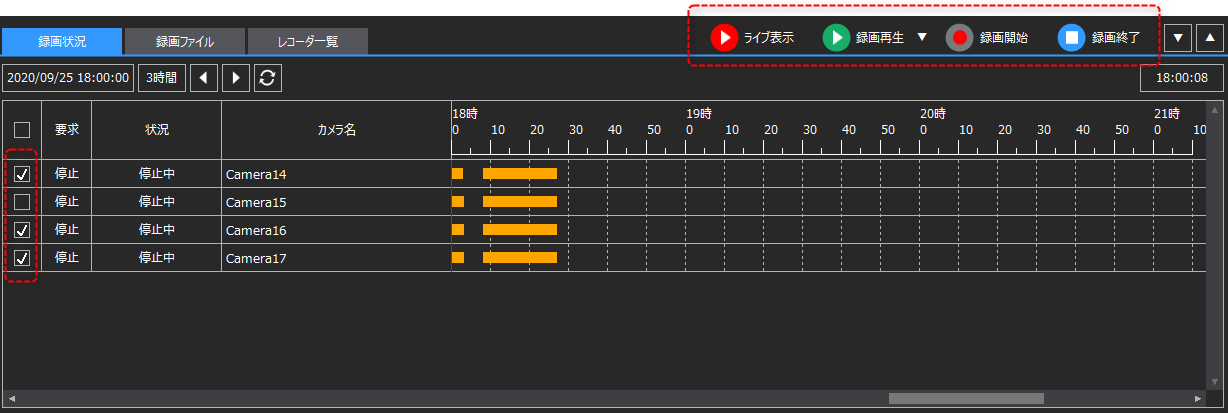
The Recording Status tab displays the status of each camera registered to the selected recorder. You can select a camera to play live video or recordings, or start and stop recording.
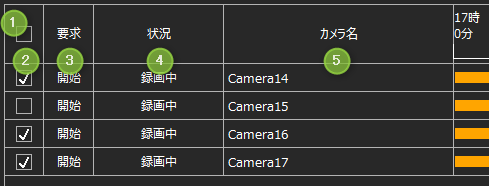
The list shows the cameras registered to the currently selected recorder.
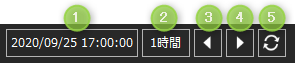
Below you can change the timeline scrolling and display period settings.
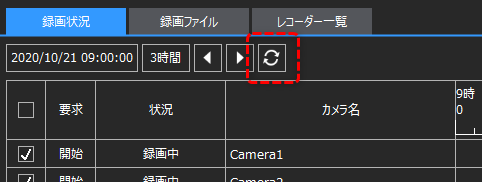
To change the display period: 1.Clicking this will display a date selection dialog, allowing you to select the start date and time of the display period. 2.Specify the display period of the timeline. You can choose from 1 hour, 3 hours, 6 hours, 12 hours, and 24 hours. 3.This is a page turner for the timeline. It scrolls back by the displayed period. 4.This is a page forward in the timeline. It scrolls forward by the displayed period. 5.Sets the display position to the current latest time.
The name and status of the camera are displayed on the left side of the list. Cameras with a check mark will be available for various operations such as live display and recording.
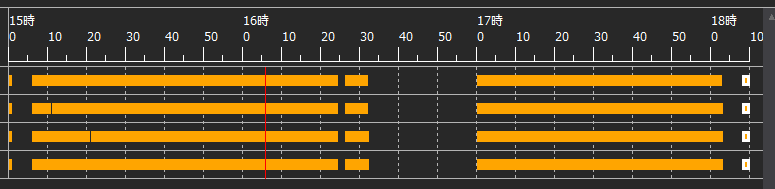
A timeline is displayed to the right of the list, showing bars indicating the time periods for which recording data exists.
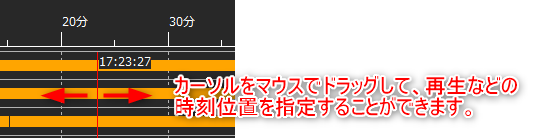
A vertical red line is displayed on the timeline as shown below. This line is called the "cursor." You can specify the playback position and other times by dragging the cursor with the mouse.
In addition, by clicking a bar displayed on the timeline, you can select the beginning time of the recording in file units of the saved recording data (file division units in the recording settings of the camera registration).
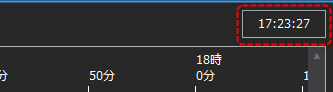
The time at the current cursor position is displayed in the upper right corner of the list.
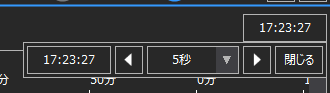
When you click the time, the display will change as follows: You can specify the cursor position by directly entering the time, or move the cursor forward or backward by a specified number of seconds.
Please note that the timeline display is not updated automatically. Click the refresh button below to update to the latest status.
|
|||||||||||||||||||||||||||||||||||||
Recorder operation area / Recording status tab / Operation |
When the Recording Status tab is selected, you can perform various operations using the following operation icons at the top of the list. Note that cameras with checked checkboxes in the left column of the list will be the targets of various operations.
■ Live display
Click View Live to display the live video from the selected camera.
During live viewing, "Live" will be displayed in a red frame and the operation icons will change to the following:
Live display operations: 1.Pause/play the live video. 2.Ends live display. The operation icons will return to their original state.
■ Recording and playback
Click Play Recording to play the recording from the current cursor position.
While recording or playing back, "Play" will be displayed in a green frame and the operation icons will change to the following:
Recording playback operations: 1.Pauses/plays the recording. 2.Go back one frame. 3.Advance one frame. 4.Select the playback speed (0.5, 1, 1.5, 2, 4). 5.The recording playback will end. The operation icons will return to their original state.
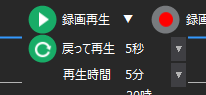
In addition, if you click the down arrow to the right of recording playback, you can set the following items.
•Go back and play...Specify how many seconds back from the cursor position you want to play. •Playback Time: Specify the time to play the recorded video.
■ Start recording
Clicking Start Recording will start recording for the selected camera. It will connect to the camera and start recording.
■Recording finished
Clicking Stop Recording will stop recording on the selected camera. It will also disconnect the camera and remove it from recording control processing.
|
||||||||||||||||||||||||||||||||||||||
Recorder operation area/Recording file tab |
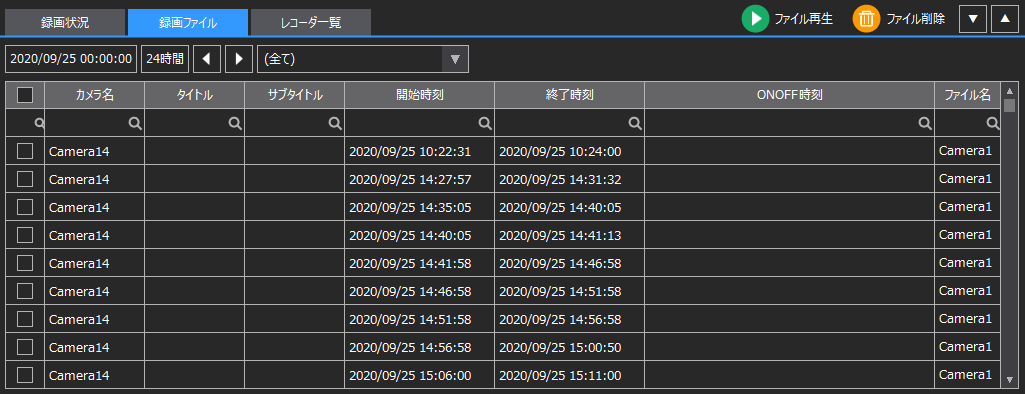
The Recording Files tab displays a list of the recording files of the selected recorder. You can select a file from the list to play the video or delete the recording file.
Below you can change the period of recorded files that are displayed in the list.
To change the display period of the list: 1.Clicking this will display a date selection dialog, allowing you to select the start date and time of the display period. 2.Specify the display period for the data to be displayed in the list. You can select from 1 hour, 3 hours, 6 hours, 12 hours, or 24 hours. 3.Moves the start date and time to the past by the display period. 4.The start date and time will be moved forward by the display period. 5.You can select the cameras to display. If you select "All", all cameras registered to the currently selected recorder will be displayed.
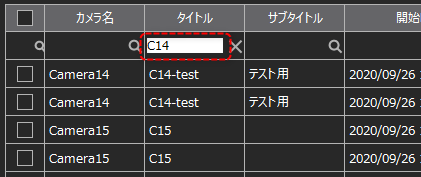
In the list, you can narrow down the results by using search keywords for each column.
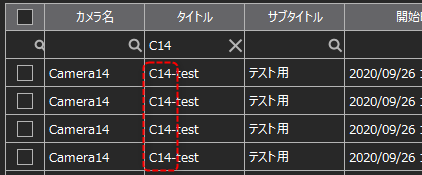
For example, if the display is as shown below, enter "C14" in the search field in the Title column and press Enter to confirm.
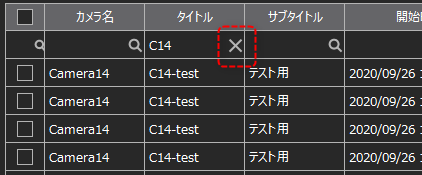
This will narrow down the search to only recording files that contain "C14" in the title. The magnifying glass icon in the header where you specified the condition will change to an "X".
Click the "x" in the search header to remove the filters.
The list displays the following items:
|
||||||||||||||||||||||||||||||||||||||
Recorder operation area / Recording file tab / Operation |
When the Recording Files tab is selected, you can perform various operations using the following operation icons at the top of the list. Note that the recording files whose checkboxes in the left column of the list are checked will be the target of various operations.
■ File playback
Click Play File to play the selected recording file.
While the file is being played, "File" will be displayed in a green frame and the operation icon will change to the following display.
File playback operations: 1.Pauses playback. 2.Go back one frame. 3.Advance one frame. 4.Select the playback speed (0.5, 1, 1.5, 2, 4). 5.The recording playback will end. The operation icons will return to their original state.
■ File deletion
Click Delete File to delete the selected recording file.
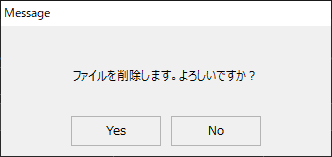
If you select to delete a file, the following confirmation dialog will be displayed. Click Yes to delete the file.
|
||||||||||||||||||||||||||||||||||||||
Recorder operation area/Recorder list tab |
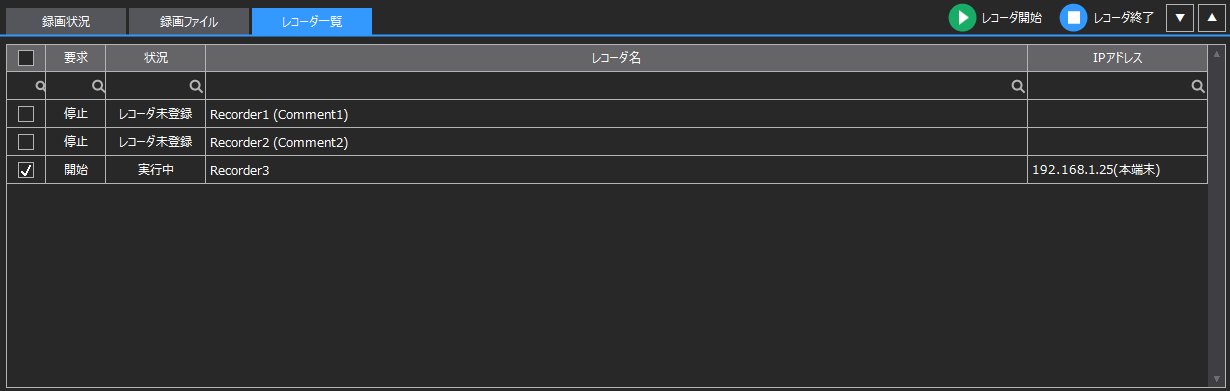
The Recorder List tab displays a list of registered recorders. Select a recorder from the list to start/stop recorder processing.
As with the Recording Files tab list, you can narrow down the list by searching for keywords in each column.
The list displays the following items:
|
||||||||||||||||||||||||||||||||||||||
Recorder operation area / Recorder list tab / Operation |
When the Recorder List tab is selected, you can perform various operations using the following operation icons at the top of the list. Note that recorders with checked checkboxes in the left column of the list will be the targets of various operations.
■ Start the recorder
Click Start Recorder to start the selected recorder. The recorders of the clients configured for that recorder will also start.
■ Recorder Finished
Clicking End Recorder will end the selected recorder. The recorders of the clients set to that recorder will also stop.
|
||||||||||||||||||||||||||||||||||||||
5 |
Collapse the recorder operation area
|
Collapses the vertical display width of the recorder area to expand the camera display area. |
|||||||||||||||||||||||||||||||||||||
6 |
Expand the recorder operation area
|
Expands the vertical display width of the recorder area and collapses the camera display area. |