About the alarm master for Alarm server "Alarm"
In the standard framework server settings, an action named "Alarm" is registered as Alarm server (CSV) for alarm monitoring.
The alarm master for the "Alarm" action is stored below.
(Project folder)\server\alarm\master.csv
The alarm master is a text file in CSV format and can be freely edited using a text editor such as Notepad or Excel.
Editing an Alarm Master
The procedure for editing an alarm master is explained below.
■ Prerequisites
In the configuration example introduced here, the following tags are assumed to be registered in Panel Server instead of the actual tags that communicate with PLC. When actually building a monitoring system, please read these tags as tags that communicate with PLC.
Units used:
Virtual Device (U01)
tag:
Numeric tags from U01.F01.D0000 to D0099 (100 points)
Bit tags from U01.F01.M0000 to M0099 (100 points)
■Work Instructions
Open the alarm master file "master.csv" for alarm monitoring using a text editor such as Notepad.
Then, the following is written:
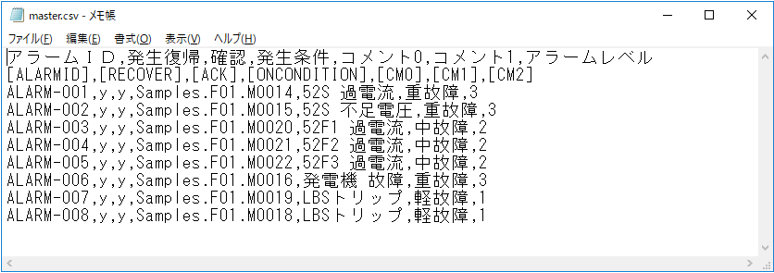
The above is sample data. For actual operation, you must delete unnecessary lines and define alarms according to the rules of the alarm master format.
The rules for writing alarm masters are as follows:
•Line 1: This is the title line.
•Line 2: Defines the type of field.
•The alarm settings are defined from the third line onwards.
The standard alarm function has the following default field definitions:
field |
Contents |
[ALARMID]
|
This is the alarm ID. You can define any string. Please assign a unique ID to identify the alarm. |
[RECOVER]
|
Use lowercase "y" or "n" to define whether or not an event occurs and whether or not it returns. |
[ACK]
|
Define whether or not to confirm by using lowercase "y" or "n". |
[ONCONDITION]
|
Define the conditions under which an alarm occurs. For example, if you define a tag path as "U01.F01.M0000", an alarm will occur when that tag becomes True (it has the same meaning as writing "U01.F01.M0000==TRUE").
|
[CM0]
|
Enter the alarm message in comment 0. |
[CM1]
|
Comment 1 defines the label string for the alarm level. You can define either "Minor failure", "Medium failure", or "Major failure". |
[CM2]
|
Comment 2 defines the alarm level value. The level value is defined as a number between 1 and 3 according to the alarm level.
Minor failure: 1 Medium failure: 2 Major failure: 3
|
If you do not need to change the alarm monitoring items or the information to be saved, leave the first and second lines unchanged and edit only the third line onwards.
•Leave the first and second lines as they are.
•Delete the third and subsequent lines as they are sample data.
•The actual alarm definition is written from the third line onwards.
The following is an example.
Alarm ID, occurrence and recovery, confirmation, occurrence condition, comment 0, comment 1, alarm level [ALARMID],[RECOVER],[ACK],[ONCONDITION],[CM0],[CM1],[CM2] ALARM-001,y,y,U01.F01.M0000,Test alarm 1,Minor fault,1 ALARM-002,y,y,U01.F01.M0001,Test alarm 2,Medium fault,2 ALARM-003,y,y,U01.F01.M0002,Test alarm 3,Medium fault,2 ALARM-004,y,y,U01.F01.M0003,Test alarm 4,Major fault,3 |
In the above example, tags U01.F01.M0000 to M0003 of the virtual device are used as alarms.
Once you have finished editing, save the alarm master.
|
For details about the alarm master format and fields, see "Alarm Master Format". |

|
If you want to include a comma in an alarm message, for example, you can do so by enclosing the string including the comma in double quotation marks "".
Example) ALARM-001,y,y,U01.F01.M0000,"Test Alarm 1, ABC",Minor Fault,1
|
|
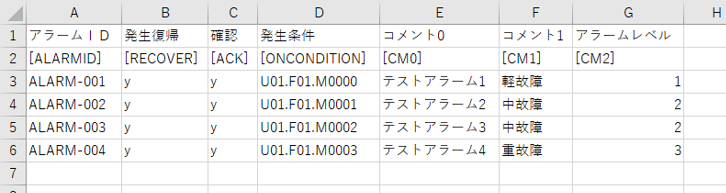
The alarm master is a CSV file, so it can also be edited using Excel. Editing using Excel is convenient when defining a large number of alarms.
(Example of opening alarm master in Excel)
Furthermore, if a string contains a comma, it will automatically be enclosed in double quotation marks when you save the CSV in Excel.
Please note that if you edit the file in Excel, be sure to save it in CSV format. For example, if you overwrite the file with a tab delimited file, the action will not load correctly.
|
Operation check
After configuring the alarm master for alarm monitoring, check the alarm operation.
1.Bring your application online
Run Panel Server online.
Click the browser run icon (green arrow) at the top of the Panel Editor screen to call up Panel Browser.

2.Displaying the alarm summary screen
Once Panel Browser is running, display the alarm summary from the menu.
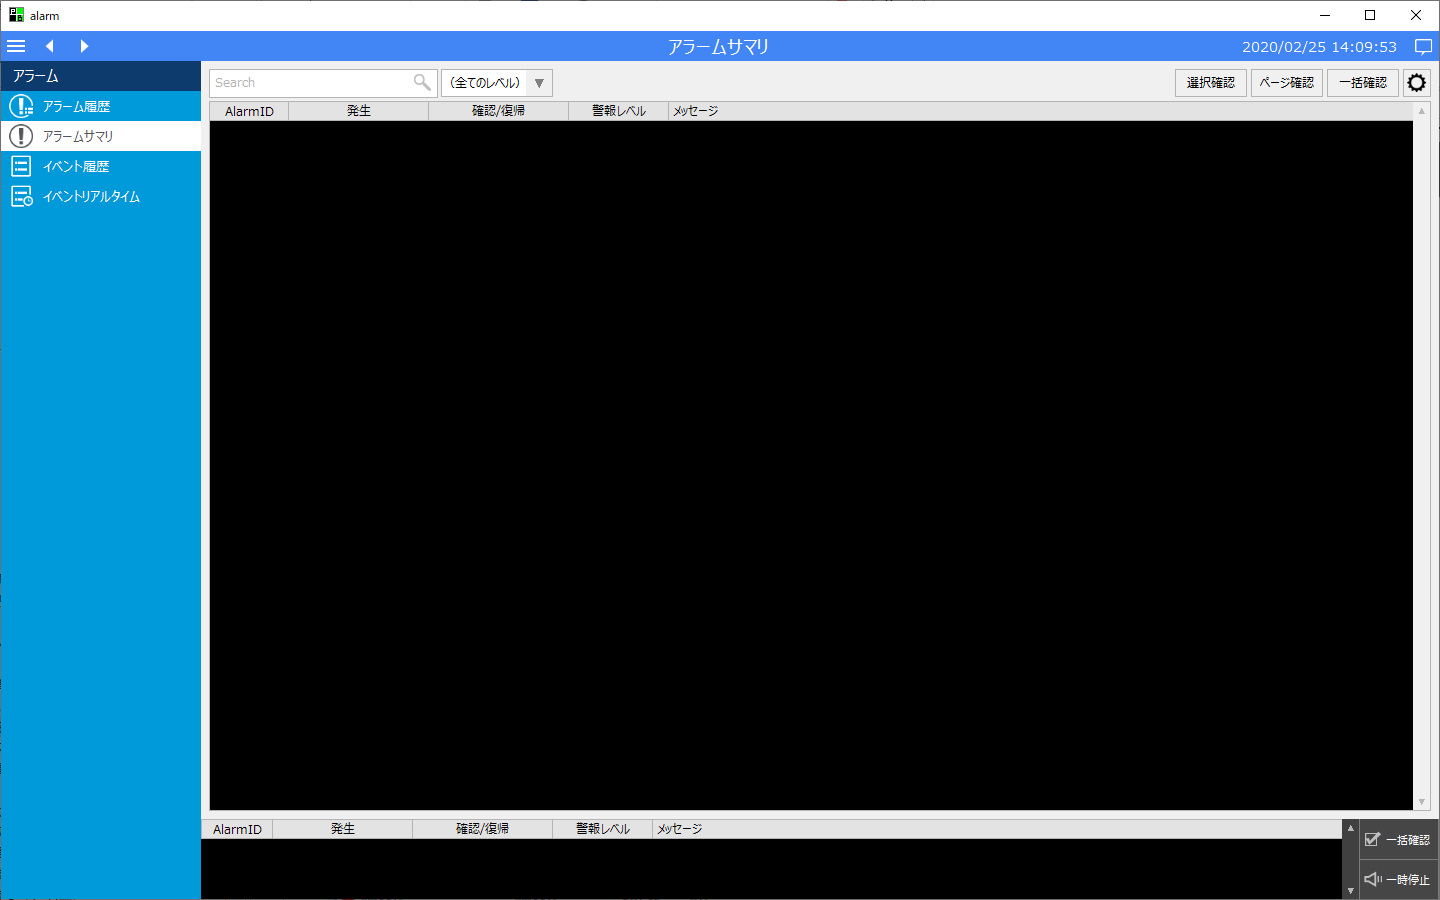
At present, no alarms have been generated.
3.Raise an alarm
Select the F01 folder of the U01 unit from Panel Server and make the tags M0000 to M0003 appear in the multiview.
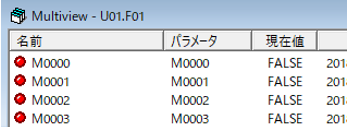
Select M0000 from the multi-view, press the "F5" key to display the write dialog, and set the value to "TRUE" (an alarm will sound).
Then, a new alarm line will be displayed on the alarm summary screen and will begin flashing, as shown below.

|
When testing in an environment where the device is actually connected to a PLC, you can check the operation by directly editing the values of the target device using ladder editing software on the PLC side. |
To stop the alarm, press the "Pause" button displayed in the bottom right of the screen.
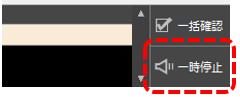
Next, write TRUE to all tags M0001 to M0003 using the same procedure as above.
Then, three new alarm lines will be added and will start flashing, as shown below.
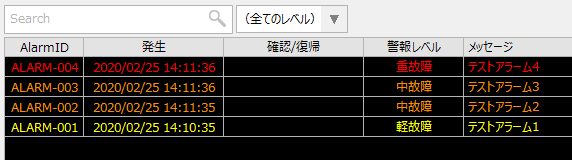
As shown here, minor faults are displayed in yellow, medium faults in orange, and major faults in red.
4.Resetting and checking alarms
Next, on the Panel Server side, change M0000 from TRUE to FALSE.
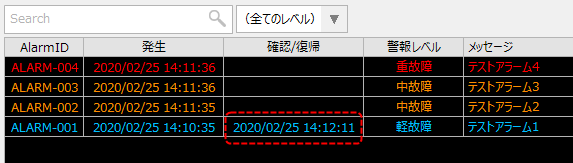
Then, as shown below, the alarm that was flashing yellow due to M0000 changed to flashing blue, and the date and time of recovery was displayed in the Confirmation/Recovery column.
Next, check the alarms. Click the "Check all" button in the top right of the alarm summary screen. (Note: You can also check by selecting each line or by page.)

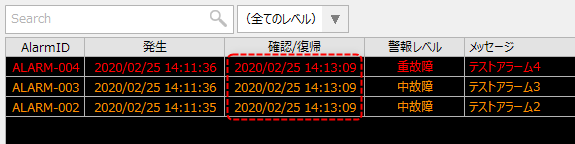
The M0000 alarm, which has already been cleared, will be removed from the list on the alarm summary screen, and the continuing alarms M0001, M0002, and M0003 will stop flashing and become lit, and the date and time of the confirmation will be displayed in the Confirmation/Resolution column.
Next, on the Panel Server side, change M0001, M0002, and M0003 from TRUE to FALSE.
All alarms will now be removed from the list on the alarm summary screen.

5.Checking the alarm history
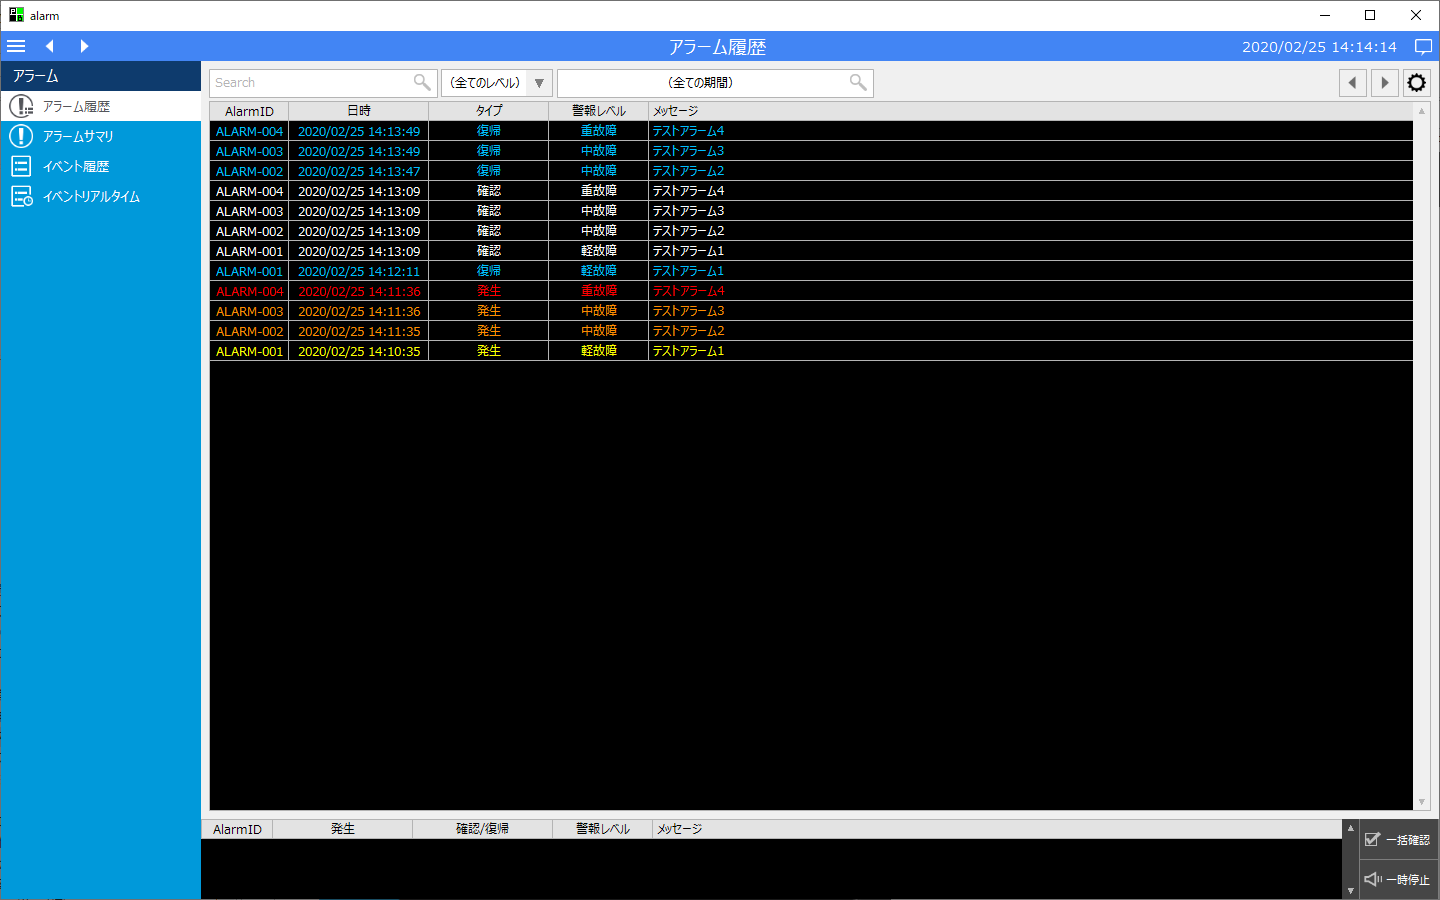
Click "Alarm History" from the menu on the left side of the screen to display the Alarm History screen.
Please confirm that the alarm occurrence, recovery, and confirmation performed by the series of operations above are recorded as alarm history.