Registering login user information for your own project
For original projects that do not use the standard user management function, registration and editing of user information used for login must be done from the settings screen of Panel Server Panel-Interface.
The following explains the procedure for setting up user information assuming an original project.
1.Display the Panel-Interface settings screen.
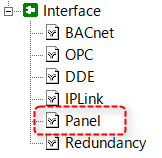
In the left tree of Panel Server, right-click on "Interface" or "Panel" and select "Properties" from the menu.
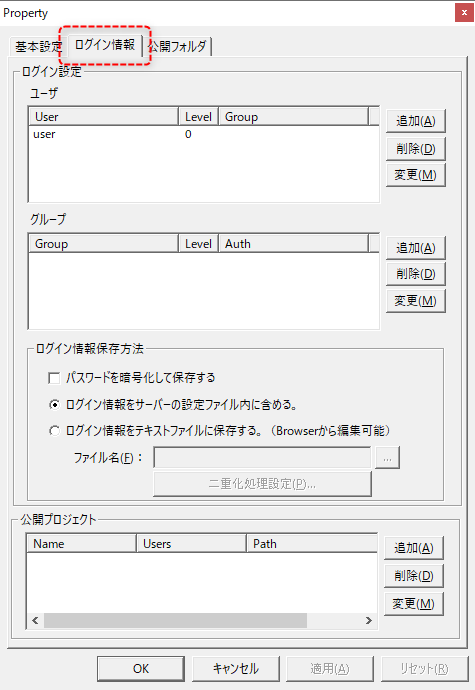
The Panel-Interface settings screen will appear, so select the "Login Information" tab from the screen.
(Panel-Interface/Login Information tab)
2.Remove the default user (if necessary)
In the initial settings of Panel Server, which does not use the standard framework, a user with the username "user" and password "pass" is pre-registered. If you do not need to be particularly concerned about logging in, you can use this user information as is. On the other hand, if you want to register multiple login users and switch between users depending on the situation, you should delete the default "user" user as it is not recommended from a security standpoint.
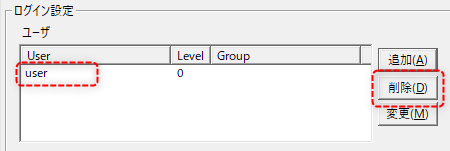
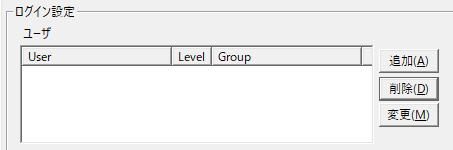
To delete a user, select the target user "user" from the list and click the "Delete" button on the right.
It has been deleted.

|
Panel Server has user information registered by default with the username "user" and password "pass". This user is used for automatic login with default settings. If you are using the login function for security protection, be sure to delete this user as it is not recommended from a security standpoint. On the other hand, if you want to operate with automatic login using only one user (if there is no need to switch users during operation), you can use the default user as is without deleting it.
|
3.Registering login settings
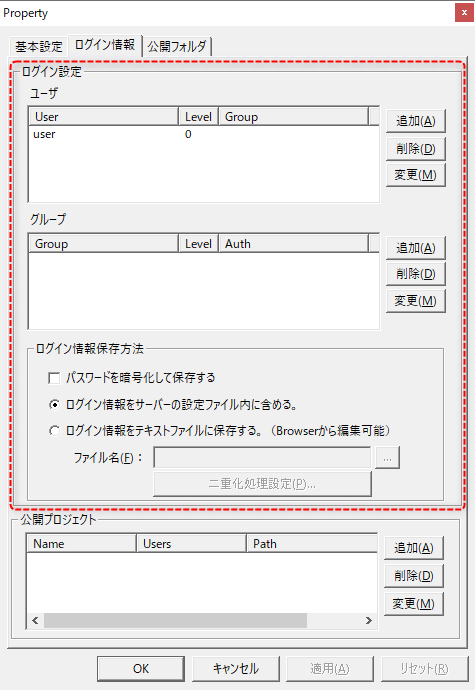
The Login Info tab allows you to configure how users, groups, and login information are saved.
Setting items
|
explanation
|
User
|
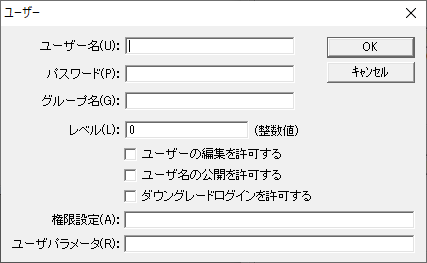
When you click the Add or Change button, the following dialog box will be displayed.
Setting items
|
explanation
|
Username
|
Please enter your username.
|
password
|
Please specify a password of your choice.
|
Group Name
|
User levels and authority settings can be managed collectively in the following groups. If you do not use groups, there is no need to specify them.
|
level
|
Specify the level value to be set for the user as an integer value.
|
Allow users to edit
|
Checking this box will allow the user to edit user information from the client. For users for whom this item is not enabled, calling route methods to edit user information such as AddLoginUser and DelLoginUser will fail. If you do not want to edit user information from the client, there is no need to check this box.
|
Allow Username to be Disclosed
|
If you check this box, the user name will be obtained by the GetPublicUserName route method from the script. If you do not want to obtain the user name from the client, there is no need to check this box.
|
Allow Downgrade Login
|
If checked, the user will be eligible for downgrade login using the DowngradeLogin route method. This parameter is used by the user management function. If you do not want to perform downgrade login, there is no need to check this box.
|
Permission Settings
|
When you log in with this parameter set, the string specified in the parameter will be set directly to the PSUserAuth root property.

|
In the standard user management function, this parameter is implemented to be saved in the following map format.
(Map format)
-Define the permission key and permission value, separating them with a half-width colon ":".
・When defining multiple settings, list them separated by semicolons ";".
Example) style:Style 1;key2:123;key3:abc
Although it is possible to reference the value of the PSUserAuth root property as a string from a script and use it as is, by defining the authority string in map format, you can generate map values for all authorities by converting it from map format to a map value using the MAPSTRTO route method and calling the SetAuthMap route method. This mechanism makes it easy to obtain authority values by simply calling the GetAuth route method from a script.
"Getting permission settings from a script" provides an example of using permission settings from your own project.
|
|
User parameters
|
You can specify user parameters. If you log in with this parameter set, the parameter will be set in the PSUserParam route property. If you do not want to use it, leave it blank.
|
|
group
|
User levels and authority settings can be managed collectively by group. Setting up a group is not mandatory. Levels and authority settings can be granted to individual users, or can be consolidated by registering a group. If no group is set, the level and authority setting values set for each individual user will be adopted. If a group is registered, the values registered on the group side will be adopted with priority.
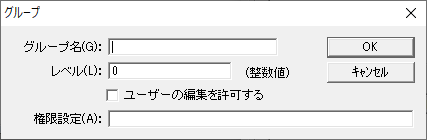
When you click the Add or Change button, the following dialog box will be displayed.
Setting items
|
explanation
|
Group Name
|
The group name.
|
level
|
Specifies the user's level as an integer value.
|
Allow users to edit
|
Check this box to allow users in the group to edit user information from the client. See "Users" above for details.
|
Permission Settings
|
A permission string can be specified, see "Users" above for details.
|
|
How to save login information
|
Set how your login information will be saved.
Setting items
|
explanation
|
Encrypt and store passwords
|
By checking this setting, your password will be encrypted and saved. We recommend that you leave this setting checked.
|
Include login information in the server configuration file
|
The login information is stored in the server configuration file.
|
Save your login information in a text file
|
Store your login information in an external text file.
|
|