Video recorder screen operations
This section explains how to operate the video recorder screen. Click the links below to jump to the relevant section of this page.
•Individual operation of video players
•Recording start/stop operation
•Select and operate the recording file ("Recording file" tab)
•Recorder start/stop operation (Recorder List tab)
•Screen display area resize operation
■ Recorder selection
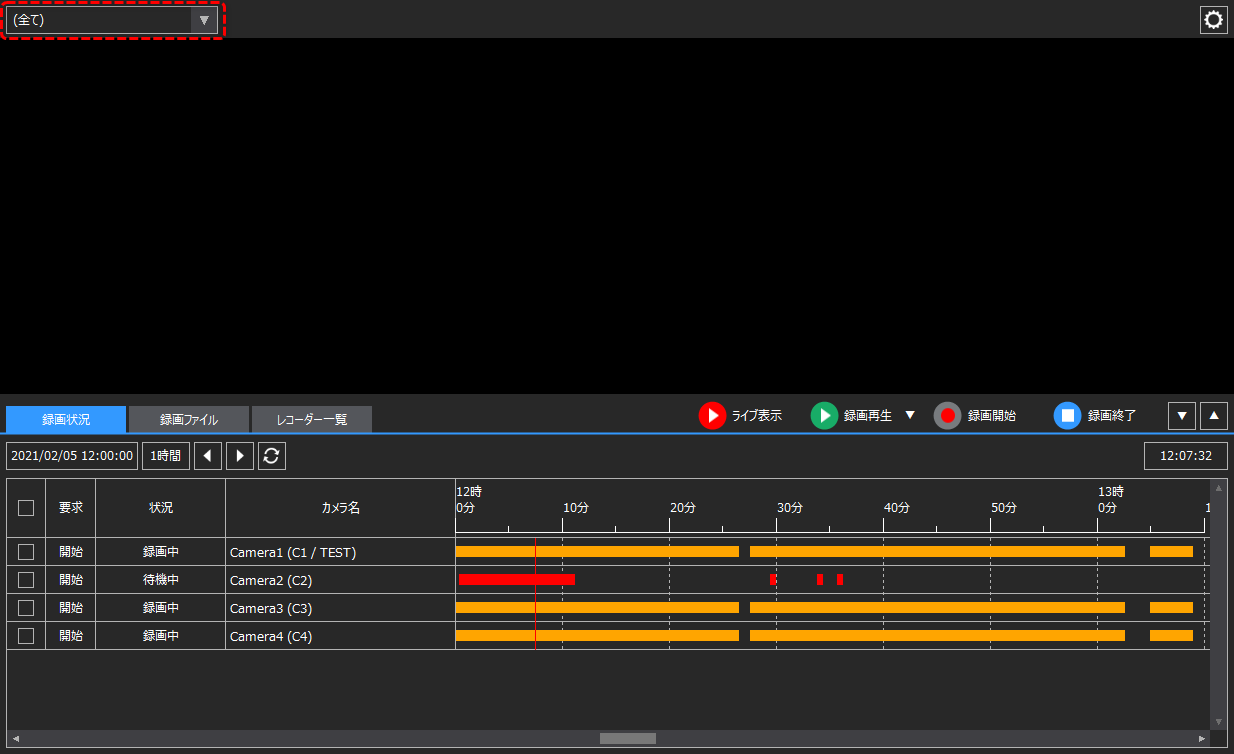
On the Video Recorder screen, you can select the recorder to display on the screen.
|
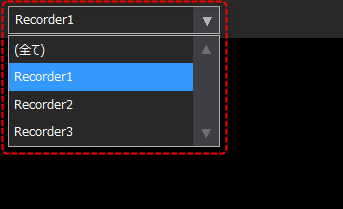
You can select the recorder from the combo box at the top left of the screen. If you select "All" here, the cameras of all recorders will be displayed.
|
■ Camera selection and basic operations
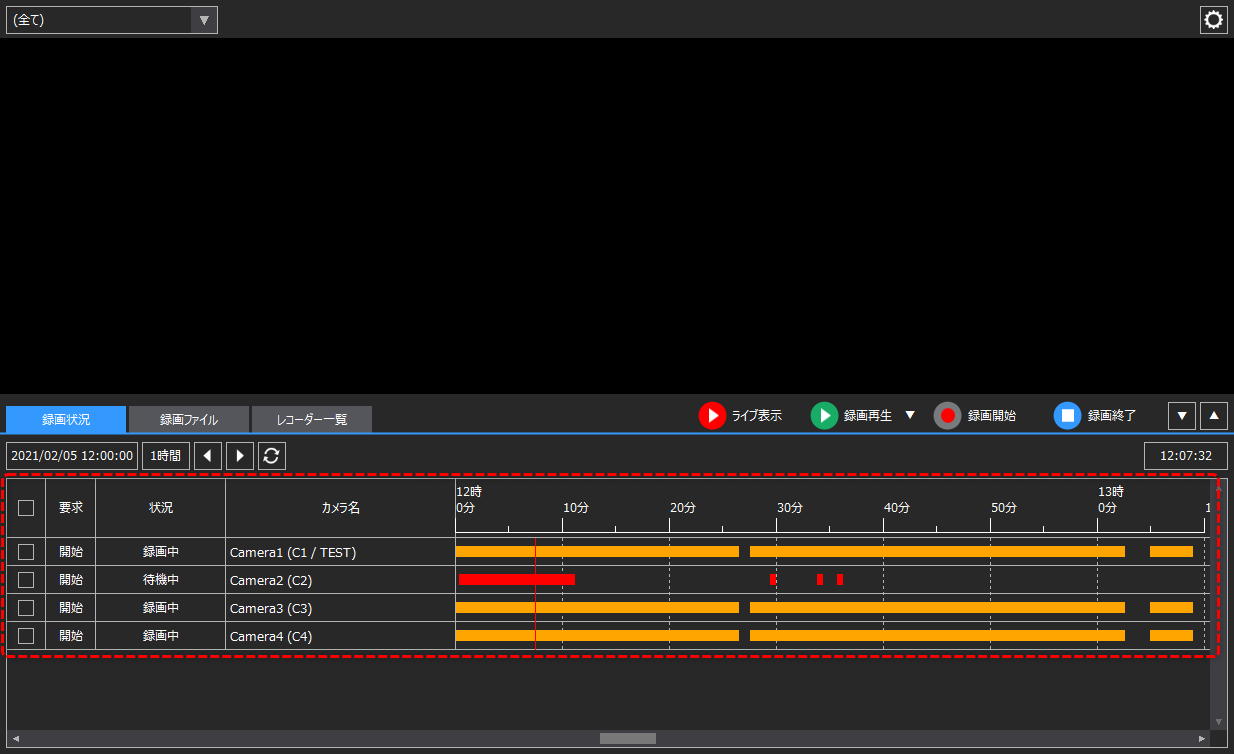
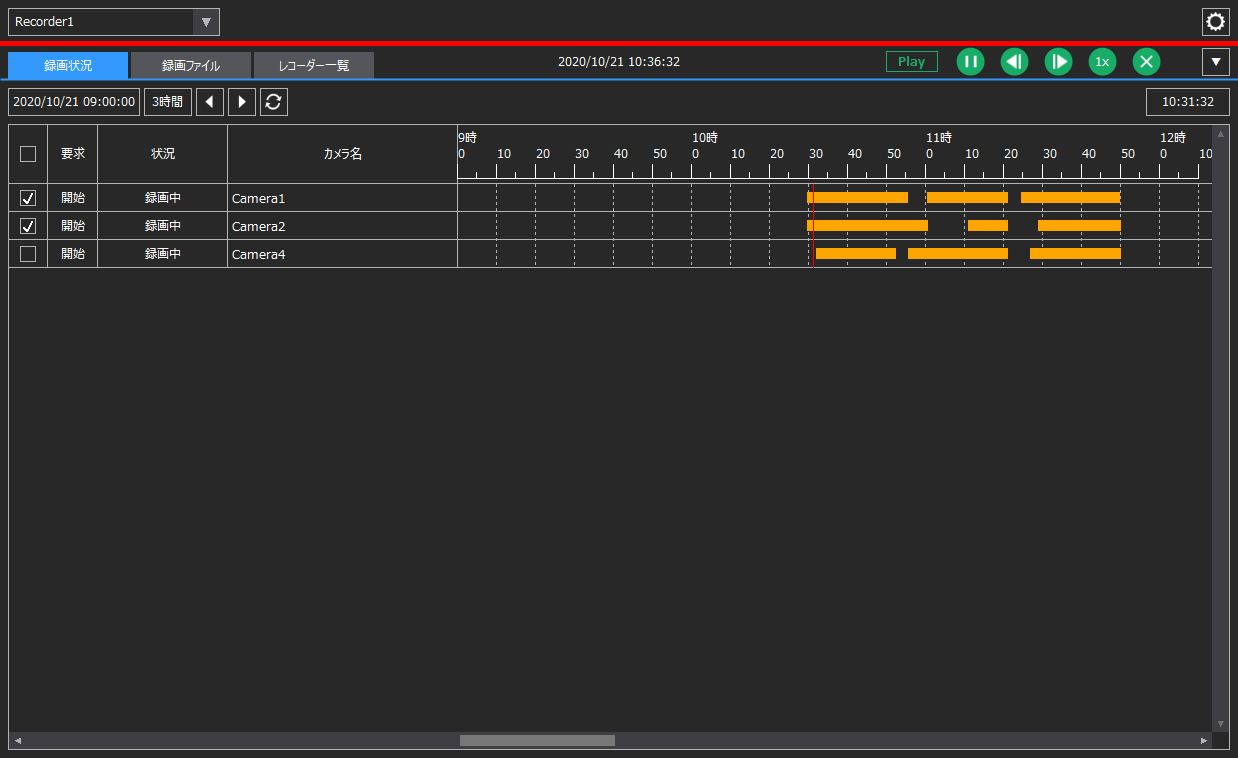
The "Recording Status" tab in the recorder operation area displays a list of the cameras registered to the currently selected recorder.
|
|
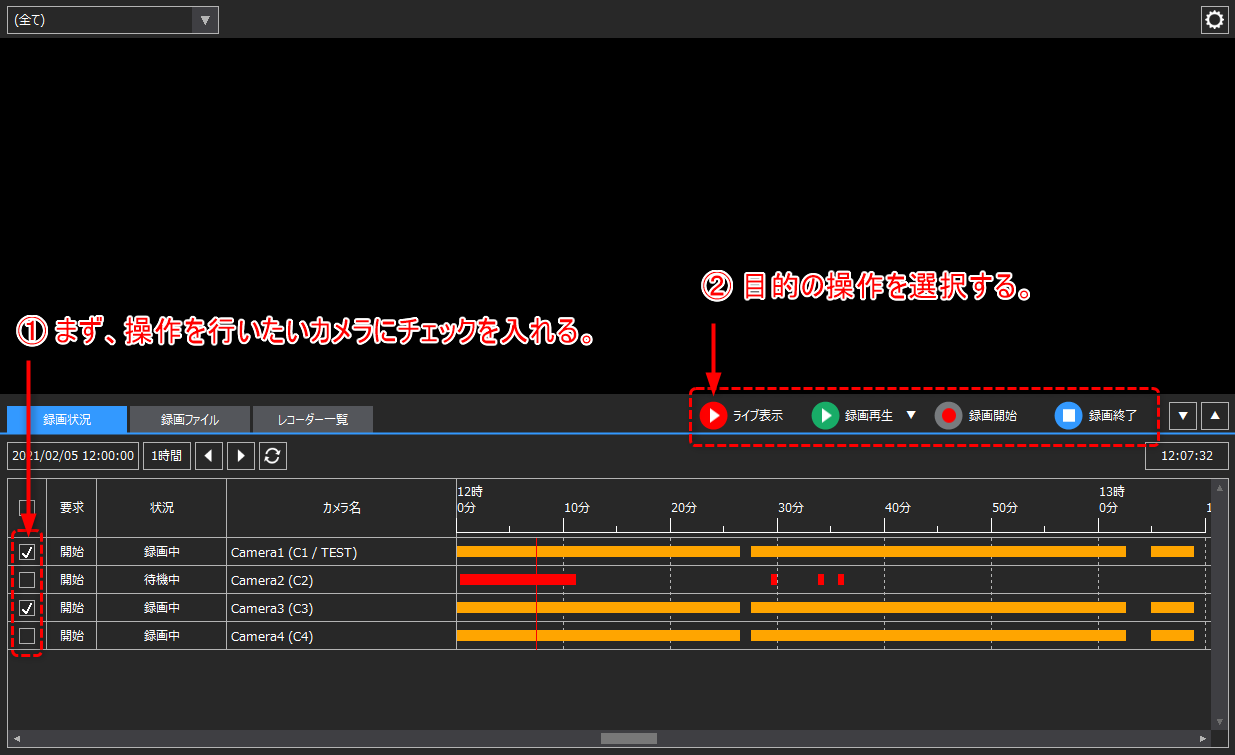
The basic flow of operating the video recorder is to first check the camera you want to operate from the list, and then perform the desired operation using the operation icon at the top of the list.
|
The content displayed on the operation icon changes depending on the situation.
(Initial display)
(Example of recording and playback)
|


The live view shows the live video from the selected camera.
|
To display live images, follow the steps below.
•First, check the camera you want to operate from the list. •Run the "Live View" icon.
|
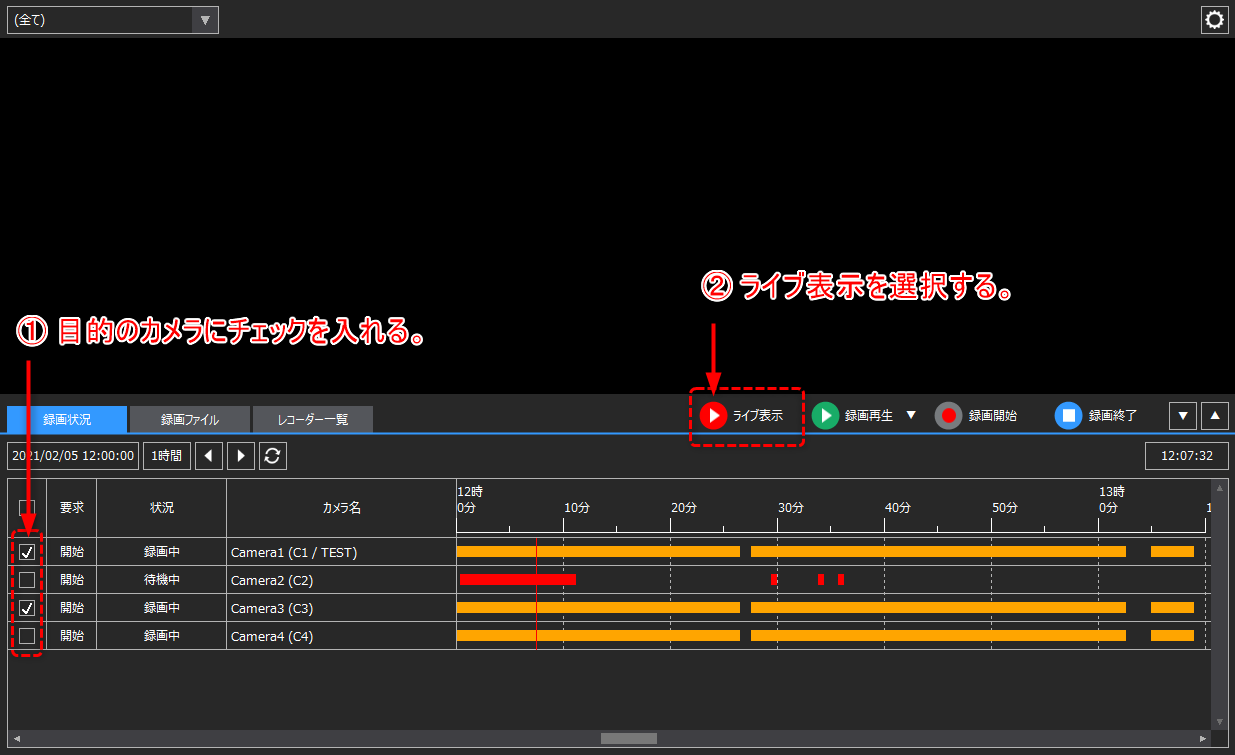
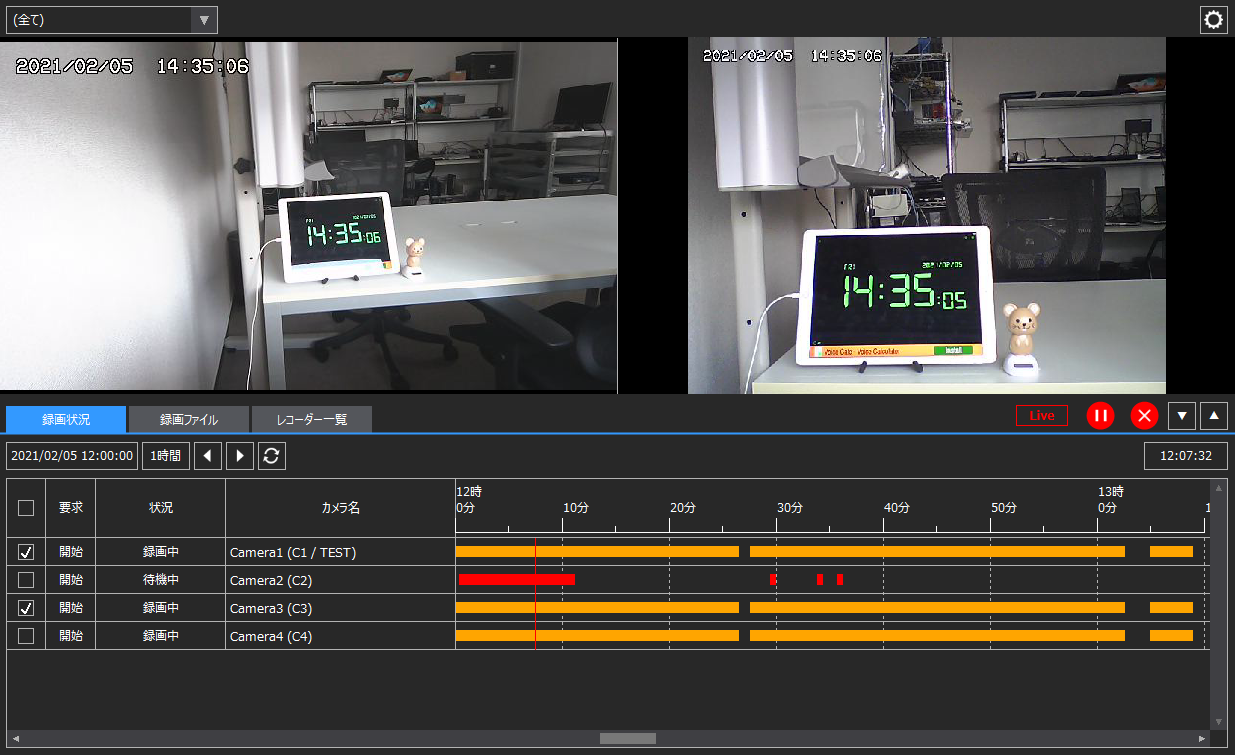
Then, live video will be displayed in the camera display area. Below is an example of selecting two cameras at the same time.
|
During live display, the icon display will change as follows:
You can pause the live video being displayed by clicking the icon below.
Also, click below to end live display.
|
Recording playback displays the recording data from the selected camera.
|
The recording and playback operations are as follows:
•First, check the camera you want to operate from the list. •Next, the playback start date and time of the recorded data is determined. •Run the "Recording and Playback" icon. |
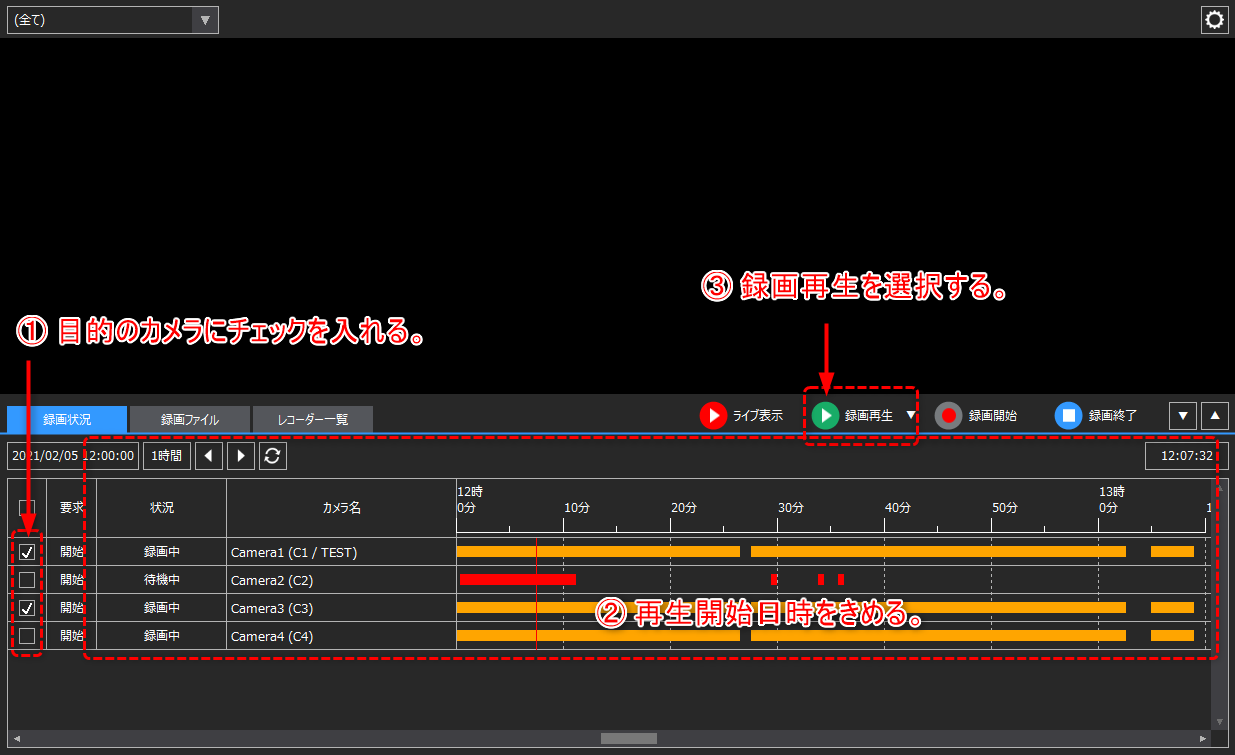
You can select the playback start date and time in the recorder operation area at the bottom of the screen. The time chart displayed in this area shows the time periods in which actual recorded data exists in bar format, which is useful when searching for the recorded data you want to play.
|
The date and time displayed in the time chart can be changed from the following parts.
Clicking on a date allows you to select the desired date and time from the date and time selection dialog. You can also change the display width of the time chart by selecting from 1 hour, 3 hours, 6 hours, 12 hours, or 24 hours. Clicking the left and right arrow buttons will switch pages to the previous or next time period in units of the current display width. |


Clicking a bar on the time chart will select a block of the data file of the saved recorded data, and the beginning of that block will be set as the playback start date and time.
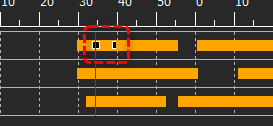
Also, the vertical red line displayed on the time grid is called the "cursor." You can drag this cursor left or right with the mouse to select the playback start date and time.
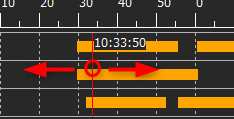
Once you have selected the start date and time for playback, click Play Recording.

The recorded data will then be played back and displayed in the camera display area according to the selected conditions.
|
While playing back recorded data, the icon display will change as follows:
You can pause the recording video that is currently playing by clicking the icon below.
Click the icons below to rewind or advance one frame.
The following icons allow you to change the playback speed.
Click the icon below to end the recording.
|
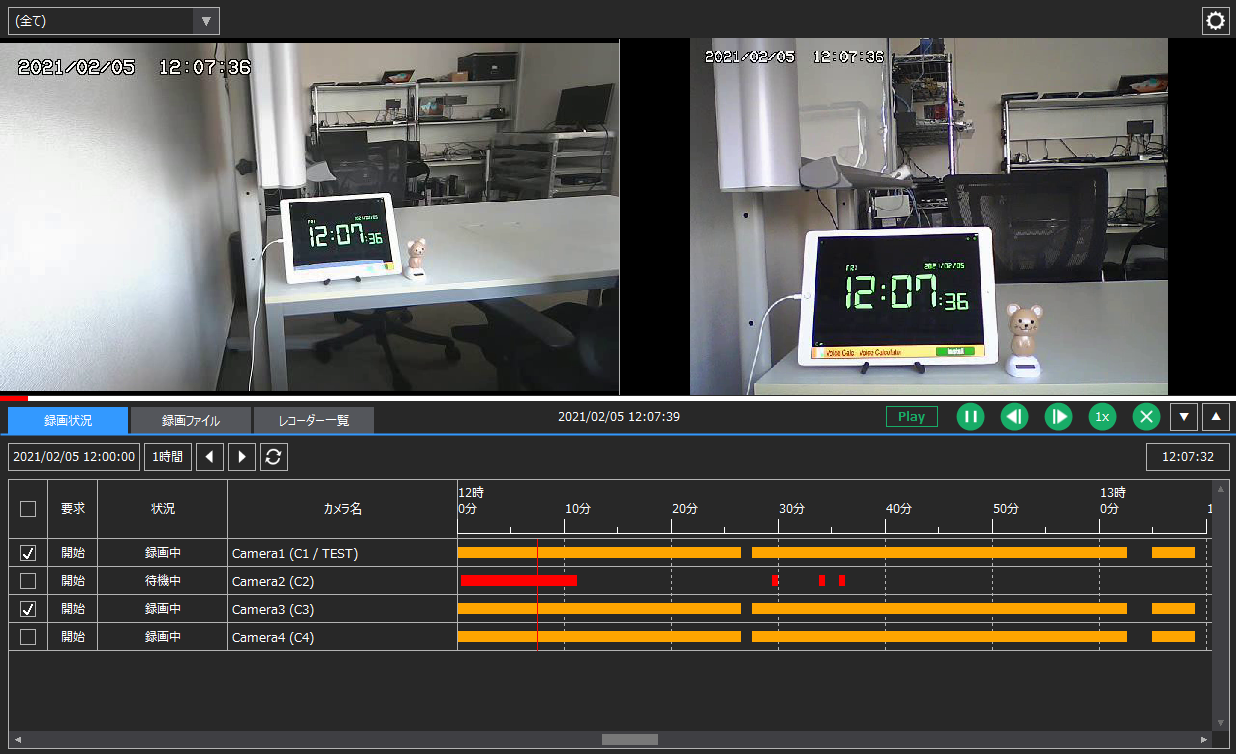




Individual video player controls
The camera viewing area is displayed by the video player.
|
If multiple cameras are selected, multiple video players will be displayed tiled, one for each selected camera.
|
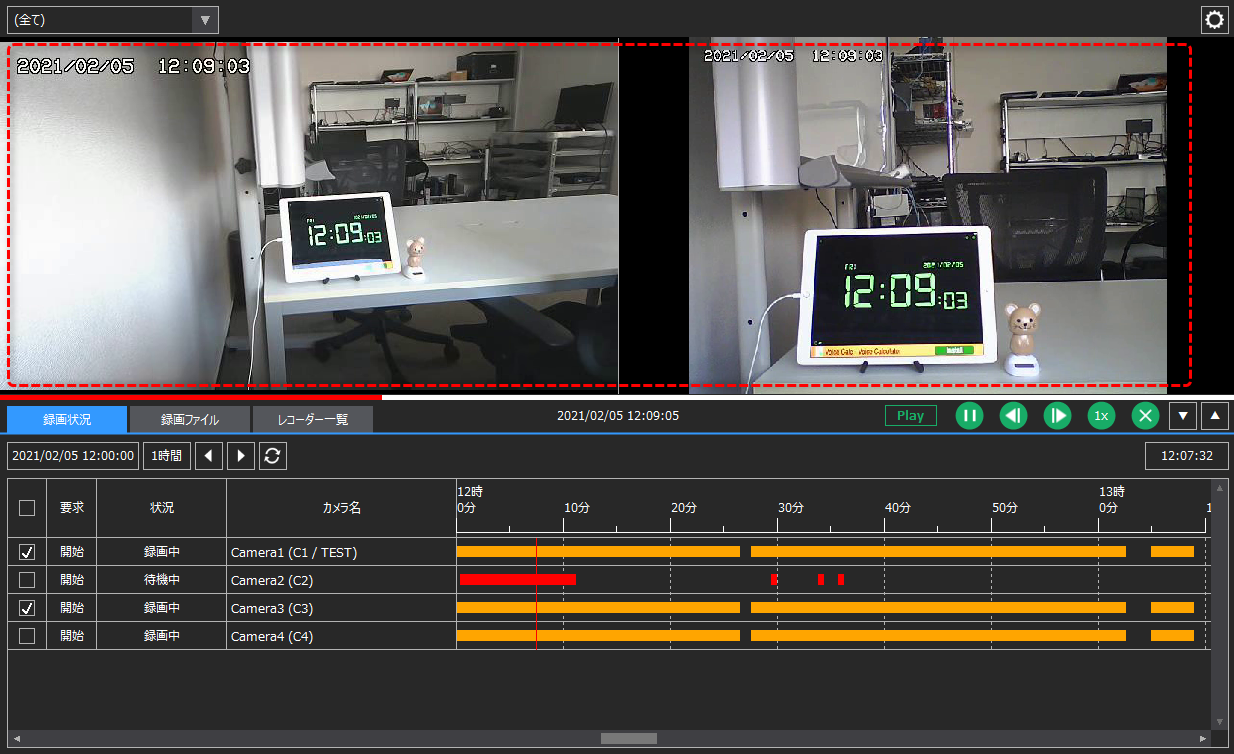
Each video player can be operated independently.
|
When you hover your mouse over the video player, a video controller will appear at the bottom of the pane. You can perform various operations such as pausing, recording, frame-by-frame advance, and capturing using the controller icons.
|
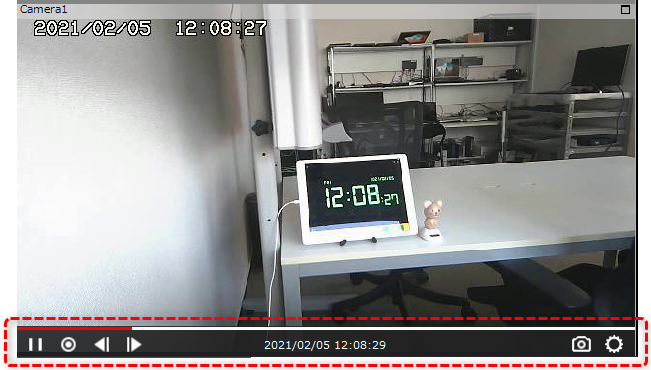
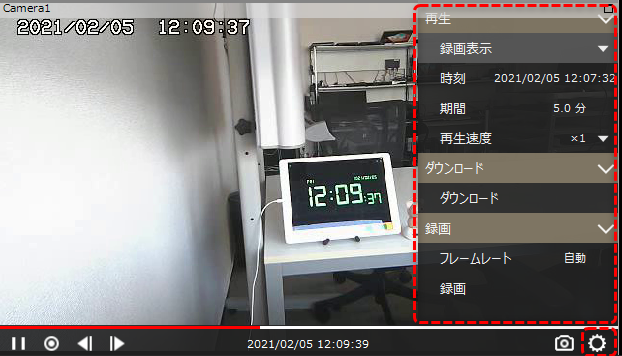
Additionally, clicking the settings icon on the right side of the controller will bring up a settings menu over the video player.
|
In the settings menu, you can perform various operations such as switching between live and recorded display modes, changing the playback position date and time, and changing the playback speed.
|

Recording start/stop operation
The video recorder recording process can be started/stopped manually for each camera.
|
Click the icon below to start recording for the selected camera.
You can also click the following to stop recording for the selected camera:
|
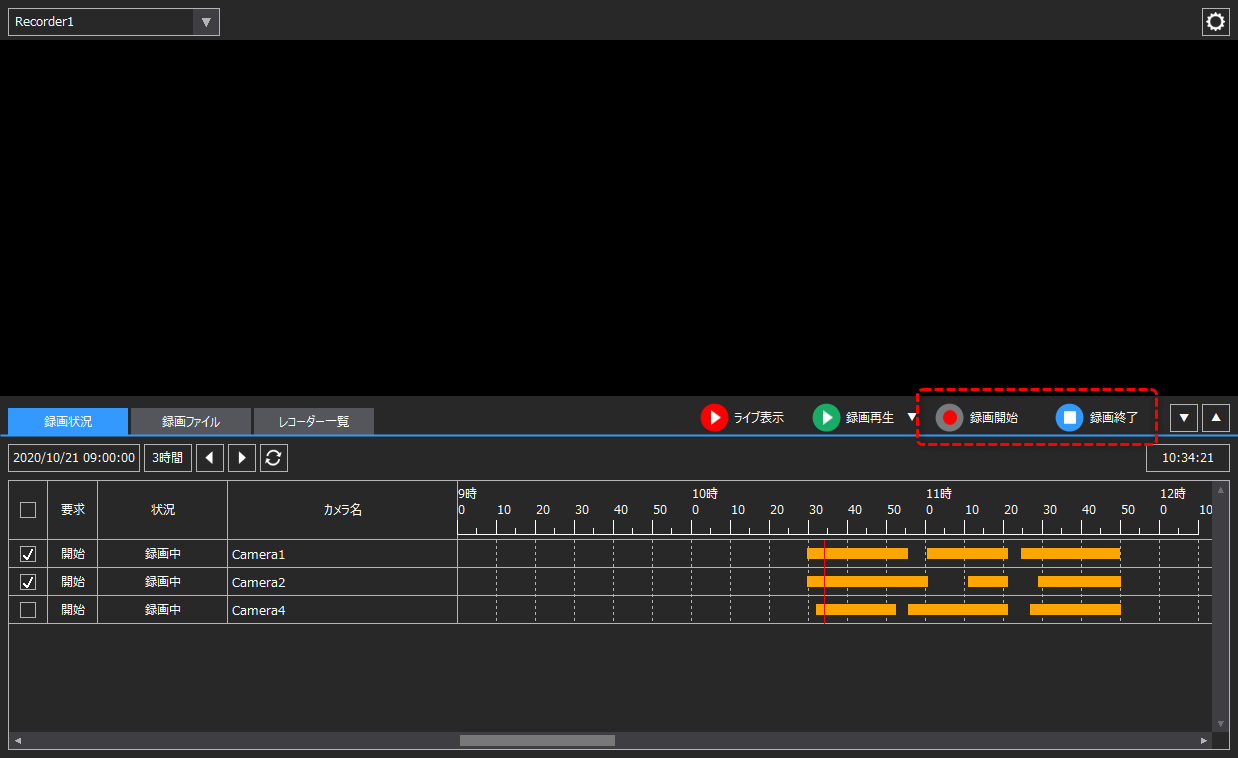


The current recording status is displayed in the Status column in the list.

The time chart display is not updated automatically. Click the button below to update it to the latest state.
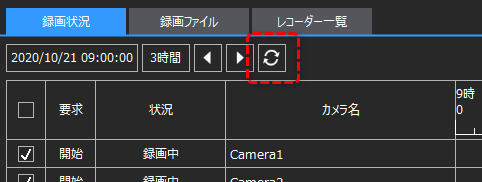
Selecting and Working with Recorded Files (Recorded Files tab)
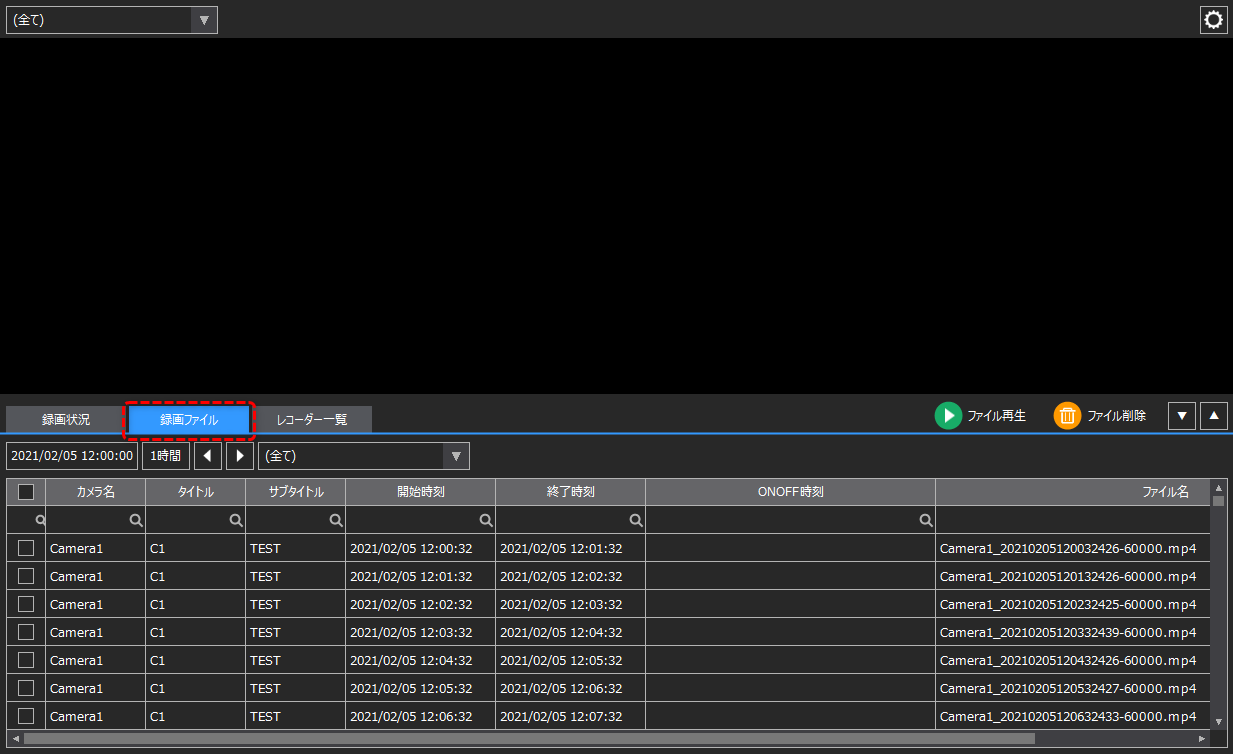
When you select the "Recorded Files" tab, you can select and play the recorded files of the currently selected recorder from a list.
|
Select the desired video file from the list and click Play File to play the file.
Click the following to delete the selected file.
In addition, you can narrow down the list by searching each column for a string in the list header.
|


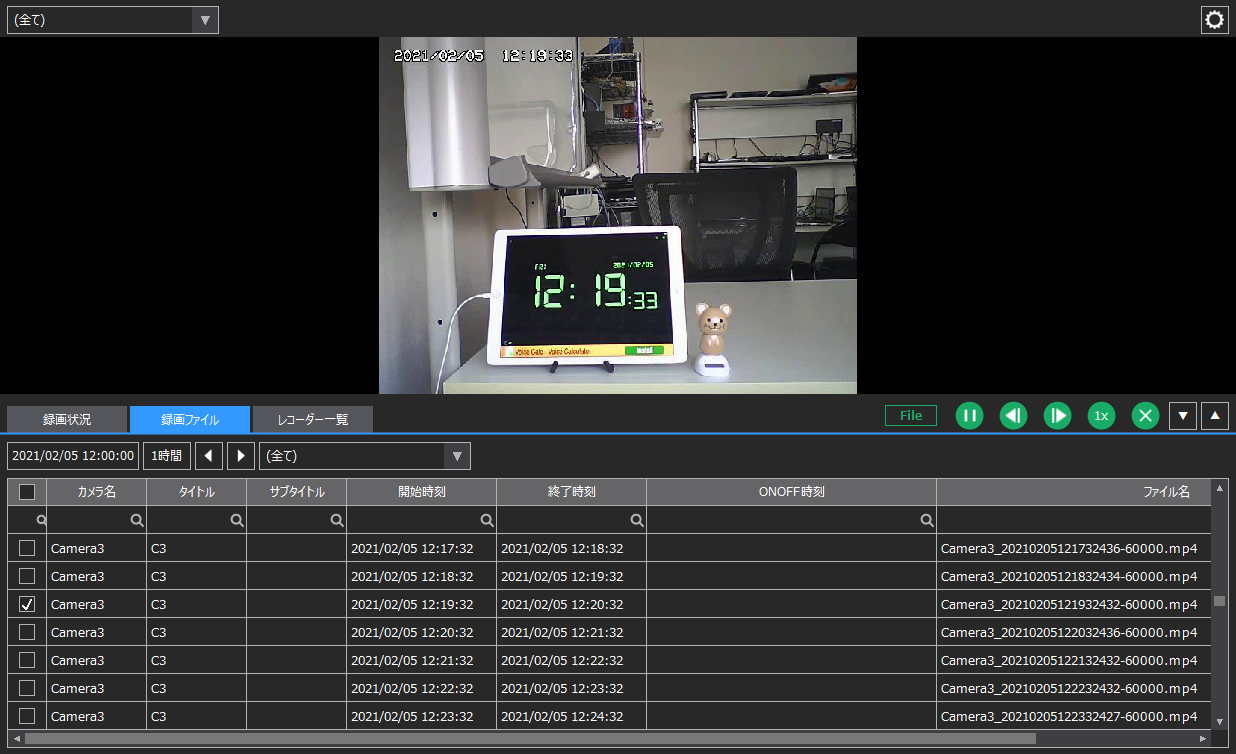
Below is an example of selecting and playing a file from the Recording Files tab.
Recorder start/stop operation (Recorder List tab)
When you select the "Recorder List" tab, a list of currently registered recorders will be displayed.
|
Select the desired recorder from the list and click Start Recorder to start processing for that recorder.
Click the following to terminate processing for the selected recorder.
|
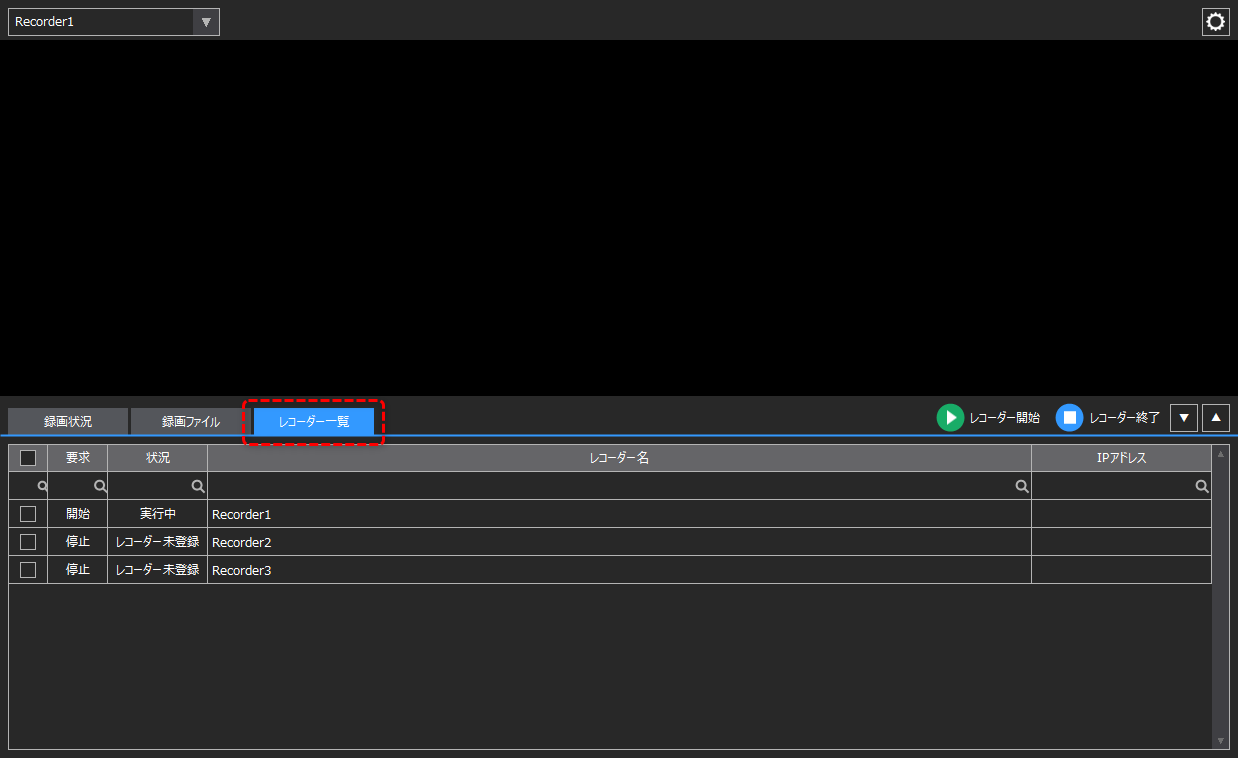

The current recorder status is displayed in the Status column in the list.

Screen display area resize operation
The video recorder's screen display area can be flexibly resized.
■ Changing the size of the display area
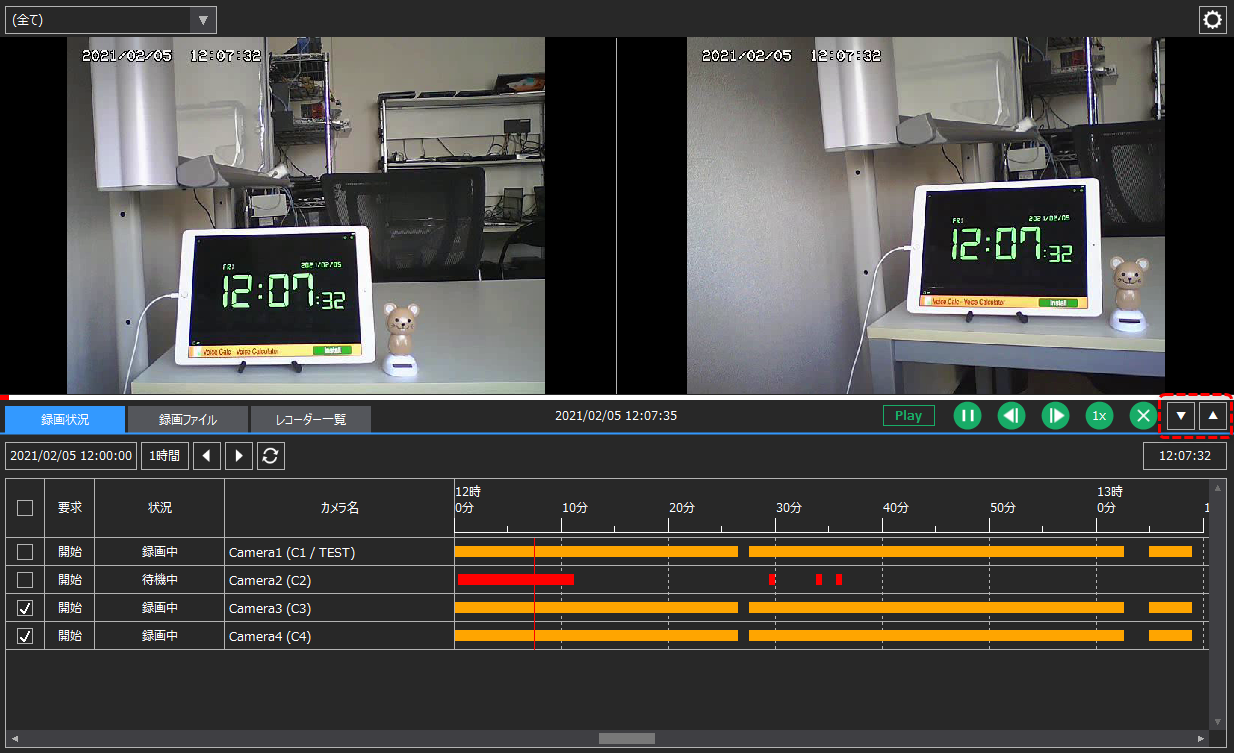
The normal display state is shown below. Clicking the arrow button displayed to the right of the center of the screen allows you to switch the camera display area and recorder operation area to full screen display.
|
Clicking the down arrow button will collapse the recorder operation area and display the camera display area in full screen (if the camera display area is collapsed, it will expand the area to its original size).
(Example of full screen camera display area)
|

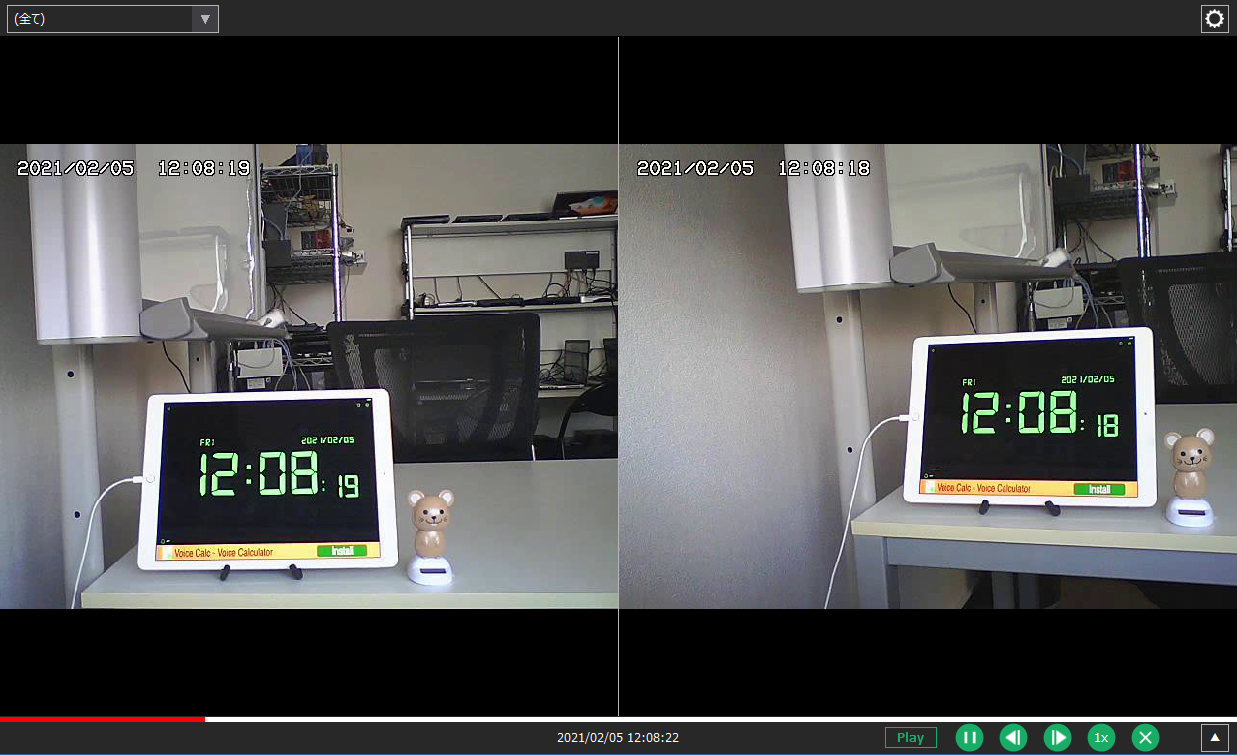
Clicking the up arrow button will collapse the camera display area and display the recorder operation area full screen (if the recorder operation area is collapsed, it will expand to its original size).

(Example of full-screen display of recorder operation area)
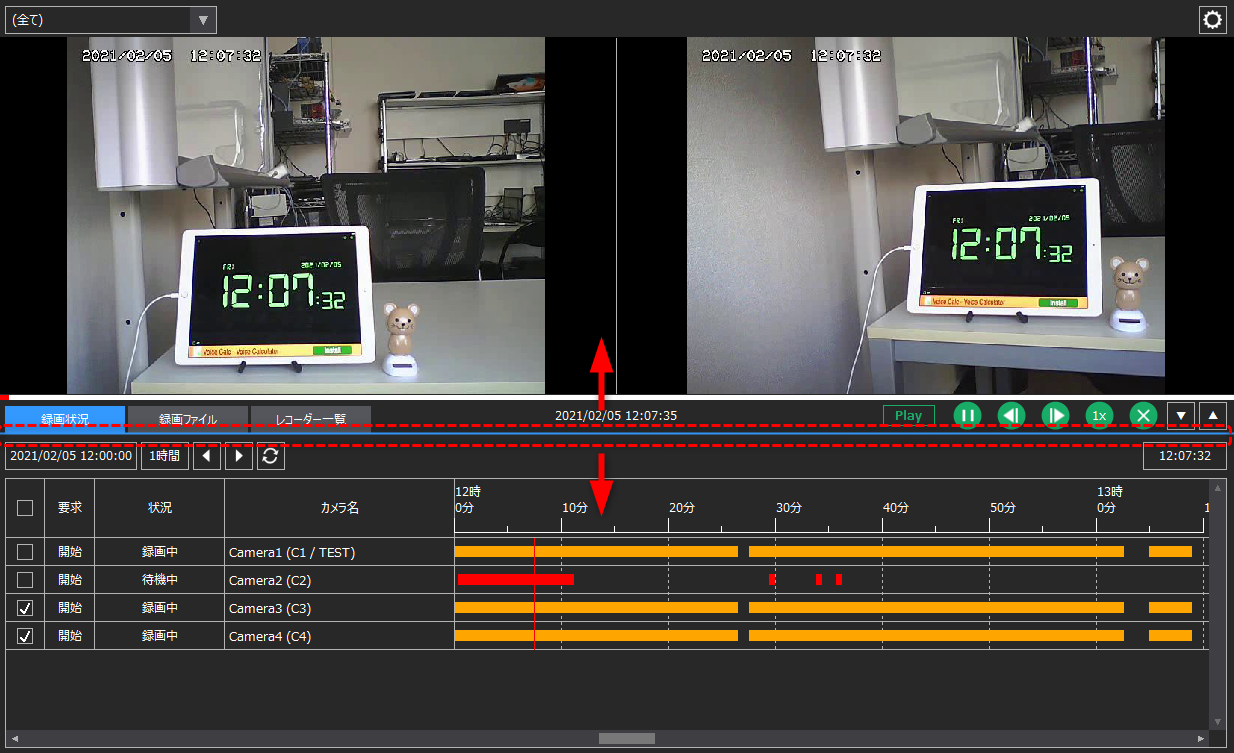
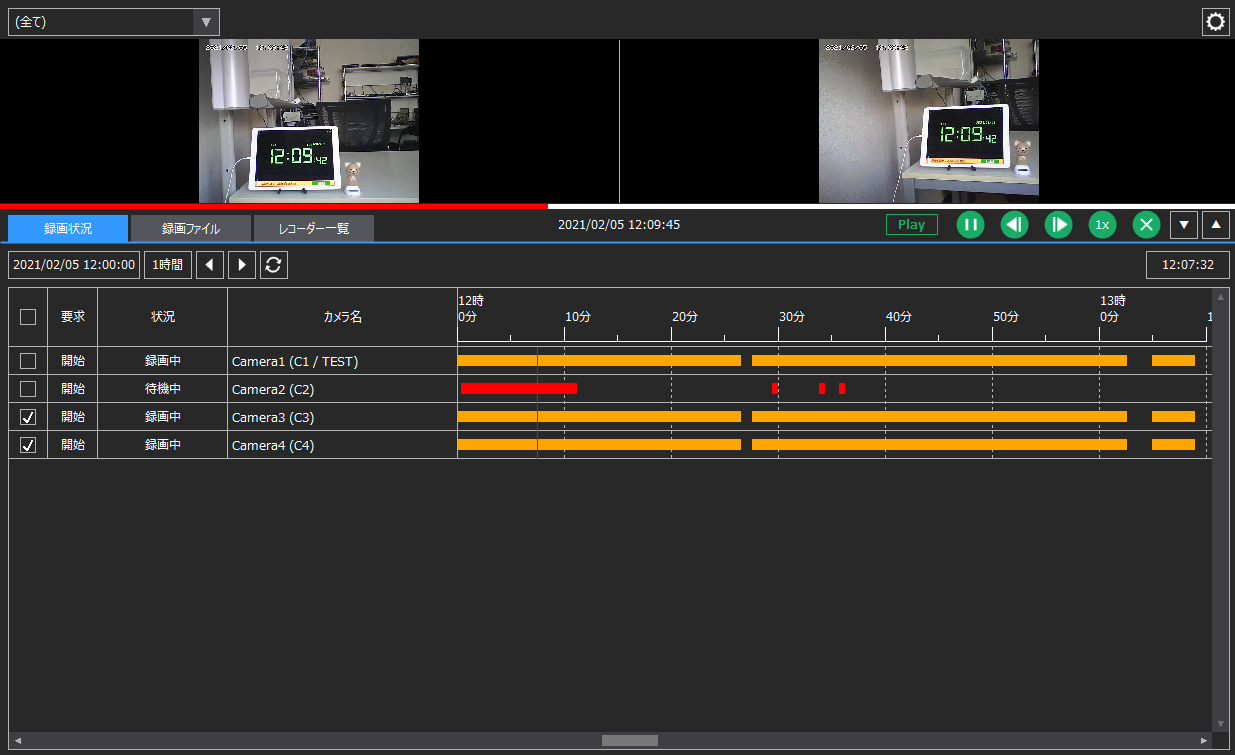
You can also freely change the top and bottom division ratio by dragging the line in the center of the screen with the mouse.
|
(Example of an expanded recorder operation area)
|
■ Maximize video player display
When you hover the mouse cursor over a video player, the video player title bar appears. You can maximize the selected player to fill the entire camera viewing area by clicking the button on the right of the title bar (the maximize button) or by double-clicking the title bar.
|
To maximize the video player, click the button below.
|
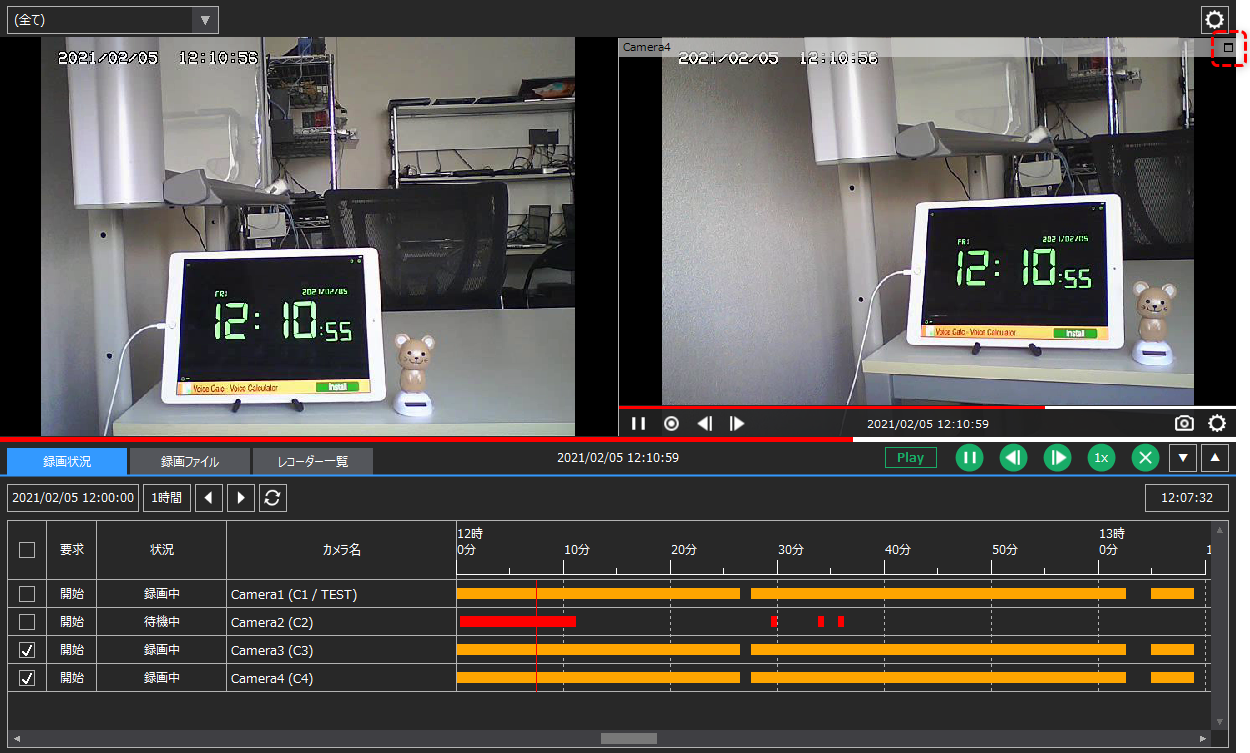
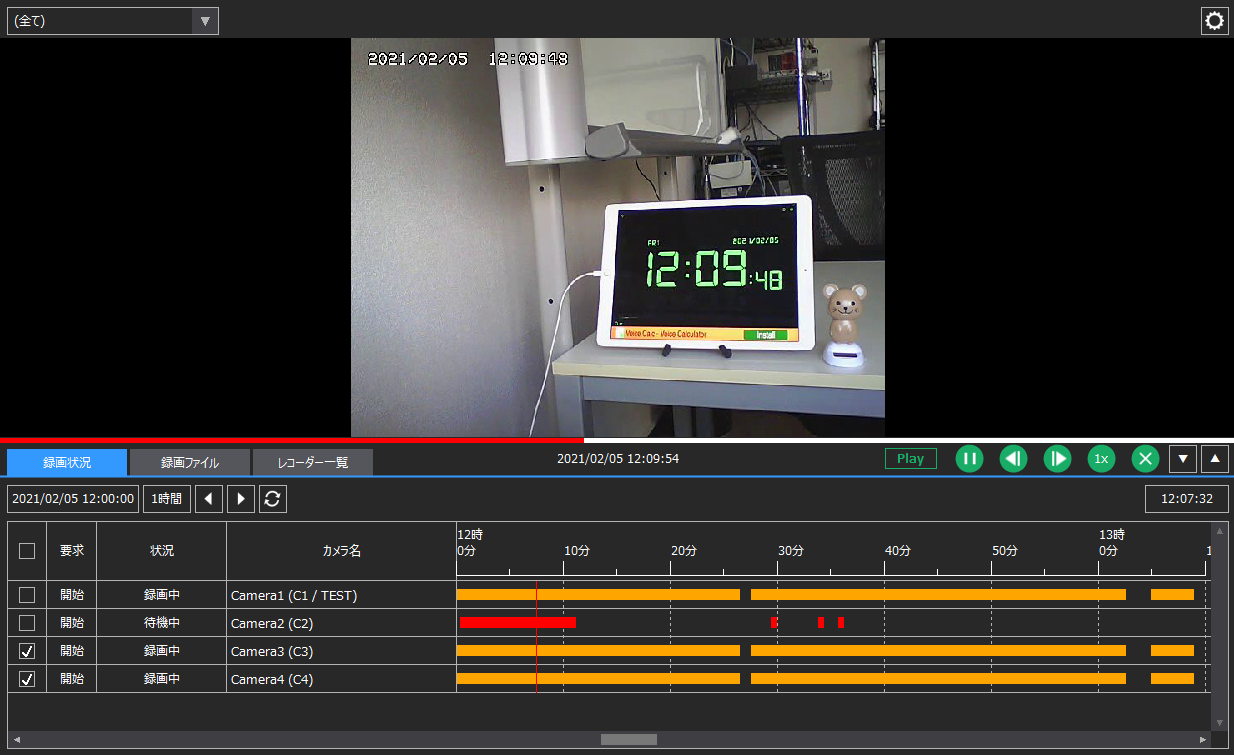
The video player will then be enlarged to fill the entire camera display area, as shown below (note that the image's aspect ratio will be maintained when it is enlarged).
|
In this state, if you expand the camera display area to fill the entire screen, the image from the selected camera will be enlarged to fill the entire screen.
(Example of full-screen camera display)
|
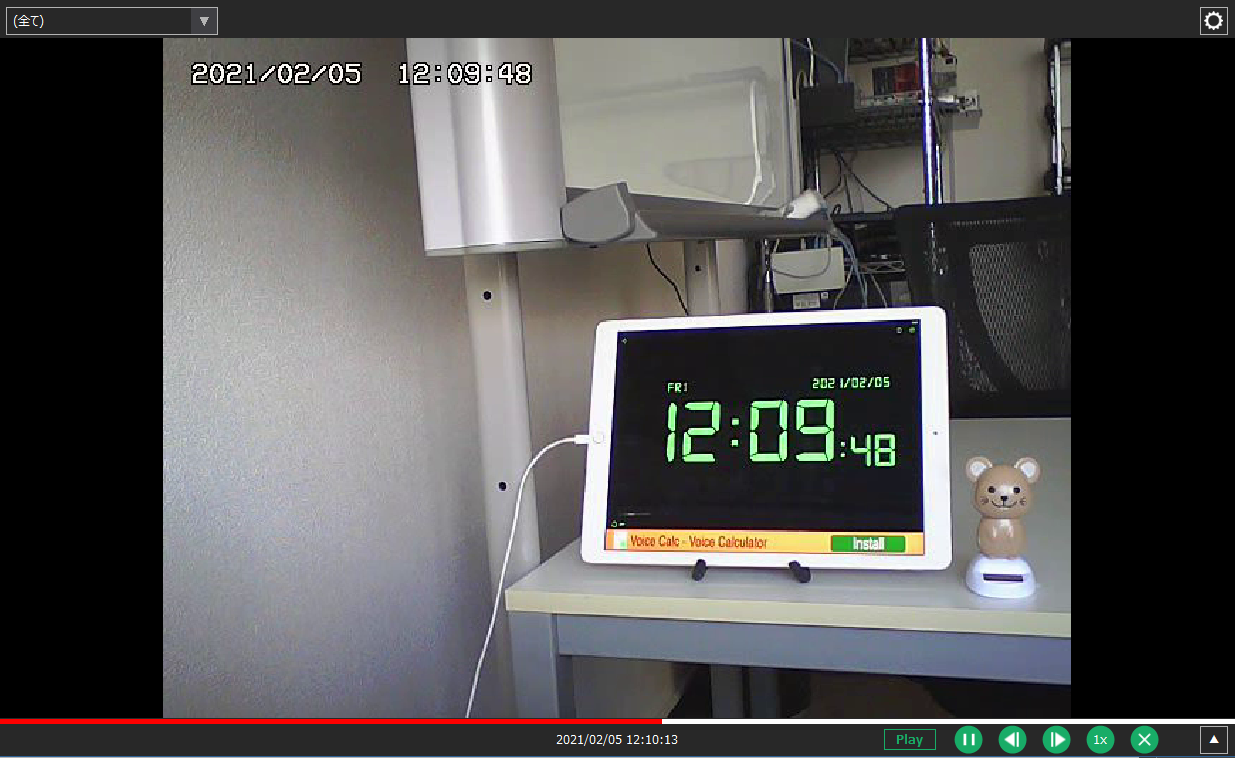
You can return the video to its original size by clicking the icon in the video player's title bar or by double-clicking the title bar.