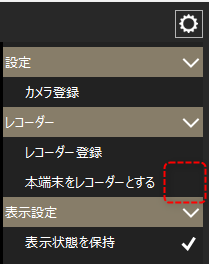
Video recorder settings consist of "camera registration," "recorder registration," and "recorder terminal registration." After defining the recorder by registering the camera and recorder, you must register the client PC that will actually record as a recorder terminal. Note that each video recorder setting task is performed while the client is running. These setting tasks should be performed while both Panel Server and Panel Browser are running online.
The following describes how to register each setting for the video recorder.
•Registering the recorder device
The camera registration settings screen can be displayed from the video recorder's settings menu.
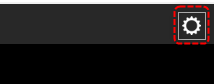
Click the settings icon to open the menu and select Camera Registration.
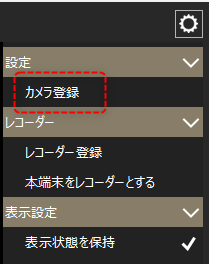
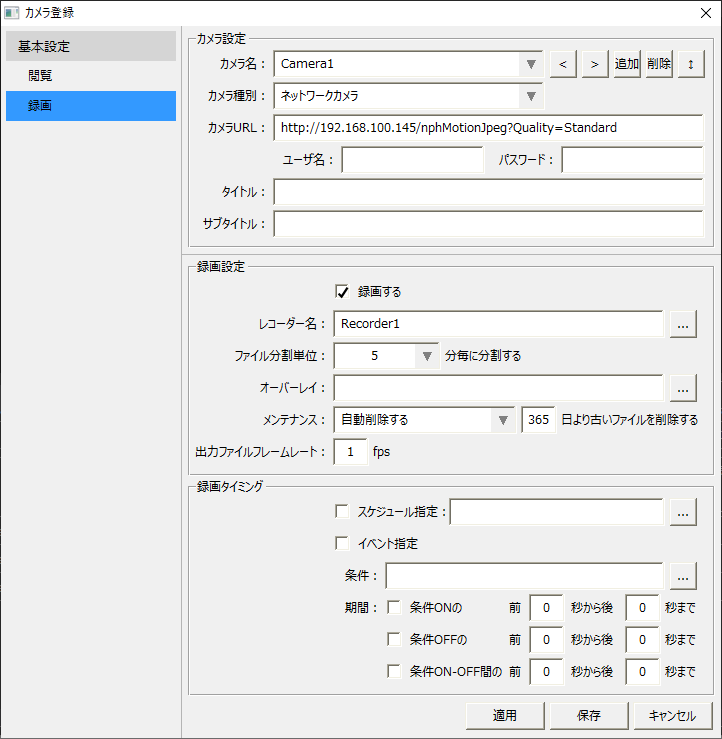
The camera registration screen will then pop up.
(Camera registration screen)
|
For details on camera registration, please refer to "Camera registration operation".
|

|
The settings for the recorder's recording destination, transfer settings, and viewing destination must be carefully configured to suit the actual operation. For ideas on the recorder's recording settings, please refer to "Video Recorder System Configuration and Operation". |

The recorder registration settings screen can be displayed from the video recorder settings menu.
Click the settings icon to open the menu and select Recorder Registration.
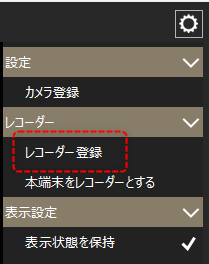
Then the recorder registration dialog will pop up.
(Recorder registration dialog)
|
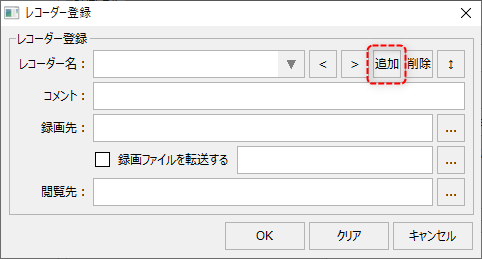
The image on the left shows that no recorders have been registered yet.
To add a recorder, click the "Add" button near the right of the recorder name.
|
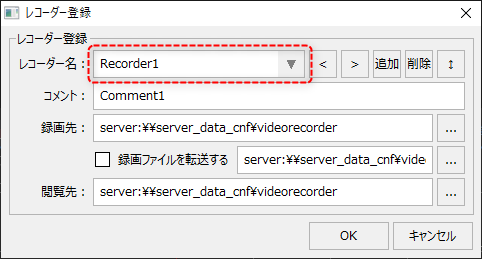
A new recorder will be automatically added with the name "Recorder1". If you want to change the name, you can edit it directly in the combo box.
|
|
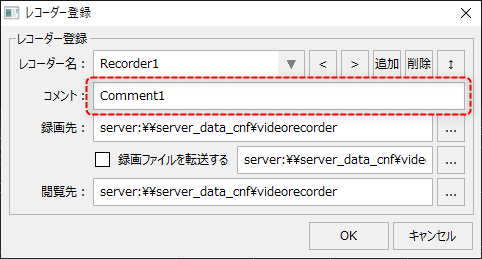
You can specify any comment as the comment. The comment you set here will be displayed in various places, such as the selected recorder name and the list display of video recorders.
To switch recorder selection, select the desired recorder from the combo box or use the "<" and ">" buttons to switch the currently selected recorder.
|
|
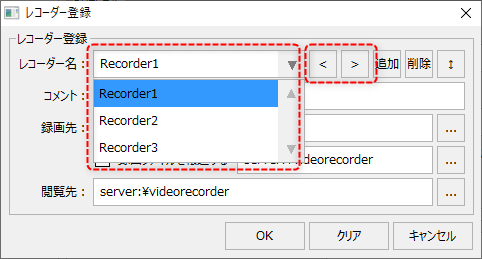
Click the "Delete" button to delete the currently selected recorder.

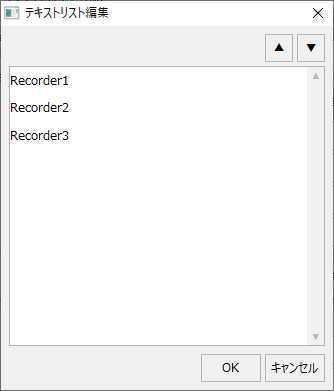
You can also click the button below to display the Text List Editing dialog box, where you can edit the display order of the recorders.

(Text List Editing Dialog)
|
To change the display order of recorders, select the target recorder and click the "▲" or "▼" button.
|
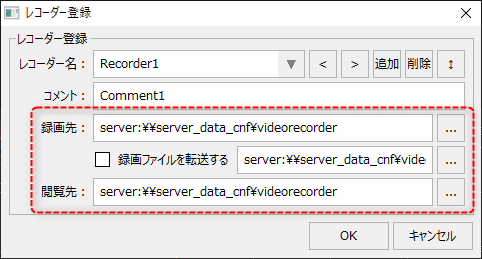
The folder settings for recording, transfer, and viewing of recording files are set to save on the server side by default, but you can change these settings freely.
|
|
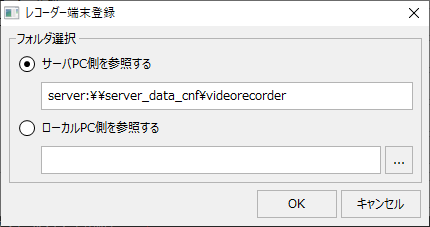
To set the recording destination, click the Settings button next to the destination folder name.
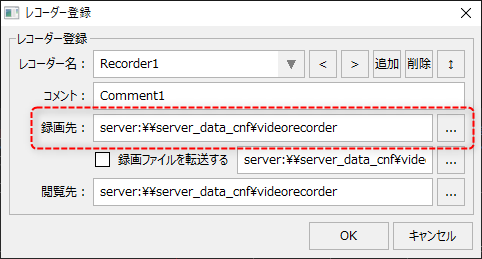
This will pop up a folder selection dialog.
When selecting a folder, select whether to save to the server PC or to the local PC, and specify the destination folder. |
|




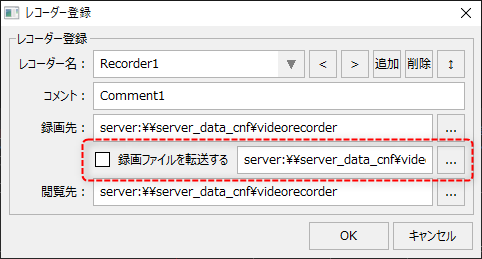
"Transfer recording files" allows you to set the video recorder to automatically transfer recording files to a specified folder.
|
Check "Transfer recorded files" and click the setting button next to it to display a pop-up folder selection dialog. Set the destination folder in the same way as the recording destination. Setting the transfer allows you to automatically transfer recorded data to another folder (such as a network drive).
|
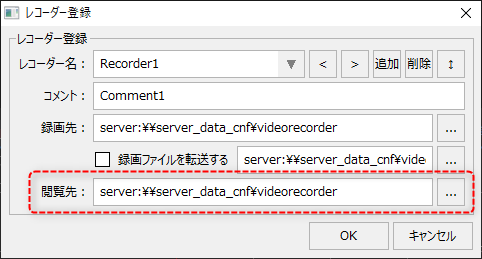
In the viewing destination setting, specify the folder that will be the reference for the recorded data to be played back when playing back recorded data from the video recorder screen, etc. Set the viewing destination so that it refers to the intended location, such as one of the folders set in the recording destination or transfer destination.
|
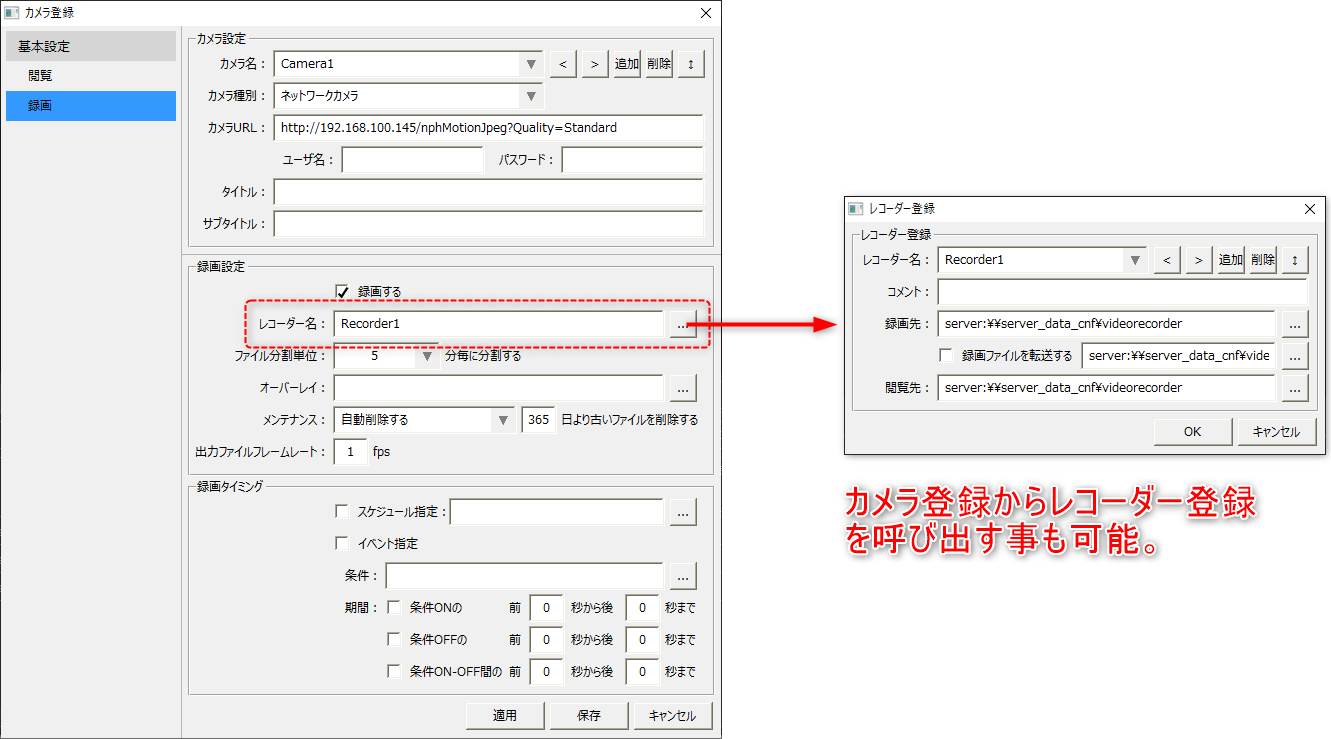
In addition to calling up the recorder registration dialog from the menu above, you can also call it up from the recording settings on the camera registration screen. You can register the recorder during the recording settings flow of camera registration, or you can register the recorder in advance and then register the camera.
(Recorder settings for camera registration)
|
Registering the recorder device
After defining the recorder, you need to register one of the client PCs as a recorder terminal. Assign one client PC as a recorder terminal for each recorder.
|
Be sure to perform the following settings from the client PC that will actually perform the recording. Note that if you copy the entire project folder of the client setting file of a client PC registered as a recorder terminal to another client PC and run it online, the destination client PC may operate as a recorder terminal. If you manually copy the setting files of a client PC during the project development stage, etc., please be careful with the settings, such as deregistering the recorder terminal first before copying. |
■ Registering the recorder device
The registration of the recorder device can be displayed from the video recorder settings menu.
Click the settings icon to open the menu and select "Use this device as a recorder."
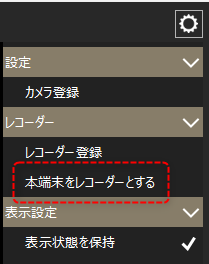
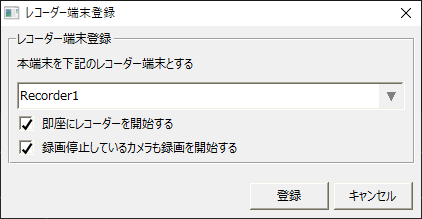
Then the recorder registration screen will pop up.
(Recorder device registration screen)
|
Select the target recorder name from the combo box. Also, if you want to start the target recorder immediately, check "Start recorder immediately." Also, if you want to start recording on the cameras registered in the recorder immediately, check "Start recording even on cameras that are stopped."
Once you have completed the above settings, click the "Register" button.
|
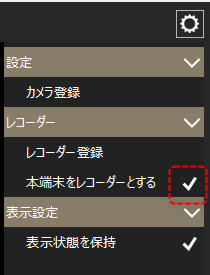
Once the registration of the recorder device is complete, a check mark will be displayed in the following area of the menu. You can also tell if you are a client that is a recorder device by checking whether or not the following check mark is displayed.
■ Unregistering the recorder device
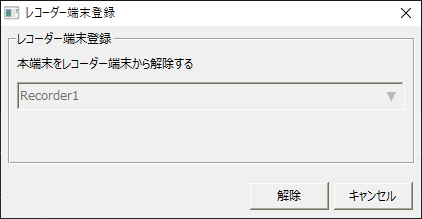
To remove a client PC that has been registered as a recorder device, follow the steps below.
From the settings menu of the client PC that is set as the recorder terminal, select "Use this terminal as a recorder."
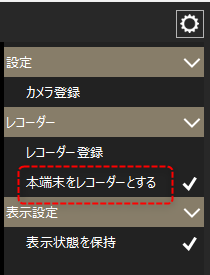
The following dialog will then be displayed:
|
If you want to remove it from the recorder device, click the "Remove" button.
|
When the recorder device is released, the check mark displayed in the following area will disappear.