overview
Daily report page settings (point registration) are done from the settings screen while the client is running.
The following explains how to register points in the daily report. Please note that the following operations should be performed while both FA-Server and FA-Client are running online.
•Displaying the point registration dialog
Display of point registration dialog
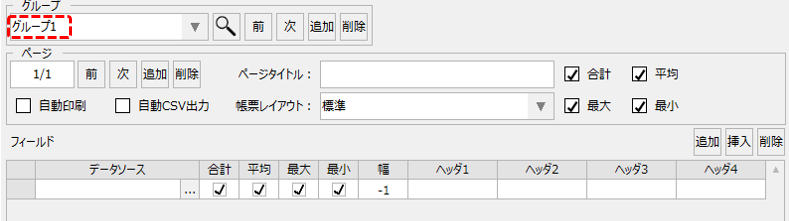
Below is the initial state of the daily report screen. If no settings have been made, it will be displayed as shown below.
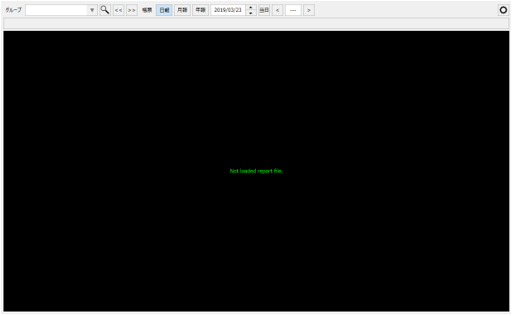
To display the daily report, you must register points. Points for the daily report are registered from the point registration dialog.
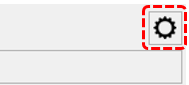
This settings dialog can be called up from the menu on the daily report screen.
To display the menu, click the settings icon (gear icon) in the top right corner of the screen.
Select "Point Registration" from the menu displayed on the right side of the screen.
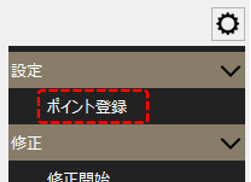
The settings dialog is displayed.
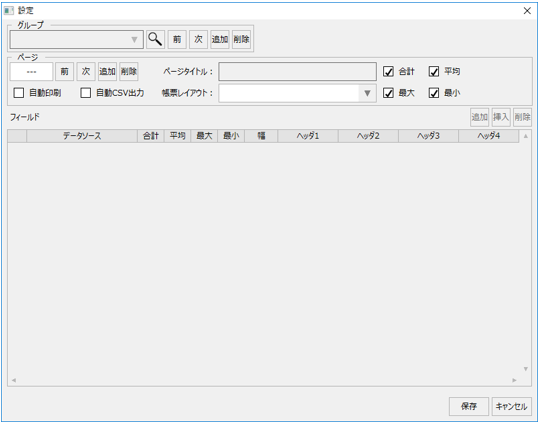
First, you need to add a group for the report. To add a group, click the "Add" button near the right of the group name.

This will add a new group called "Group 1" and the display of the page and field settings will change as shown below. If you want to change the group name, you can also edit it directly from the combo box.
To switch group selection, select the desired group from the group combo box, or use the "Previous" and "Next" buttons to switch the currently selected group.
You can also delete the currently selected group by clicking the "Delete" button.
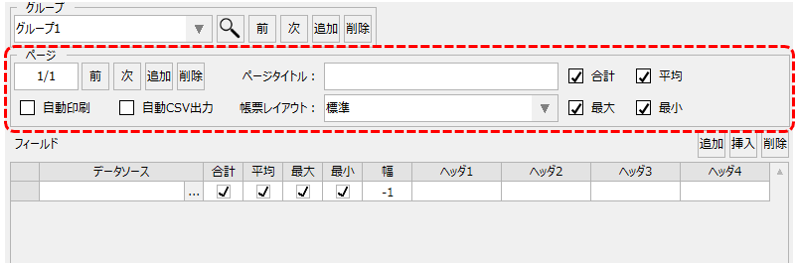
After adding a group, configure the page settings for the forms in the group.
The "page" mentioned here refers to the unit of the type that you want to manage together in the same report. For example, you can create a page for each unit of information you want to manage, such as when you want to separate reports by measurement value and usage (accumulated value), such as "List of equipment A measurement values" and "List of equipment A power usage", or when you want to separate reports by equipment, such as "Equipment A management report" and "Equipment B management report".
Note that the page number set here is the unit of pages displayed on the daily report screen, and is not the unit of page breaks when printing the form. Page breaks for forms are automatically performed according to the number of field columns that are inserted at the time of printing, for the format defined in the layout master.
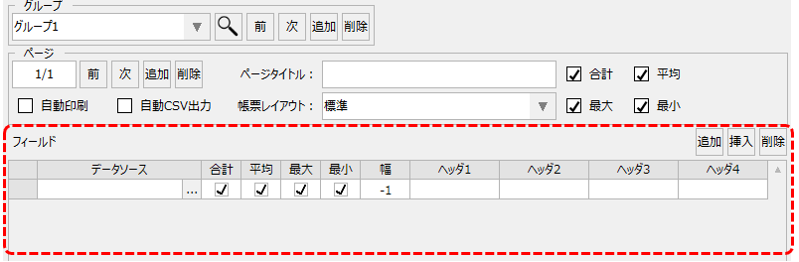
Page settings can be made in the following areas of the settings screen.
■ Adding and deleting pages
You can freely add and delete pages. To add or delete a page, do so from the following section.

■Page title
Set the page title in the input box below. You can enter any text string directly into the title. The title will be displayed as the selected page title on the daily report page, and will also be used for the title of the printed report.

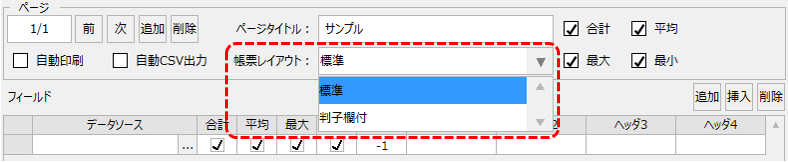
■Selecting the form layout
Next, select the form layout to be used on this page. You can select the form layout from the following combo box.
The sample provides two layouts: "Standard" and "With stamp column."
■ Setting the summary items to be displayed on the report
At the end of the Daily/Monthly/Yearly Report line, the "total," "average," "maximum," and "minimum" for the displayed period can be automatically displayed (printed). For example, in the case of a daily report, hourly aggregated data for 24 hours is displayed in a total of 24 lines of detail, and at the end of that, the total, average, maximum, and minimum for the day are displayed.
All items are checked by default. You can hide the target aggregated values by unchecking them here.

For example, if you only want to handle the instantaneous values of measured values in a daily report, the "total" will have no meaning as information. In such a case, if you want to hide only the total, change the above setting.
■Setting automatic printing and automatic CSV output
You can automatically print forms and output them in CSV format. This setting can be made for each page.
Checking the following check boxes will enable automatic printing and automatic CSV output.

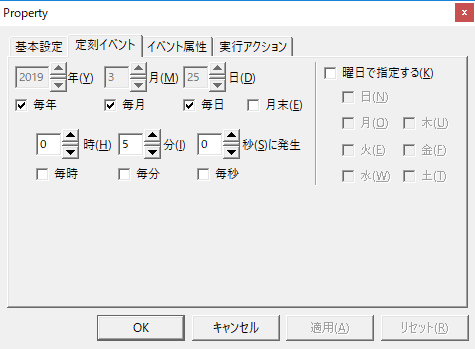
Furthermore, the above automatic processing is carried out by Scheduled event registered on the FA-Server side.
If you want to change the time when automatic processing occurs, you can do so by changing the date and time of Scheduled event.
(Scheduled event settings screen)
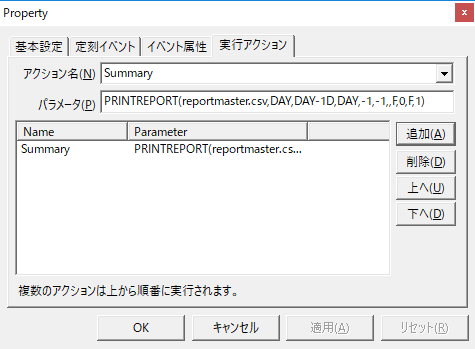
In the client connection sample, the following Scheduled event is registered in the event "Summary" folder to call the "Summary" action at the time of automatic printing processing.
What happens |
Scheduled event name |
Default setting date and time |
Parameters of the Run Event action |
Automatic daily report printing |
PRINTREPORT_DAY |
Everyday at 00:05 |
PRINTREPORT(reportmaster.csv,DAY,DAY-1D,DAY,-1,-1,,F,0,F,1) |
Automatic monthly report printing |
PRINTREPORT_MONTH |
00:06 on the first day of every month |
PRINTREPORT(reportmaster.csv,MONTH,MONTH-1MO,MONTH,-1,-1,,F,0,F,1) |
Automatic printing of annual reports |
PRINTREPORT_YEAR |
Every year at 00:07 on January 1st |
PRINTREPORT(reportmaster.csv,YEAR,YEAR-1Y,YEAR,-1,-1,,F,0,F,1) |
Daily report CSV automatic output |
CREATECSV_DAY |
Everyday at 00:10 |
CREATESUBREPORT(reportmaster.csv,csv_header2,CSV\DAY\DAYSUB_[GROUPID2]_[PAGEID2]_%Y%m%d.csv,DAY,DAY-1D,DAY,-1,-1,0,F,2) |
Monthly report CSV automatic output |
CREATECSV_MONTH |
1st of every month at 00:11 |
CREATESUBREPORT(reportmaster.csv,csv_header2,CSV\MONTH\MONTHSUB_[GROUPID]_[PAGEID]_%Y%m%d.csv,MONTH,MONTH-1MO,MONTH,-1,-1,0,F,2) |
Automatic annual report CSV output |
CREATECSV_YEAR |
Every year at 00:12 on January 1st |
CREATESUBREPORT(reportmaster.csv,csv_header2,CSV\YEAR\YEARSUB_[GROUPID]_[PAGEID]_%Y%m%d.csv,YEAR,YEAR-1Y,YEAR,-1,-1,0,F,2) |
|
To use the automatic printing and automatic CSV output features, the above events must be registered in FA-Server. If the event is not registered, manually add Scheduled event, specify the "Summary" action as the event execution action, and specify the above "Event execution action parameters."
(Execution Actions tab)
|
After setting up the page, define the fields to be output on the target page.
Field settings are done in the following parts of the settings screen.
Fields can be added or deleted by operating the following buttons on the settings screen.
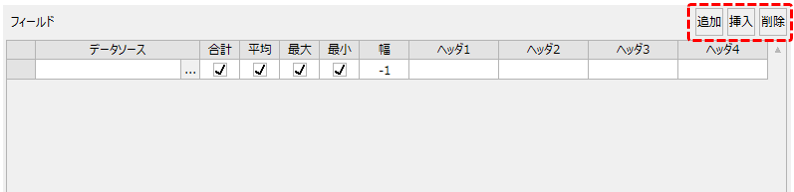
Once you have added the fields, you can select the data source by clicking the Select button below.

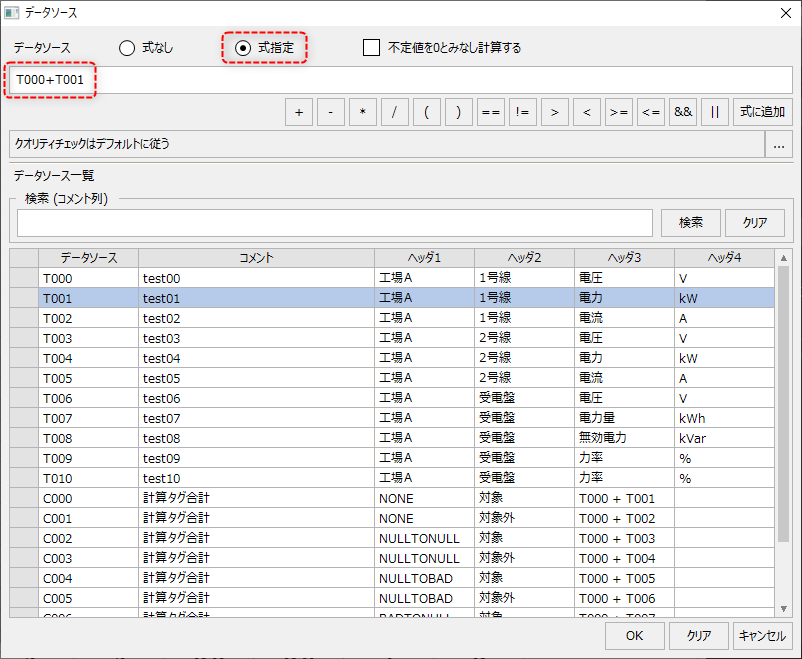
This will display the data source selection dialog.
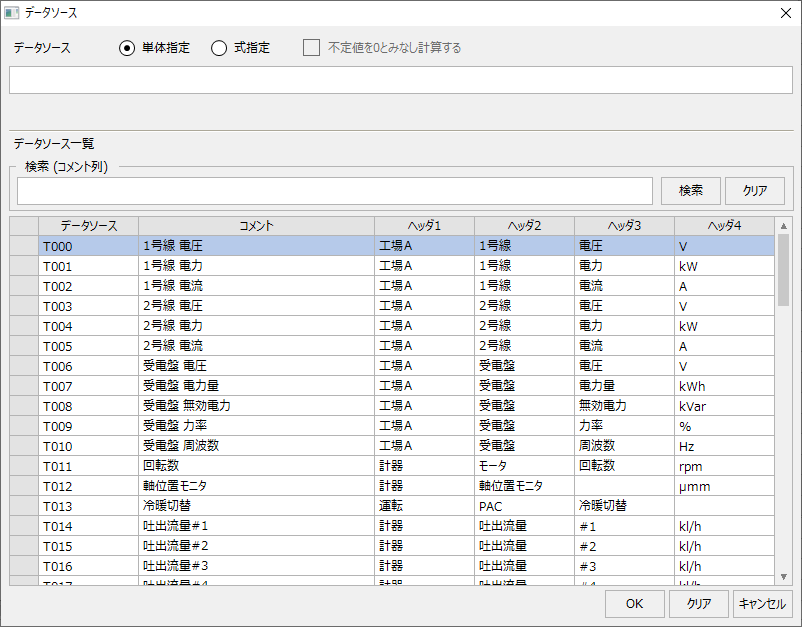
The list displays the contents registered in the "Tag Field Master" and "Calculated Field Master" of the summary action.
Selection is performed by selecting the target row from the dialog and clicking the "Select" button, or by double-clicking the target row.
When you select a data source, it will be displayed as follows. Below is an example where "T000" is selected.

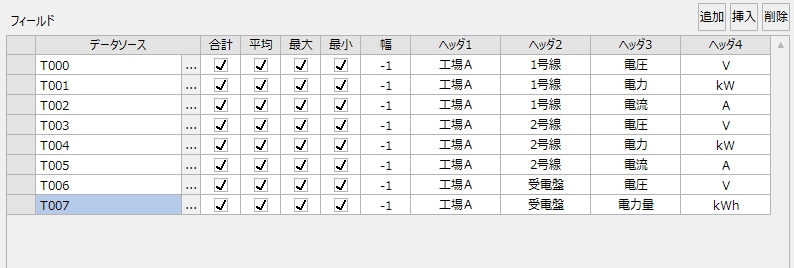
In the settings for each field, you can set whether or not to use the total, average, maximum, or minimum for each field.
The width defaults to "-1", but this setting adjusts it automatically, so in most cases there is no need to change it.
On the daily report screen and daily report form layout, four lines of headers can be output. The header contents defined in the summary action field master are displayed as the initial value for each header setting. If you want to change the header contents, you can edit them directly by double-clicking the target cell in the grid. Furthermore, if you specify "*" (a half-width asterisk) as the header, the header string defined in the report header column of the field master can be used as the header when the page is displayed on the daily report screen, etc.
(Example of setting "*" in the header)

In addition, four lines of headers can be output on the daily report screen and daily report layout. The header contents set in each master of the summary action are displayed as the initial value in each header. If you want to change the header contents, you can edit them directly by double-clicking the target cell in the grid of the above field.
Below is an example of setting the fields:
To save your settings, click the "Save" button in the bottom right of the settings screen.
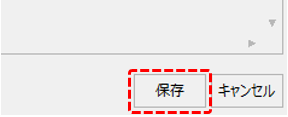
When you edit a field, the changes take effect immediately.
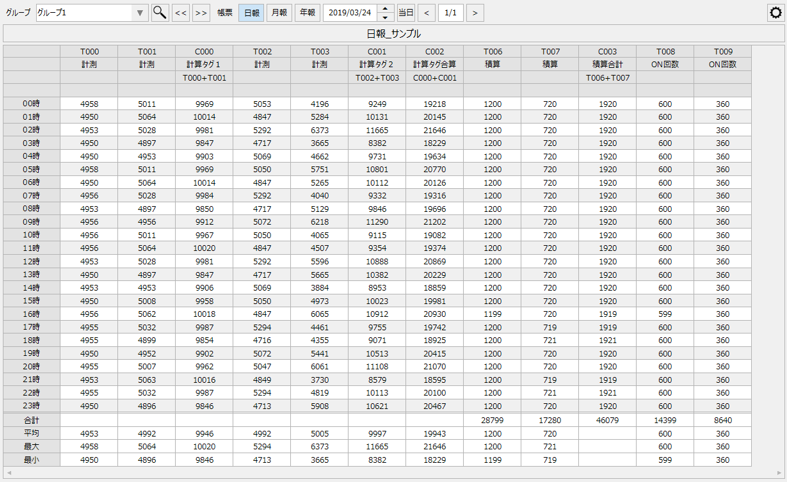
The following is an example of the daily report screen.
|
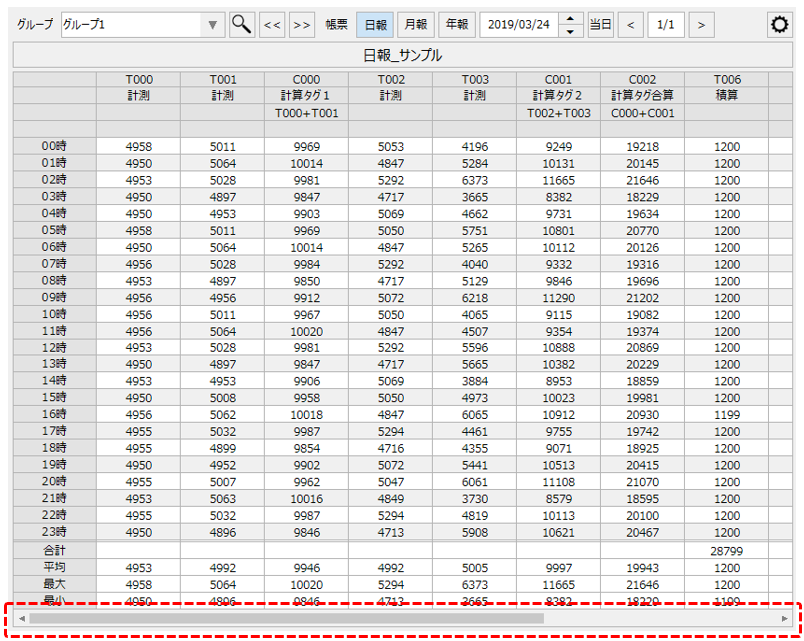
The daily report screen is displayed on a page-by-page basis. The summary information for the fields registered on one page is displayed side-by-side in the report grid. If there are more fields registered than can fit on the screen, a horizontal scroll bar is displayed in the report grid, and you can view the fields by scrolling. In other words, there is no concept of page breaks within the same page when it comes to screen display, and all fields registered on one page are displayed on one screen.
(Horizontal scroll bar displayed on daily report screen)
On the other hand, when printing a report, page breaks are automatically inserted according to the content defined in the layout master of the form layout selected for the target page. For example, if the layout master is defined as 10 columns and 25 fields are registered in one page, when you print that page, page breaks are inserted every 10 columns, and a total of three forms are output. |
Dynamic calculations on fields
By specifying a calculation formula in the data source selection dialog, you can dynamically display the calculation results of fields on the daily report screen.
For details on how to set up dynamic calculations, see "Dynamic calculations in fields (specifying the calculation formula when registering points)".
|
The calculation of the formula defined in the point registration is performed dynamically when the daily report screen is displayed. Therefore, the calculation results are not included in the actual daily report summary data and are not saved. If you need to save the calculation results in the daily report summary data, use static field calculations using the calculated field master. For details, see "Static Field Calculations (Calculated Field Master Definition)". |