About the Easy Settings tab (input)
Here we will explain the Easy Input Type Settings tab.
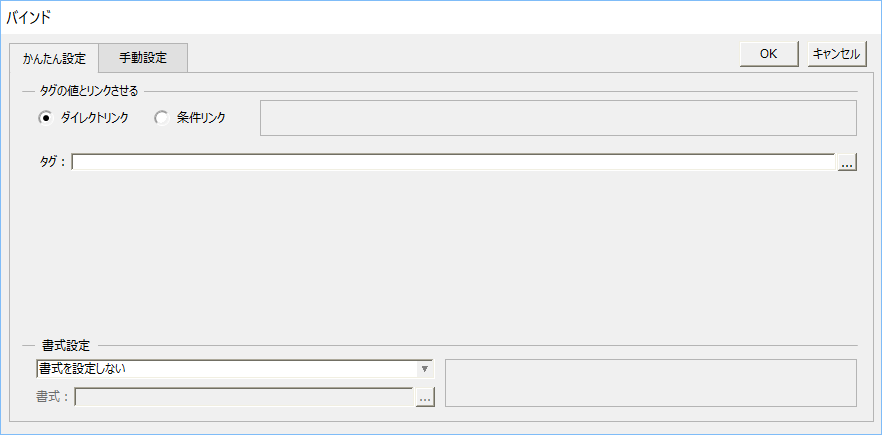
This type has two setting methods: "Direct Link" and "Conditional Link".
In addition to simply specifying a tag path, direct links can also specify arithmetic expressions that follow the arithmetic syntax and can describe function calls. Condition links allow you to freely define combinations of results for each condition, such as condition expression 1, result 1, condition expression 2, result 2, etc., allowing you to set up more complex processing.
You can choose between direct linking and conditional linking using the radio buttons below.
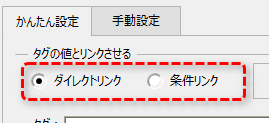
Direct Link
Direct links mainly specify tag paths, but can also specify expressions using arithmetic operations and call functions.
Enter the operation syntax including the tag path directly in the input box below.

Below are some configuration examples.
1)Tag Path
This is the simplest example. Just write the tag name directly, such as "U01.F01.T01".
U01.F01.T01 |
2)Formula
You can write calculation formulas like the ones below. You can also specify multiple tag paths to get the results of calculations between tags.
(U01.F01.T01 + U01.F01.T02) * 2 |
3)function
You can also write the function as follows:
Math.Ave(c(U01.F01.T01, U01.F01.T02, U01.F01.T03)) |
|
When setting a tag path, in addition to entering it directly into the input box, you can also copy and paste it from Panel Server. |

|
You can also specify other property names that your control has in the bind condition. To specify a property name, enclose the property name in "$".
$Property Name$
|
|
The arithmetic expression syntax is explained in detail in the Scripting Guide. For more information on the syntax, see "Calculation Expression Syntax in the Scripting Guide. |
Conditional Links
Condition links allow you to freely define any combination of results for each condition.
It also supports blinking processing for when you want to display colors or values in a blinking manner.
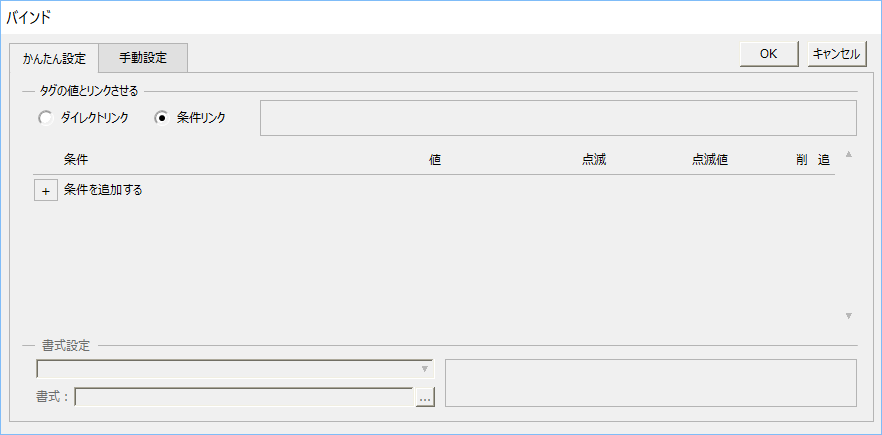
1.To set up a condition link, first click the "+" button below to add a condition.
A new line has been added.

2.Next, write the condition expression in the "Condition" section. You can also write an arithmetic expression including a tag path in the condition. Double-click the desired input section to enter editing mode, where you can enter the condition directly. Alternatively, you can click the "..." button to the right of the condition input section to display the condition dialog below, and edit the condition from the dialog.
|
In the example on the left, the tag and a number are compared using the following statement:
U01.F01.T01 < 10
|
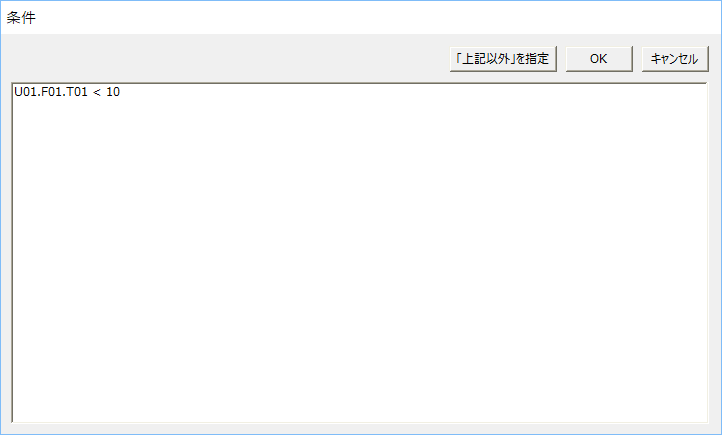
When you click the OK button in the condition dialog, the setting conditions will be reflected as follows.

|
When specifying a string in the condition settings, enclosing it in double quotation marks "" will determine it as a string. However, if you specify "TRUE", "FALSE", "T", or "F" without enclosing it in double quotation marks, it will be treated as a Boolean value. With the exception of these and function names, strings not enclosed in double quotation marks will be processed as tag paths. |
3.Next, enter any value in the "Value" section. In addition to fixed values such as numbers and characters, you can also enter an arithmetic expression including a tag path. Double-click the desired input section to enter it into editing mode, where you can enter a value directly. Alternatively, you can click the "..." button to the right of the value input section to display a value dialog like the one below, and enter a value from the dialog.
|
In the example on the left, if the tag falls below 10, the value will be set to the string "LOW".
When specifying a string, enclose it in double quotation marks "". For numeric values, specify any number.
|
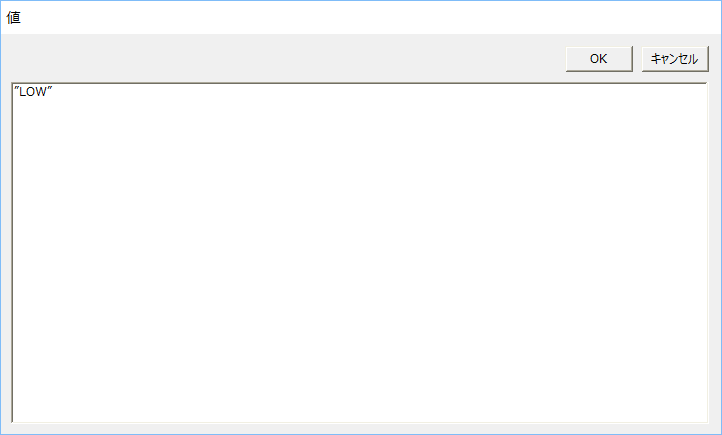
When you click the OK button in the value dialog, the setting value will be reflected as shown below.

To add more conditions, click the "+" button at the bottom of the "Add condition" field to add a new line.
If you want to insert a new line before an already registered line, click the "+" button next to "Add" on the right to insert a new line. If you want to delete an existing line, click the "-" button next to "Delete" on the right to delete the target line.

|
In the condition link of the easy setting, when specifying a string in the value setting, if you enclose it in double quotation marks "", it will be interpreted as a string. Also, if you specify "TRUE", "FALSE", "T", or "F" without enclosing it in double quotation marks, it will be treated as a Boolean value. With the exception of these and function names, strings not enclosed in double quotation marks will be treated as tag paths. |
|
You can also specify a tag path to set the value. |
|
In the Easy Setting condition link, when you set a value for the color attribute, the value editing frame will be displayed specific to the color, as shown below.
In the color setting, you can select the desired color from the color palette in the color selection dialog that is displayed separately. The selected color is displayed in color format (#FF0000, or @FormColor, etc.),Only in the color format of the color settings in this dialogEven if you do not enclose the color format in double quotation marks, it will be automatically converted to a format enclosed in double quotation marks and saved. (There is no problem if the format is enclosed in double quotation marks. In that case, it will be saved as is.) Furthermore, if you view the actually saved bind format in the Manual Settings tab, you will see that the color format has been automatically saved enclosed in double quotation marks. |

4.If you specify "Other than the above" as the last condition, you can set the value when all conditions are judged and none of them are met. To set "Other than the above", click the "Specify other than the above" button in the condition dialog.
|
|
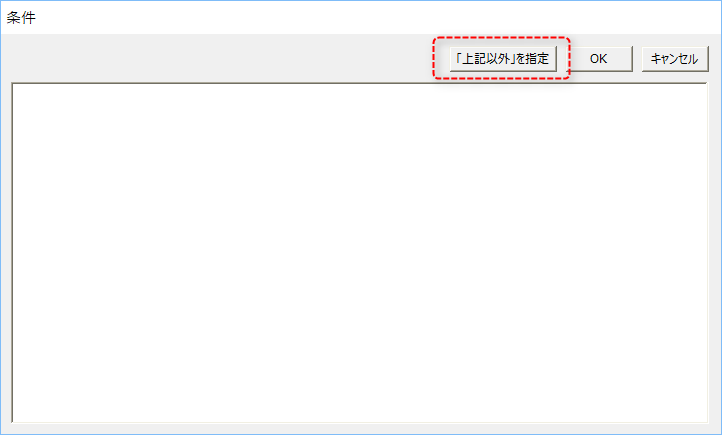
This operation will close the condition dialog and the condition will show "Other than the above." If none of the defined conditions apply, the value set in the Value field for this row will be used.

5.To define blinking, click the "..." button next to "Blinking."

Then the following blinking dialog will appear:
|
The Blink dialog allows you to specify the blink frequency.
In addition to directly specifying a value in milliseconds, you can also select from the cycles provided by the system (fast (@FAST), medium (@MEDIUM), slow (@SLOW)).
|
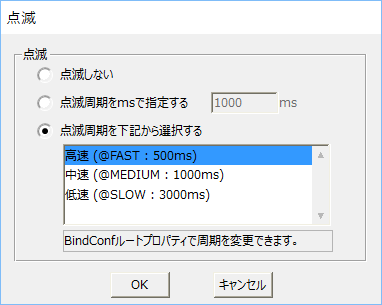
This is an example of selecting "@FAST" from the blink dialog. The "Blink value" can be edited in the same way as the "Value".

In the image above, if T01 is less than 10, the blank text "LOW" will flash every 500 milliseconds. If it is greater than 90, it will become a fixed value "HIGH". Otherwise, it will become "NORMAL".
|
If you specify blinking but omit the blinking value, the behavior will be as follows: •If the value is a string: If the value is "ERROR" and the blinking value is blank, the empty string "ERROR" will blink. •If the value is a boolean value: If the value is TRUE and the blinking value is blank, it will blink with TRUE and FALSE. |
|
The blinking cycles provided by the system (fast (@FAST), medium (@MEDIUM), slow (@SLOW)) can be freely customized. For details about the blinking cycle, see "About the blinking cycle". |
CalligraphyExpression Settings
If the property type you are setting is a number or character, you can optionally define the format.
Formatting is done in the following input areas displayed at the bottom of the dialog. Formatting is only editable for configurable properties.
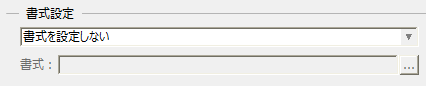
The formats that can be set are "Number format" and "Date format".
1)Number Format
Select "Set Number Format" from the combo box.

The default format is "@NUMBER". If you want to change it, you can edit it directly in the format editor or set it in the Number Format dialog.
The settings dialog will be displayed when you click the "..." button to the right of the format edit.
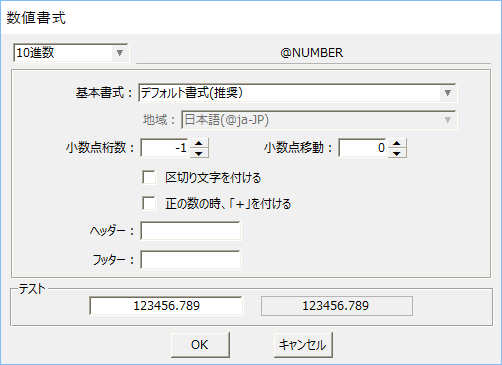
In the Number Format dialog, the settings vary depending on the base combo box in the upper left. You can select binary, octal, decimal, or hexadecimal.
■Decimal numbers
|
•You can select the number format to be used for display from the basic format. If you do not need to change it, such as when you do not make individual settings (when following the settings common to the entire system), we recommend the default format. For details on number formats, see "Number Formats". •Specify the number of decimal points. (-1: Display tag value as is) •Specify the decimal point shift. Specifying a positive number will move the decimal point to the right (10 times, 100 times, etc.), and specifying a negative number will move the decimal point to the left (1/10 times, 1/100 times). •Specifies whether to display delimiters. Checking this box will display delimiters according to the selected number format (commas, periods, etc.). •Specifies whether to display "+" when the number is positive. Checking this box will display "+". •You can specify the strings to be displayed as headers and footers. |
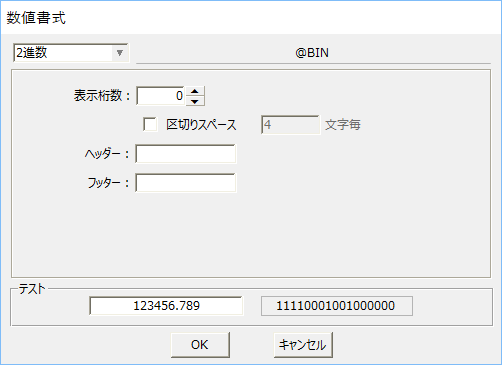
■Other bases
|
•If you specify the number of digits to display, the number will be padded with zeros to the specified number of digits. If the number exceeds the number of digits, it will be displayed as is. If you specify zero, the number of digits will not be padded. •If you specify a space as a separator, the specified number of digits will be displayed separated by a space. For example, if you specify 16 digits in binary format with 4 digit separators, it will be displayed as "0000 0100 1001 0111". •You can specify the strings to be displayed as headers and footers. |
2)Date Format
Select "Set Date Format" from the combo box.

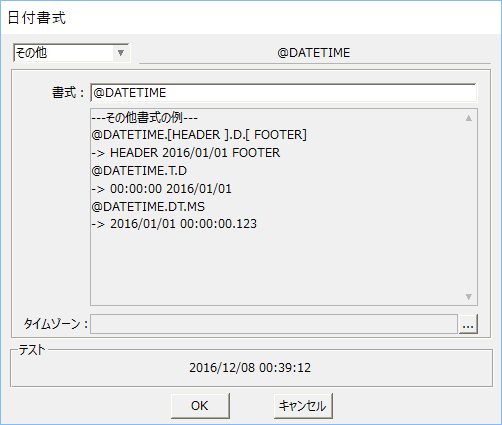
The default format is "@DATETIME". If you want to change it, you can edit it directly in the format editor or set it in the date format setting dialog.
The settings dialog will be displayed when you click the "..." button to the right of the format edit.
In the date format dialog, the settings vary depending on the format combo box selected in the upper left. You can also specify a time zone for each setting. If you are following the system-wide common settings (root properties), there is no need to specify one here. For details about time zones, see "Date and Time Formats".
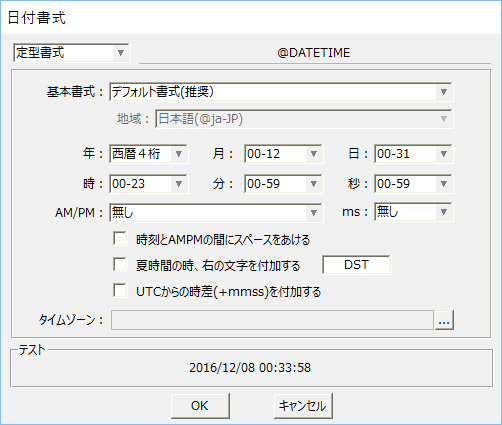
■ Standard format
|
•You can select the date and time format to be used for display from the basic format. If you do not need to change it, such as when you do not make individual settings (when following common settings across the entire system), we recommend that you use the default format. For details about the date and time format, see "Date and time format". •Specify how to display the year, month, day, hour, minute, and second. For example, for the year, you can select four-digit, two-digit, or none. •Specify how to handle AM/PM notation. You can set whether to display AM/PM or not, and if so, whether to display it before or after the notation. •Specifies whether to display milliseconds. •When daylight saving time is in effect, a specified string can be added and displayed. •You can display the time difference from UTC time. |
■ Free format
|
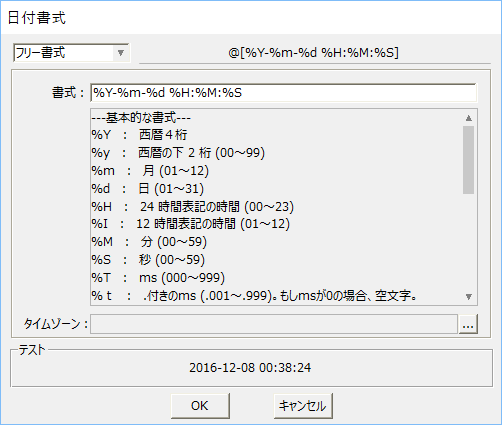
•In the free format, you can freely combine the date format (%Y, %m, etc.) to define it. The formats that can be used are listed on the dialog as guidance.
|
■Other
|
"Other" allows you to define special formats that are not included in the standard formats.
example) ・Add any string as a header or footer. - Display the date and time in reverse order (for example, display the time first and then the date). - Displays milliseconds at the end of the time, followed by a period. |