Screen Description
The style, layout, and menu editing of the standard framework can be done from the system settings screen. The system settings screen can be displayed from the client screen of the standard project generated by the standard framework. Therefore, to display the system settings screen, both Panel Server and Panel Browser must be running online.
The system settings screen is broadly divided into three tabs: "Device Settings," "Style Settings," and "User Management."
■Device settings tab/General
|
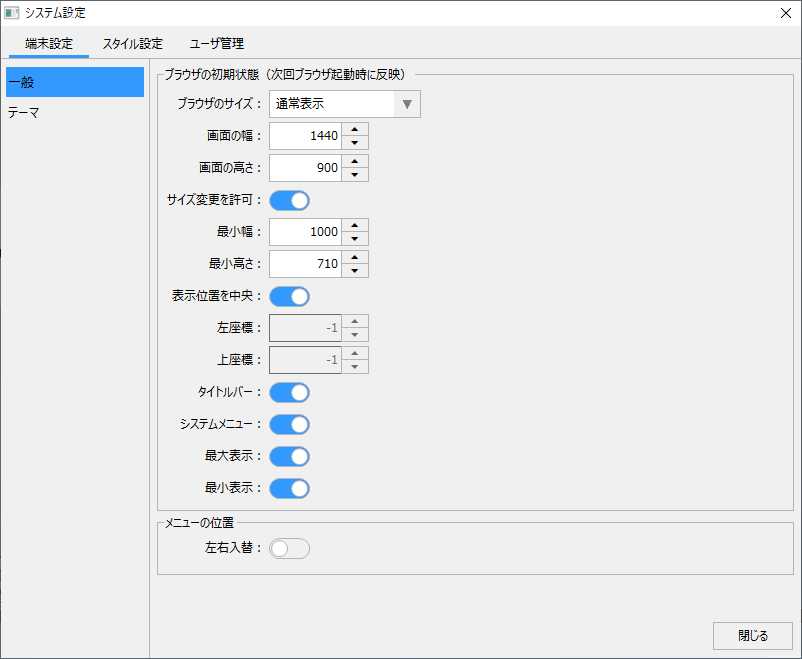
The initial browser settings will take effect the next time you start the browser.
Menu position settings take effect immediately.
|
group |
item |
explanation |
||||||
Initial state of the browser |
Browser size |
Sets the initial size of the browser.
|
||||||
Screen width |
Specifies the normal display width (the width of the entire browser application) in pixels.
|
|||||||
Screen height |
Specifies the normal screen height (the height of the entire application in the browser) in pixels. |
|||||||
Allow resizing |
Specifies whether or not to allow the browser screen size to be changed during normal display. |
|||||||
Min Width |
Specifies the minimum width in pixels that the browser will display when resized. |
|||||||
Minimum Height |
Specifies the minimum height in pixels that the browser display can reach when resized. |
|||||||
Center the display position |
The initial display position of the browser will be centered. |
|||||||
Left coordinate |
Specifies the left coordinate (X coordinate) of the initial display position of the browser. This setting is only valid if the above "Center display position" is disabled. Specify in pixels starting from the top left corner of the entire screen. Specifying -1 will make it the center. |
|||||||
Top Coordinate |
Specifies the top coordinate (Y coordinate) of the initial display position of the browser. This setting is only valid if the above "Center display position" is disabled. Specify in pixels starting from the top left corner of the entire screen. Specifying -1 will make it the center. |
|||||||
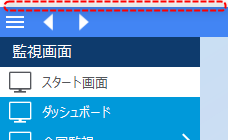
Title Bar |
If disabled, the browser title bar itself will be hidden.
|
|||||||
System Menu |
If you disable this setting, the title bar will display only the title (maximum display, minimum display, and exit buttons (such as the "x" button) will not be displayed). |
|||||||
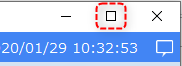
Maximum display |
Enables or disables the maximize button on the browser.
|
|||||||
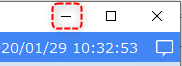
Minimum display |
Enables or disables the browser's minimize button.
|
|||||||
Menu Position |
Left and right swap |
When enabled, the main menu will be on the right and the information bar on the left. By default (disabled), the main menu is displayed on the left and the information bar on the right. |


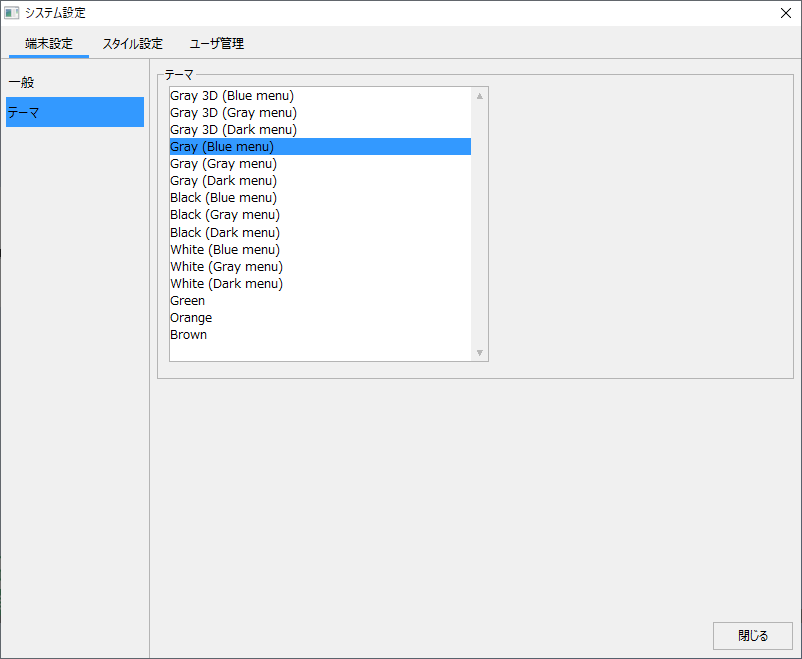
■Device settings tab/Theme
|
You can choose the visual theme.
For more information about visual themes, see "Visual Themes" in the Screen Creation Guide.
|
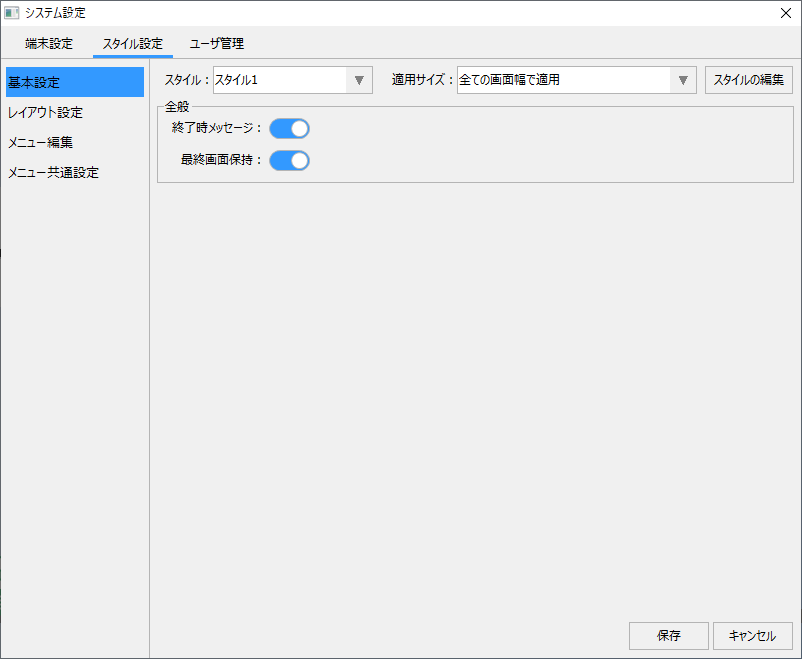
■ Style settings tab / Basic settings
|
Sets the style preferences for the currently selected style and applied size.
|
group |
item |
explanation |
General |
Exit message |
If enabled, a confirmation message will be displayed when you close the browser. |
Last Screen Retention |
If enabled, the last screen displayed will be retained when the browser is closed. The next time the browser is started, the last screen displayed will be displayed initially. |
■ Style settings tab/Layout settings
|
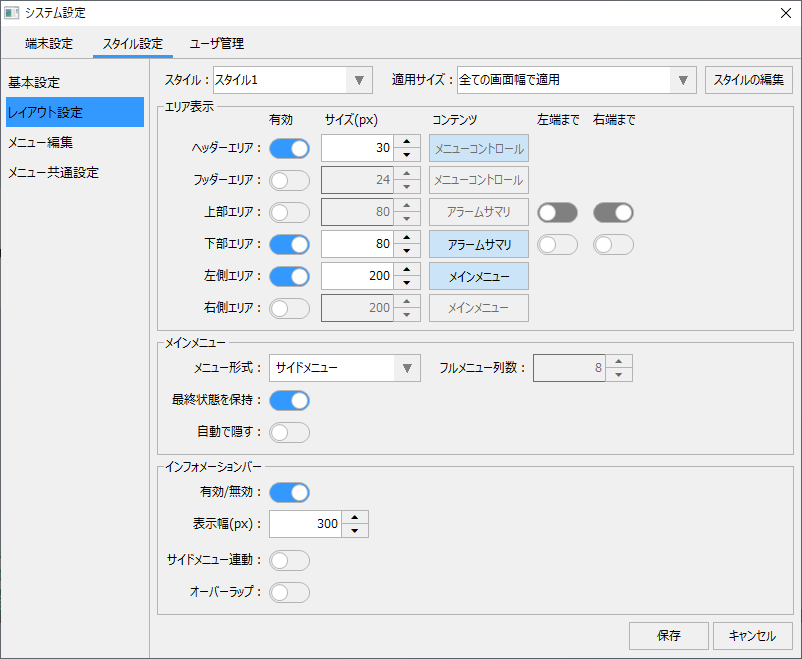
Sets the style layout for the currently selected style and applied size.
The layout settings allow you to freely change the settings for each area of the frame division in the standard framework (for example, changing the common alarm summary from the bottom to the top of the screen), the display method and location of the main menu, and the display settings of the information bar during operation.
For more information on how to edit the layout settings, see "System Settings for a Standard Project" in the Surveillance System Building Guide.
|
group |
item |
explanation |
||||||||
Area Display |
Header Area |
Configure the header area.
|
||||||||
Footer Area |
Configure the footer area.
|
|||||||||
Upper Area |
Set the top area. If you enable the top area, you can have a display frame between the header and the main area.
|
|||||||||
Lower Area |
Set the bottom area. If you enable the bottom area, you can have a display frame between the footer and the main area.
|
|||||||||
Left Area |
Configure the left area.
|
|||||||||
Right side area |
Configure the right area.
|
|||||||||
Main Menu |
Menu Format |
Select the display format for the main menu.
|
||||||||
Full menu column count |
Specifies the number of columns for displaying items on the menu screen when the main menu display format is set to full menu. |
|||||||||
Hold Final State |
When the browser is closed, the final state of the main menu (the final display state of the main menu) is retained. The next time the browser is started, it will be initially displayed in the same state as the previous time. |
|||||||||
Auto hide |
When enabled, the main menu will be auto-hide (meaning it will close automatically whenever an item is selected from the menu). |
|||||||||
Information Bar |
Enable/Disable |
Disables the information bar itself.
|
||||||||
Display Width |
Specifies the size (width) of the information bar in pixels. |
|||||||||
Side menu integration |
When enabled, the display/hide behavior of the information bar will be linked to the display state of the side menu (main menu). The side menu will automatically close when the information bar is displayed, and the side menu will automatically re-display when the information bar is closed. |
|||||||||
Overlap |
When enabled, the side menu will be displayed over the main area. |
■ Style setting tab/Menu editing
|
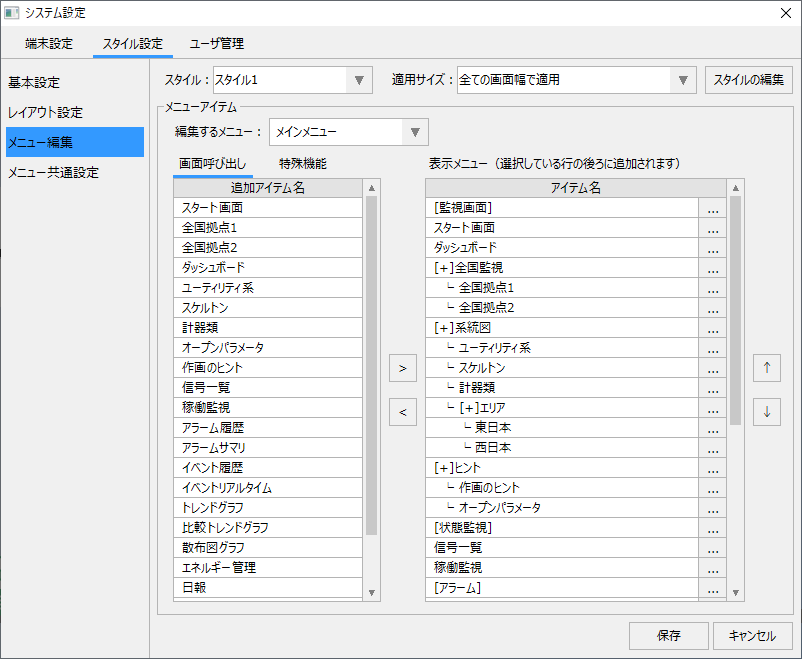
Edit the menu for the currently selected style and applied size.
In menu editing, you can select the menu to be edited and set the menu items and groups to be displayed in the menu. These settings can be freely changed during operation.
For details on how to edit the menu, please refer to "System Settings for Standard Projects in the Monitoring System Building Guide.
|
group |
item |
explanation |
||||||||||
Menu Items |
Menu to edit |
Select the menu you want to edit.
|
||||||||||
Additional Item List |
The list on the left side of the screen displays a list of display items that can be added to the menu. Select the desired item from this list and click the right arrow button in the center of the screen to add it to the list of display items.
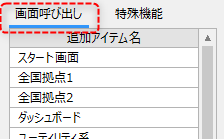
When you select the "Screen Call" tab in the list, a list of screens that can be displayed in the menu will be displayed.
For information on how to make a form that you have added yourself selectable from a menu item, see "Calling a form from a menu" in the Monitoring System Building Guide.
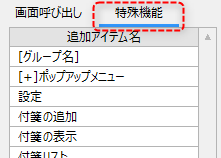
If you select the "Special Functions" tab in the list, a list of special functions that can be displayed in the menu and grouping definitions will be displayed.
|
|||||||||||
View Menu List |
The list on the right side of the screen is a list of items that are actually displayed in the menu. With any item selected from the list, you can remove it from the menu by clicking the left arrow button in the center of the screen. You can also move the display order of the menu items by clicking the up and down arrow buttons on the right of the list. |
■ Style settings tab / Menu common settings
|
Sets common menu settings for the currently selected style and applied size.
You can set the height of each menu area in the header menu and footer menu, the width and height of the items to be displayed, whether to display text, etc.
For details on how to edit the menu, please refer to "System Settings for Standard Projects in the Monitoring System Building Guide.
|
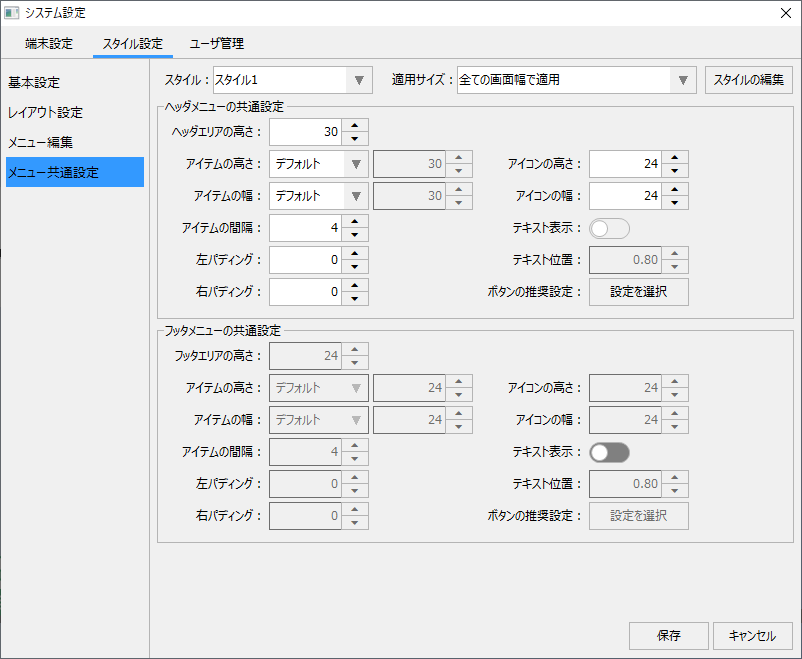
group |
item |
explanation |
Common settings for header menu |
Header area height |
Specifies the size (height) of the header area in pixels. |
Item Height |
Specify the height of the item to be displayed. You can specify the height in pixels by selecting Pixels from the combo box. |
|
Item Width |
Specify the width of the item to be displayed. You can specify the width in pixels by selecting Pixels from the combo box. |
|
Item Spacing |
Specifies the amount of space between displayed items in pixels. |
|
Left padding |
Specifies the left margin of the item in pixels. |
|
Right Padding |
Specifies the right margin of the item in pixels. |
|
Icon Height |
Specifies the height of the icon in pixels. |
|
Icon Width |
Specifies the width of the icon in pixels. |
|
Text Display |
Select whether to show or hide the text display of the menu items. If you hide it, only the icons will be displayed. |
|
Text Position |
Specifies the vertical adjustment value for the text display of the menu item. When text display is enabled, it is used to fine-tune the balance between the icon and text position. |
|
Recommended button settings |
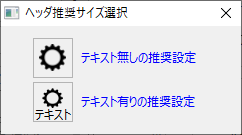
Clicking the "Select Settings" button displays the following dialog, allowing you to select the recommended settings. When you select a setting, the above settings will be replaced with the recommended values.
|
|
Common settings for the footer menu |
-
|
This is the same as the header menu setting. |
■User management tab/Login
|
Select the login mode when logging in, set the display on the information bar, etc.
For details on how to set up user management, please refer to "User Management (Login) for Standard Projects" in the Monitoring System Construction Guide.
|
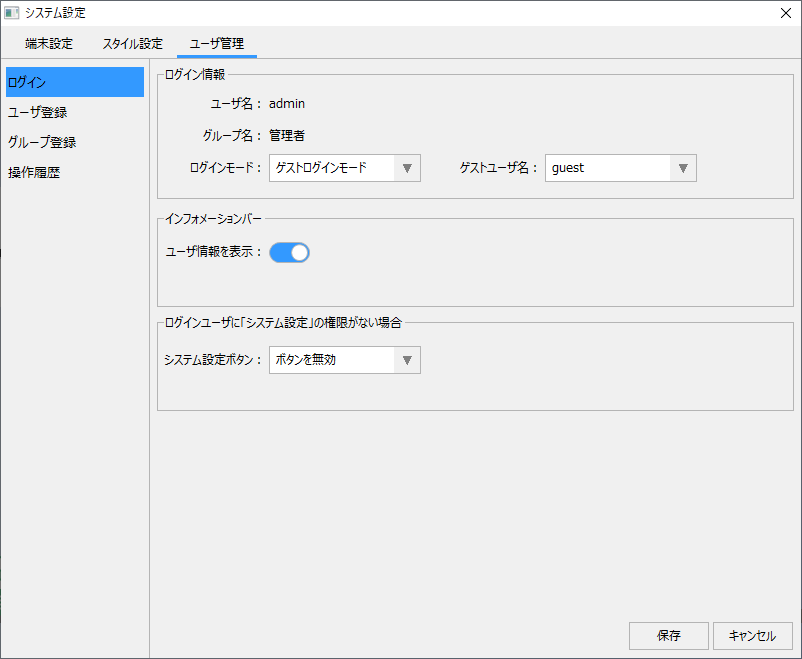
group |
item |
explanation |
||||
Login Information |
Username |
The name of the currently logged in user is displayed. |
||||
Group Name |
Displays the group name of the currently logged in user. |
|||||
Login Mode |
Select the login mode.
|
|||||
Guest Username |
If guest login mode is selected in the login mode, select the user name to be used for guest login processing when logout occurs. |
|||||
Information Bar |
View user information |
If you enable this setting, user information will be displayed in the information bar.
|
||||
If the logged-in user does not have "System Settings" permissions |
System Settings Button
|
If the group to which the logged-in user belongs does not have system setting permissions, you can select the behavior of the system setting button on the information bar, etc.
|


■User management tab/User registration
|
Register and edit login users and set passwords.
For details on how to set up user management, please refer to "User Management (Login) for Standard Projects" in the Monitoring System Construction Guide.
|
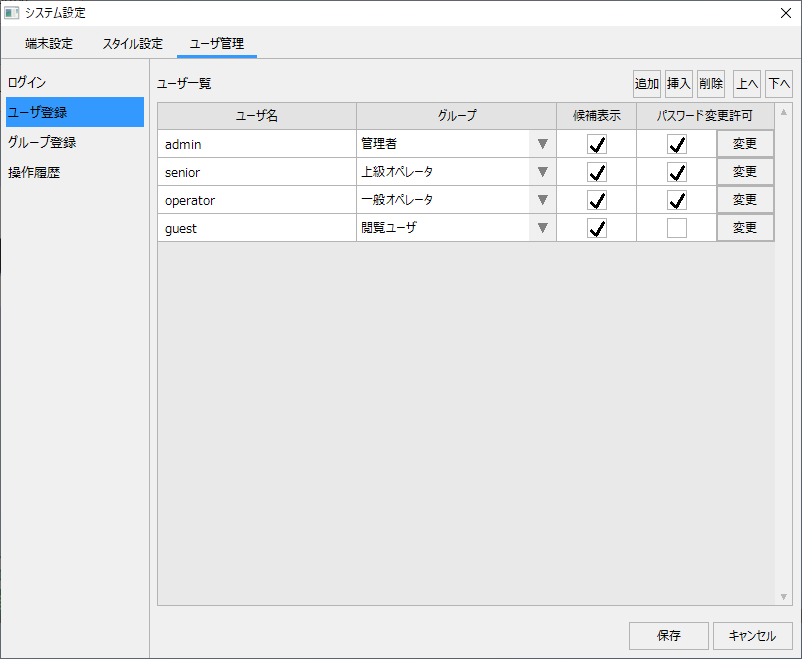
group |
item |
explanation |
User List |
Username |
Enter your username.If you change the user name, the password will be initialized to blank.If you have already registered a password, please register it again from the password settings. |
group |
Select the group to which the user will belong. You can select from groups that have been registered in advance. |
|
Candidate display |
Only user names with this setting checked will be displayed as candidates in the user name combo box on the login screen. Uncheck the box for users you do not want to display as combo box candidates. Users without this setting checked can still log in by manually entering their user name in the combo box. If you do not want candidates to be displayed at all, uncheck the box for candidate display for all users. |
|
Password change permission |
Check this box if you want to allow users to change their own passwords from the My Page dialog. For details about the My Page dialog, see "Displaying the My Page dialog and changing your password" in the Monitoring System Construction Guide. |
|
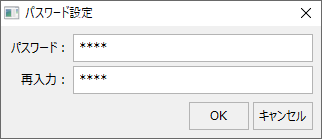
Change Password |
Set the password. Click the Change button to display the following dialog.
Even if a password has already been set, the password field in this dialog will be displayed as blank. If the password is blank and you click the OK button, the password will be deleted.
|
■User management tab/Group registration
|
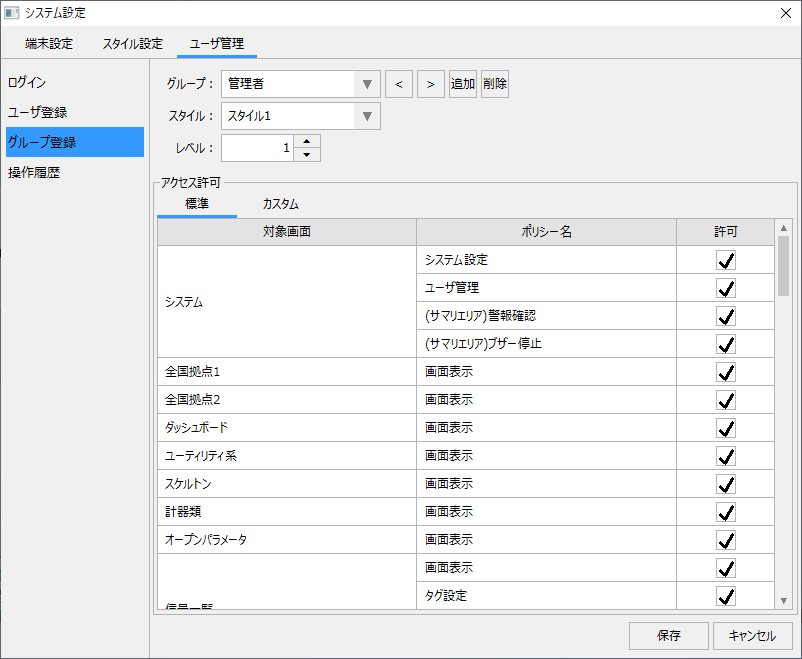
Register and edit user groups, select styles, set access permissions, etc.
For details on how to set up user management, please refer to "User Management (Login) for Standard Projects" in the Monitoring System Construction Guide.
|
group |
item |
explanation |
||||||||||||
Group Settings |
group
|
Add, edit, and delete groups. |
||||||||||||
style
|
Select the style to apply to this group. By switching the style for each group, it is possible to dynamically switch the menu contents and layout according to the logged-in user.
For more information on how to edit layout settings and styles, see "System Settings for a Standard Project" in the Surveillance System Building Guide. |
|||||||||||||
level
|
Sets the user level. You can specify any integer value. The level value set here is stored in the $USERLEVELBrowser tag and PSUserLevel route properties when a user belonging to the group logs in. By referencing these values in scripts or bind expressions, you can control according to the user's level. For details, see "Implementing logic based on user levels". |
|||||||||||||
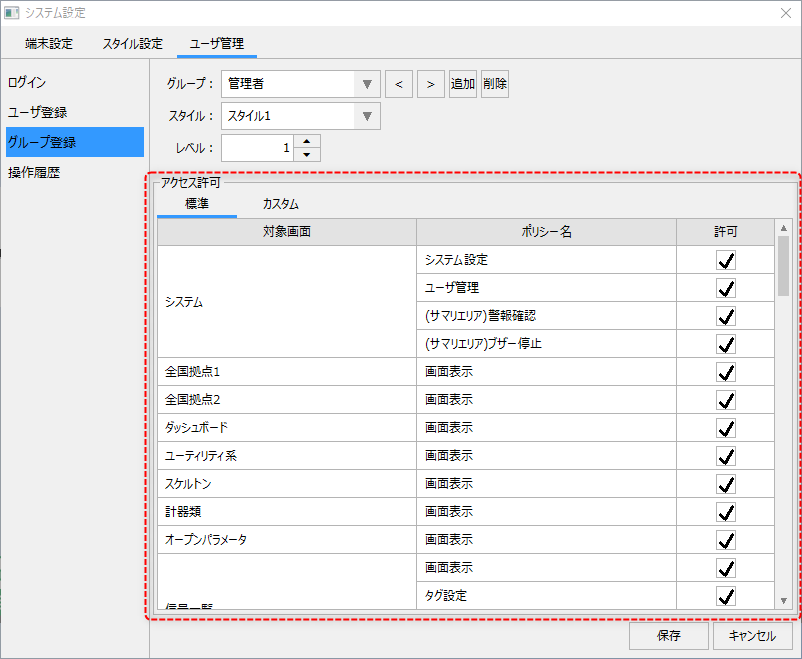
Permissions |
Standard Tabs |
On the "Standard" tab of Access Permissions, you can set the permissions for screen display and operation for each function provided as standard and for graphic screens that are the display targets of access permissions.
|
||||||||||||
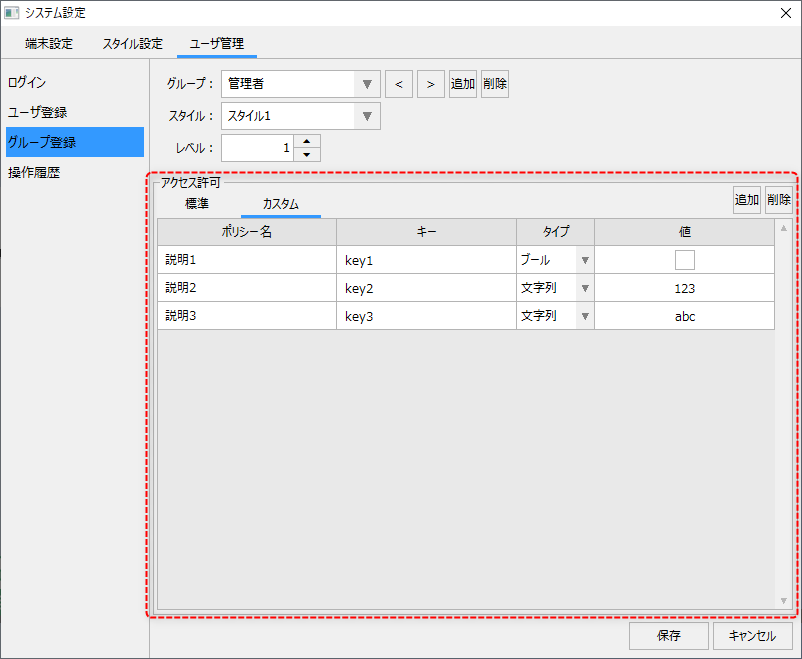
Custom Tabs |
The Custom tab in Permissions allows users to define their own permission sets.
For more information on defining your own permissions, see "Custom Permission Settings for Access Permissions" in the Surveillance System Building Guide.
|
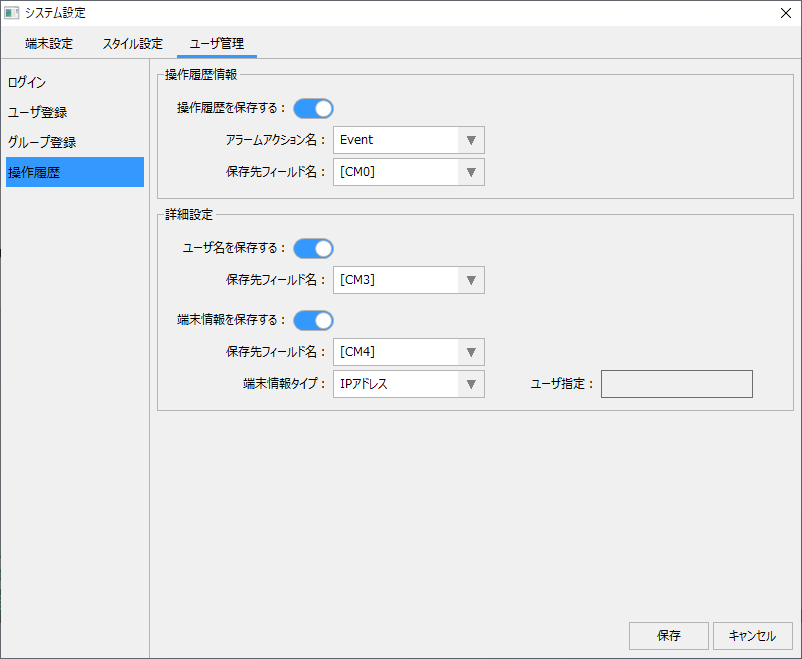
■User management tab/operation history
|
Configure the operation history. This setting is used in conjunction with the event history function that is provided as a standard feature.
For details on how to set up operation history, please refer to "User Management (Login) for Standard Projects" in the Monitoring System Construction Guide.
|
group |
item |
explanation |
||||||
Operation history information |
Save operation history
|
If enabled, operation history will be saved. |
||||||
Alarm Action Name
|
Select the Alarm server action name to be linked to save the operation history. |
|||||||
Destination field name
|
Select the field name of the alarm in which to save the operation history. |
|||||||
Advanced Settings |
Save Username
|
If enabled, the user name will be included in the operation history. |
||||||
Destination field name
|
Select the field name in the alarm where the user name will be saved. |
|||||||
Save device information
|
If enabled, device information will be included in the operation history. |
|||||||
Destination field name
|
Select the alarm field name where you want to save the device information. |
|||||||
Terminal Information Type
|
Choose from the following:
|
|||||||
User Specified
|
Specify any character string when User Specified is selected for the above terminal information type. |