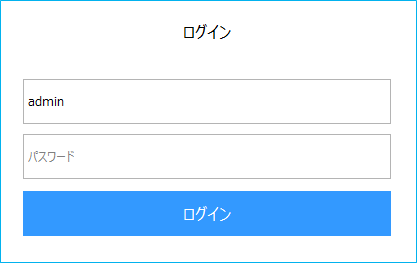
Automatic login operation (direct login from the Panel Browser login screen)
If you start Panel Browser without passing any parameters, the standard login screen will be displayed, and you can log in directly from the "Login" tab on the login screen. At this time, the parameters entered on the screen are stored internally, and the next time you start the application, all input information except for the password will be automatically entered.
(Login screen of Panel Browser)
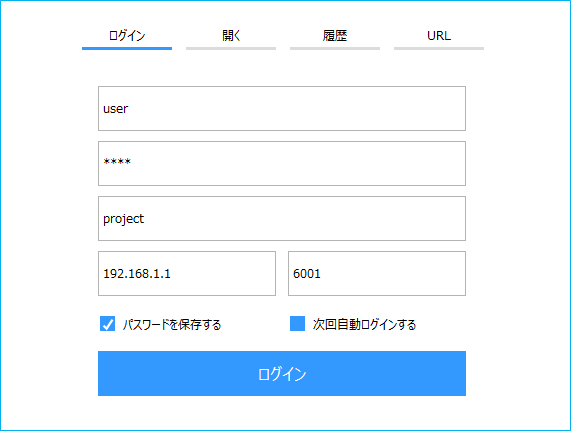
By checking "Save password" and "Automatically log in next time" on the screen above and logging in, you will be automatically logged in from the next time onwards.
Below are the steps to perform direct login from the Panel Browser login screen.
1.Launch Panel Browser.
2.The login screen will be displayed. Enter the necessary login information from the Login tab and click the "Login" button.
|
▪Username ▪password ▪Project name ▪Destination IP address ▪Port number ▪Save password ▪Automatically log in next time |
3.If direct login is successful, the client screen will be displayed.
If the user information used to log in is changed after automatic login (for example, if the password is changed or the user is deleted), automatic login will fail the next time the system is started, and the login screen will be displayed. If you log in using the newly updated user information, automatic login will be performed again from the next time onwards.
|
When executing by direct login, the setting values of the login-related route properties (PSNode, PSPanelPort, PSLoginUser, PSLoginPwd, etc.) are used with priority given to the parameters specified at the time of login. |

(Reference) Automatic login setting using login INI
|
Do not use this login method when operating with multiple users using the user management function. Use this method only when operating with only a single user without using user management, and when you do not want to be aware of login at all. |

By using the login INI, you can set it up so that login is performed completely automatically without displaying the login screen even on the first startup. However, there are disadvantages to using the login INI, such as the need to manually place files on each client, and the need to individually update the login INI contents if the login user information is updated after operation has begun. If you want to log in automatically, we recommend the method introduced at the beginning of this page.
For reference, the following explains how to set up automatic login using login INI.
1.Create a login INI file.
Create a login INI file using a text editor such as Notepad. Details of the login INI parameter specifications and execution method are described in "About Login INI".
As an example, let's assume the file name is "login.ini" and define it as follows:
PSLoginProject ・・Set according to the actual project
PSNode - Same as above
PSNode2: Same as above
PSPanelPort...Same as above
PSPanelPort2...Same as above
PSAutoLogin=T ・・Enable automatic login
PSLoginSavePwd=T - Save password
PSLoginUser = User name for automatic login
PSLoginPwd= Automatic login password
Definition example)
PSLoginProject=project PSNode=192.168.1.1 PSNode2= PSPanelPort=6001 PSPanelPort2= PSAutoLogin=T PSLoginSavePwd=T PSLoginUser=operator PSLoginPwd=pass |
|
As shown above, if you set PSAutoLogin=T, PSLoginSavePwd=T, specify the user name to be used for automatic login in PSLoginUser, and specify the password for the automatic login user in PSLoginPwd, automatic login will occur without the login screen being displayed even on the first startup. However, if the user information is changed after operation has started, the next automatic login will fail and the login screen will be displayed. You can log in by entering the correct user information on the login screen, but because the definitions in the login INI differ from the user information, login will fail every time from the next time onwards and the login screen will be displayed. Therefore, if you change the user information, you must also modify the definitions in the login INI. |
2.Create a shortcut
Create a Windows shortcut to run Panel Browser and specify the login INI file name in the /Login parameter after the Panel Browser execution path.
*"□" represents a half-width space. |
Setting example)
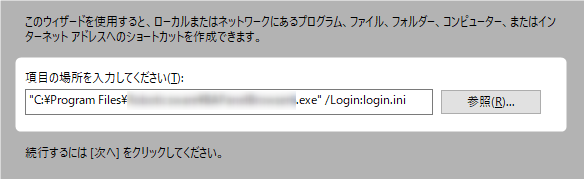
|
For details on how to create shortcuts, see "About Login INI". |
3.When the shortcut is launched, a direct login is performed according to the parameters specified in the login INI file.
|
Even if you use the login INI method, you can set it up so that the login screen is displayed only the first time you start the program by setting it as follows.
|