Recording tab/Recording timing
|
When using Nekaroku, the recording settings for Nekaroku must be configured on the Nekaroku side. Please note that the recording settings on this settings screen (such as checking "Record") and the recording timing settings are recording settings for the video recorder function and are not linked to the recording settings on the Nekaroku side. For details on linking with Nekaroku, please refer to "Linking with Mitsubishi Electric's "Nekaroku"". |

In the Recording tab, you can set up automatic recording based on a schedule or recording based on the detection of event-specified conditions under Recording Timing.
|
|
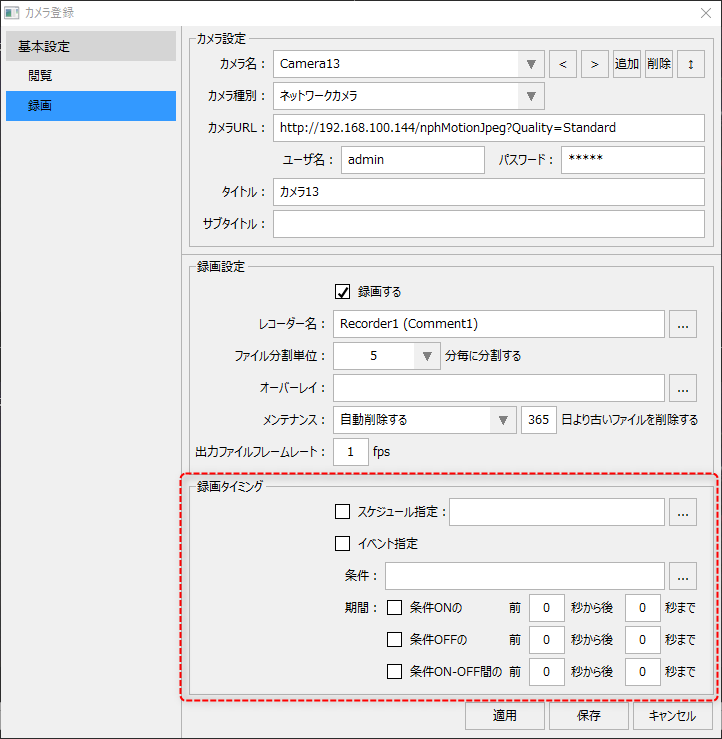
■Schedule specification
By registering schedules for each day of the week from Monday to Sunday, you can control when recording starts and stops based on the time.
If you want to specify a schedule, check the box below.

Next, click the Settings button below.

Then the weekly schedule setting dialog will pop up.
(Weekly schedule setting dialog)
|
In the weekly schedule setting, you can set the schedule for each day of the week from Monday to Sunday. On this screen, you can intuitively define the start and end times for automatic recording by adding task bands on the time chart.
Furthermore, you can register multiple tasks for each day of the week. There is no limit to the number of tasks you can register.
(Example of multiple registered tasks)
|
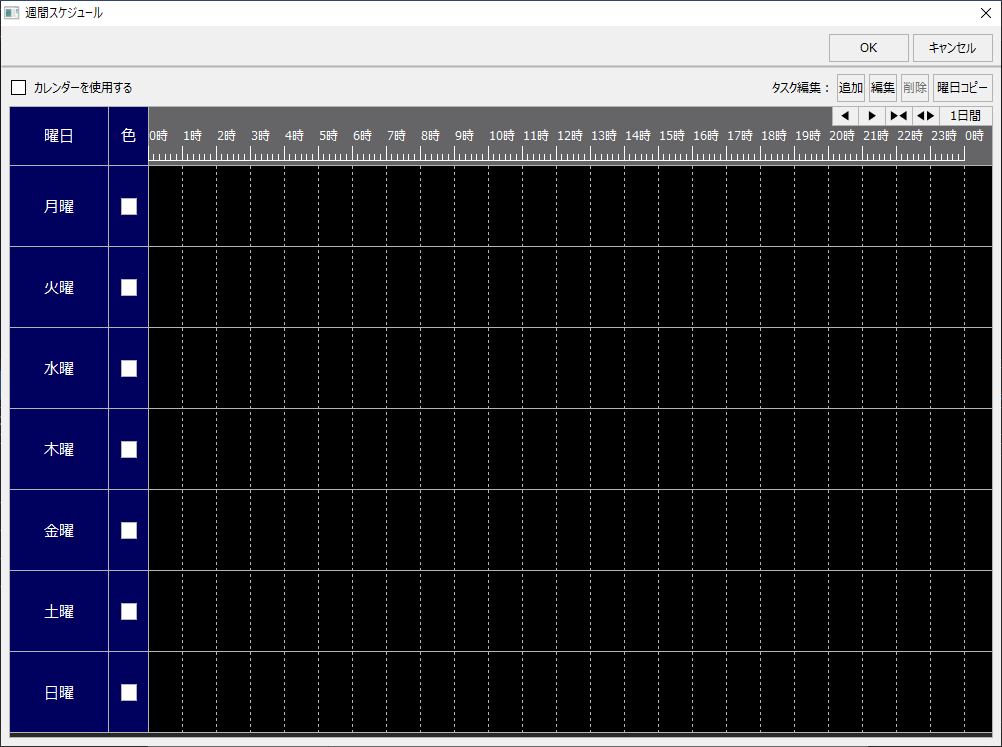

Clicking the "Add" button in the task editor will allow you to add a task to the time chart. This button is a toggle button, and the mode will change each time you click the button.
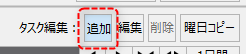
In the Add mode, you can add a new task by dragging the mouse over the time chart of the day you want to add a schedule to.
The task has been added.
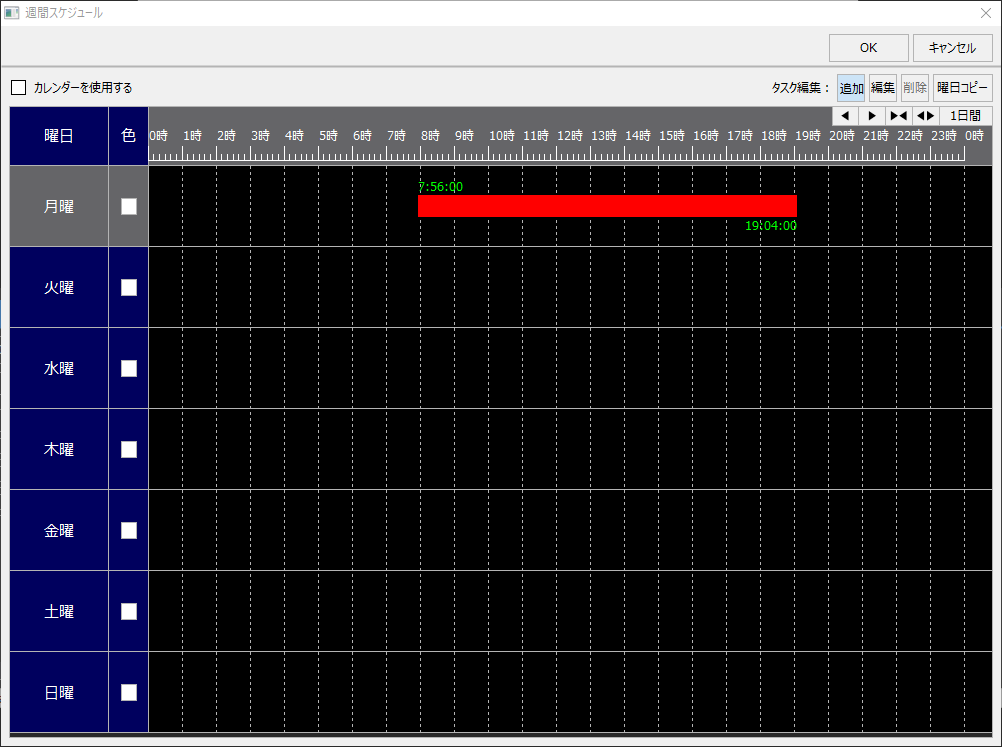
Clicking the "Edit" button in Task Editing will allow you to edit the tasks on the time chart. This button is a toggle button, and the mode will change each time you click the button.

In edit mode, when you click on a task, handles will appear on the left and right. You can change the time by dragging these handles left and right with the mouse.

Also, if you double-click the task, the following dialog will appear, allowing you to manually enter the start and end times.
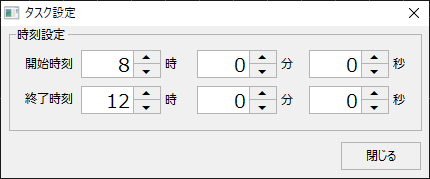
Clicking the "Delete" button with a task selected will delete the selected task.

Clicking the Copy Day button displays the Copy Day dialog box.

In the Copy Days of the Week dialog, you can select the schedule to copy from and copy it to the checked days of the week.
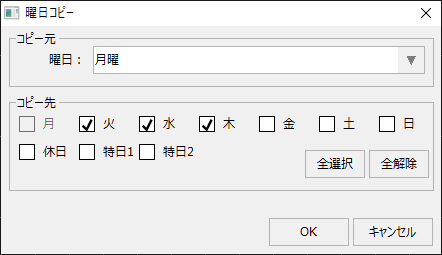
■Schedule specification (calendar settings)
In the weekly schedule, you can define a "calendar." Using the calendar, you can set schedules for holidays, special days 1, and special days 2. In addition to controlling each day of the week from Monday to Sunday, the schedules for holidays, special days 1, and special days 2 can be defined separately in the calendar to determine which dates are holidays, special days 1, and special days 2. This allows you to control the days that fall under holidays, special days 1, and special days 2 defined in the calendar according to the schedules for holidays, special days 1, and special days 2.
|
The calendar is registered as a single setting information for the entire system and is commonly referenced by the schedule settings of all cameras. |

To use the calendar, check the box below.
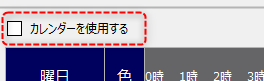
The weekly schedule screen will then change as shown below, with the most recent calendar displayed at the top of the screen and schedule columns for "Holidays," "Special Day 1," and "Special Day 2" displayed at the bottom.
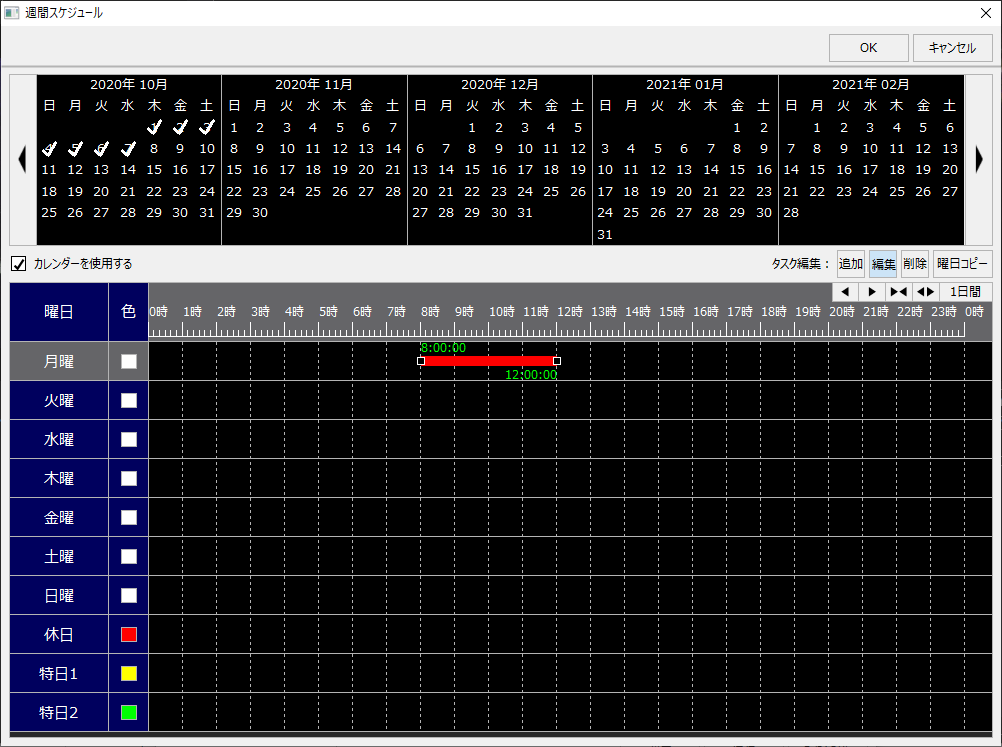
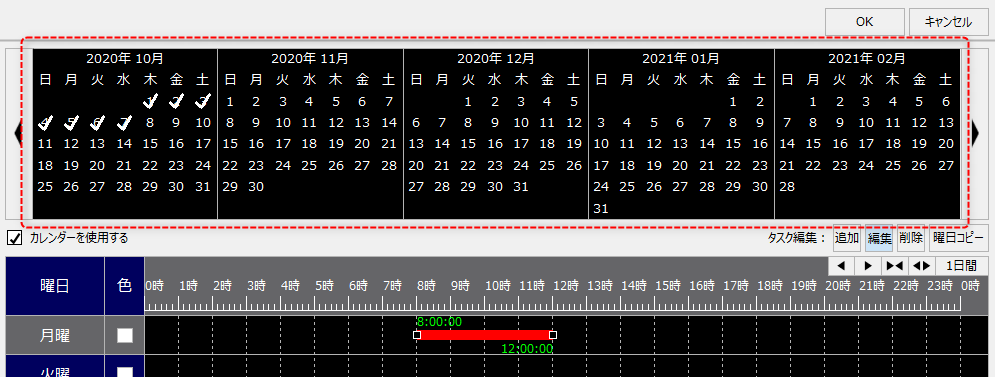
Calendars are defined in the Calendar Settings dialog, which can be displayed by clicking on the calendar area displayed at the top of the screen.
The following dialog will then be displayed:
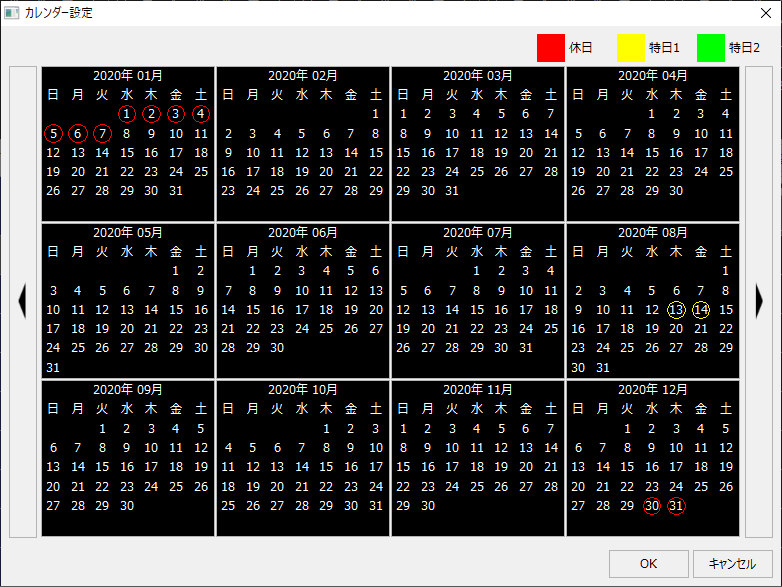
On the calendar, holidays are displayed in red, special days 1 in yellow, and special days 2 in green.
When you click on the date for which you want to change the attributes, the following dialog will appear.
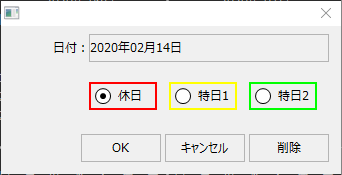
In the above dialog, select one of the attributes (Holiday, Special Day 1, Special Day 2) and click the OK button to set the attribute for the selected date. You can also click the Delete button to remove the attribute that was set for that date.
■ Event specification
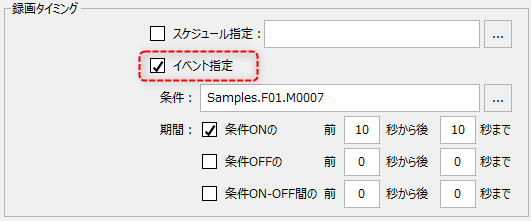
By specifying an event, recording can be performed when the specified conditions are detected.
Check the box below to enable event specification.
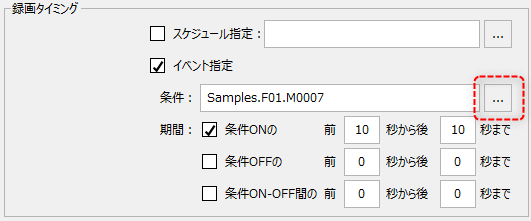
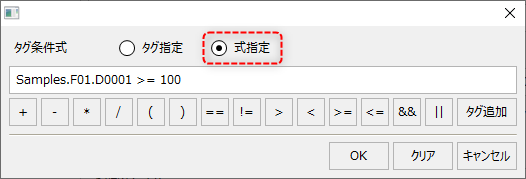
You can define a condition expression that references tags as the event specification condition. Click the button below to display a pop-up dialog for setting conditions.
(Condition setting dialog)
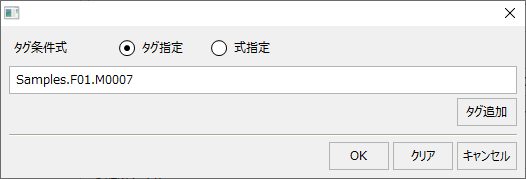
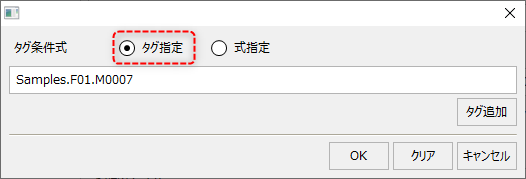
If you select to specify a tag, you can specify only the tag path. If you specify only the tag path, the condition will be ON when the tag is TRUE (other than 0). To specify a tag, you can display the dialog from "Add tag" and select it, or enter the tag path directly.
If you select "Specify expression", you can specify an arithmetic expression. You can specify arithmetic operations, comparison operations, and referencing multiple tags to perform logical operations.
By setting a period for an event, you can include in the recording a specified number of seconds of video before and after the time when the condition was detected (each can be set from 0 to a maximum of 3600 seconds).
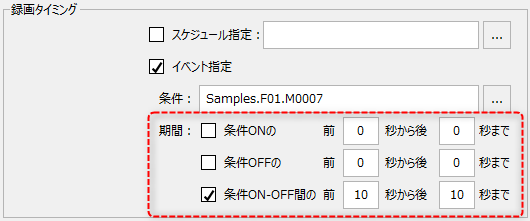
"Condition ON" and "Condition OFF" will record a single shot when the condition is met. By specifying the number of seconds before and after, you can include the specified number of seconds of video before and after the timing when the condition ON (or condition OFF) is met in the recording. These two events can be enabled at the same time.
"Between condition ON-OFF" will record continuously from when the specified condition turns ON until it turns OFF. You can also specify the number of seconds before and after this event to include the specified number of seconds of video in the recording. Note that when you enable this event, the above two checks for "Condition ON" and "Condition OFF" will be automatically cleared.
|
Event-specific duration settings are useful when used in conjunction with the overlay trigger lamp feature.For example, by setting the period so that 10 seconds before and after the condition ON-OFF is recorded, and enabling the trigger lamp in the overlay settings, the lamp will only be displayed when the condition ON is met (the lamp will not be displayed for 10 seconds before and after because the condition is not met). With this function, when playing back and monitoring videos recorded with an event specification, you can visually know when the condition was met. |
|
If you enable both schedule and event specifications at the same time, recording will occur only if the event specification conditions are met within the time range specified in the schedule. Recording will not occur for events outside the schedule range.
Specifically, the operation is as follows:
•For events with an ON or OFF condition, recording will only start if the event condition is met within the time range of the schedule period. For example, if the event condition continues to be met before the schedule period and the start time arrives, recording will not start. For these events, recording will only start if the rising edge of the ON condition (or the falling edge to OFF) is detected within the schedule period. •For events between the conditions ON-OFF, if the start time arrives while the event condition is met before the scheduled period, recording will start from the start time. •For all event conditions, if recording is in progress and the schedule end time arrives without an end event occurring, recording will stop at the schedule end time.
|