Full menu display settings
To change the menu of the standard project to a full menu, change the settings in the system settings screen of the standard framework. Display the system settings screen while both Panel Server and Panel Browser are running online. For information on how to display the system settings, see "Displaying the system settings screen".
■ Change to full menu display
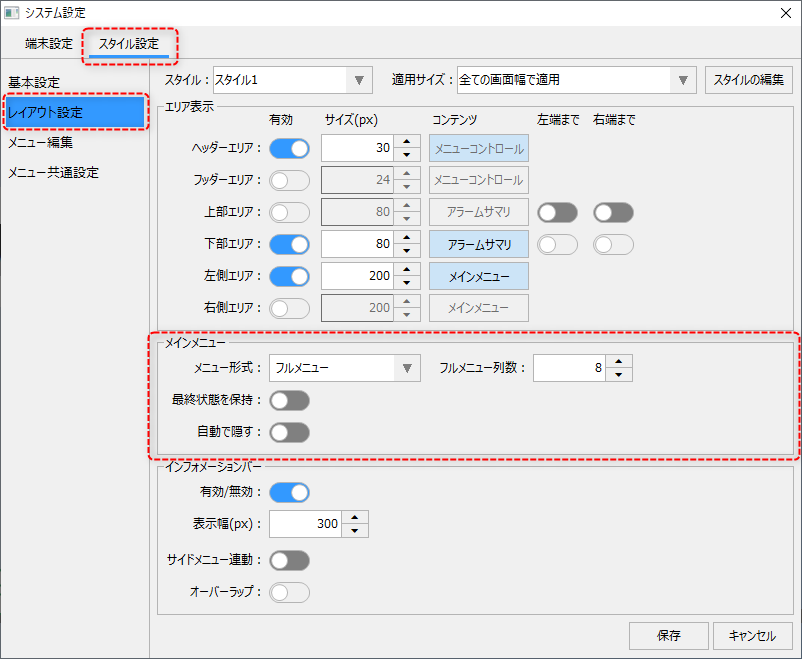
From the System Settings screen, select the Style Settings tab and display "Layout Settings" from the menu on the left side of the screen.
|
Select "Full Menu" from the "Menu Type" combo box in the main menu.
The default number of columns in the full menu is 8. If you want to change the number of columns of buttons displayed on the menu screen, change it as necessary.
Once you have changed the settings, click the Save button to save them.
|
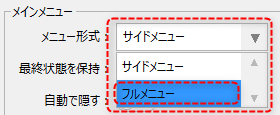
The full menu will be displayed only by changing the above settings. If you change the main menu to a full menu, other settings related to the menu (such as displaying/hiding the left area) will be ignored.
In the full menu, the following is displayed under normal circumstances:
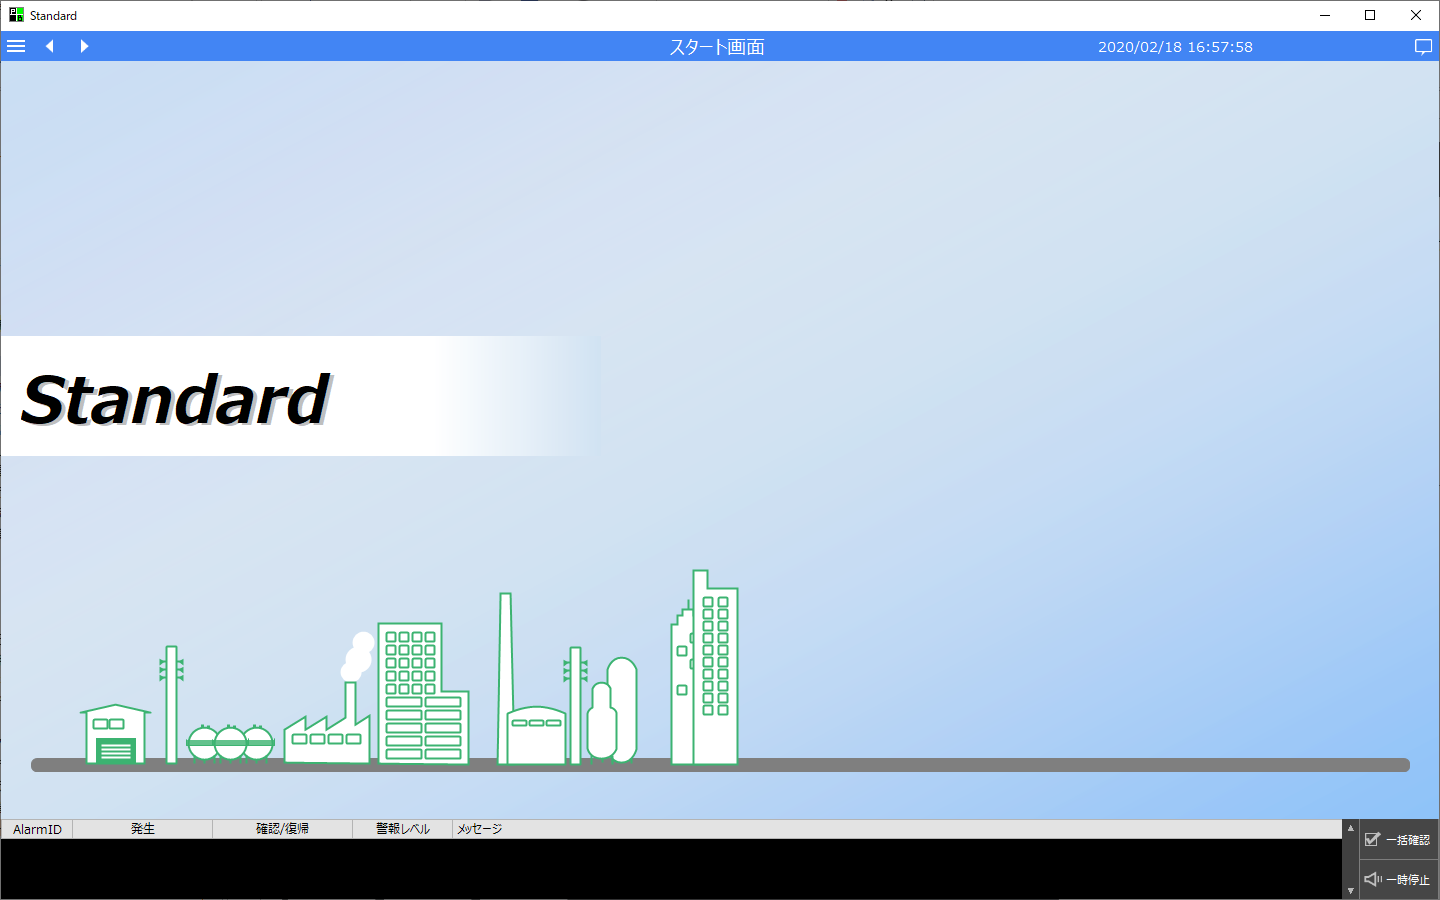
To view the menu, click the menu icon in the header area.
Then the menu screen shown below will be displayed.
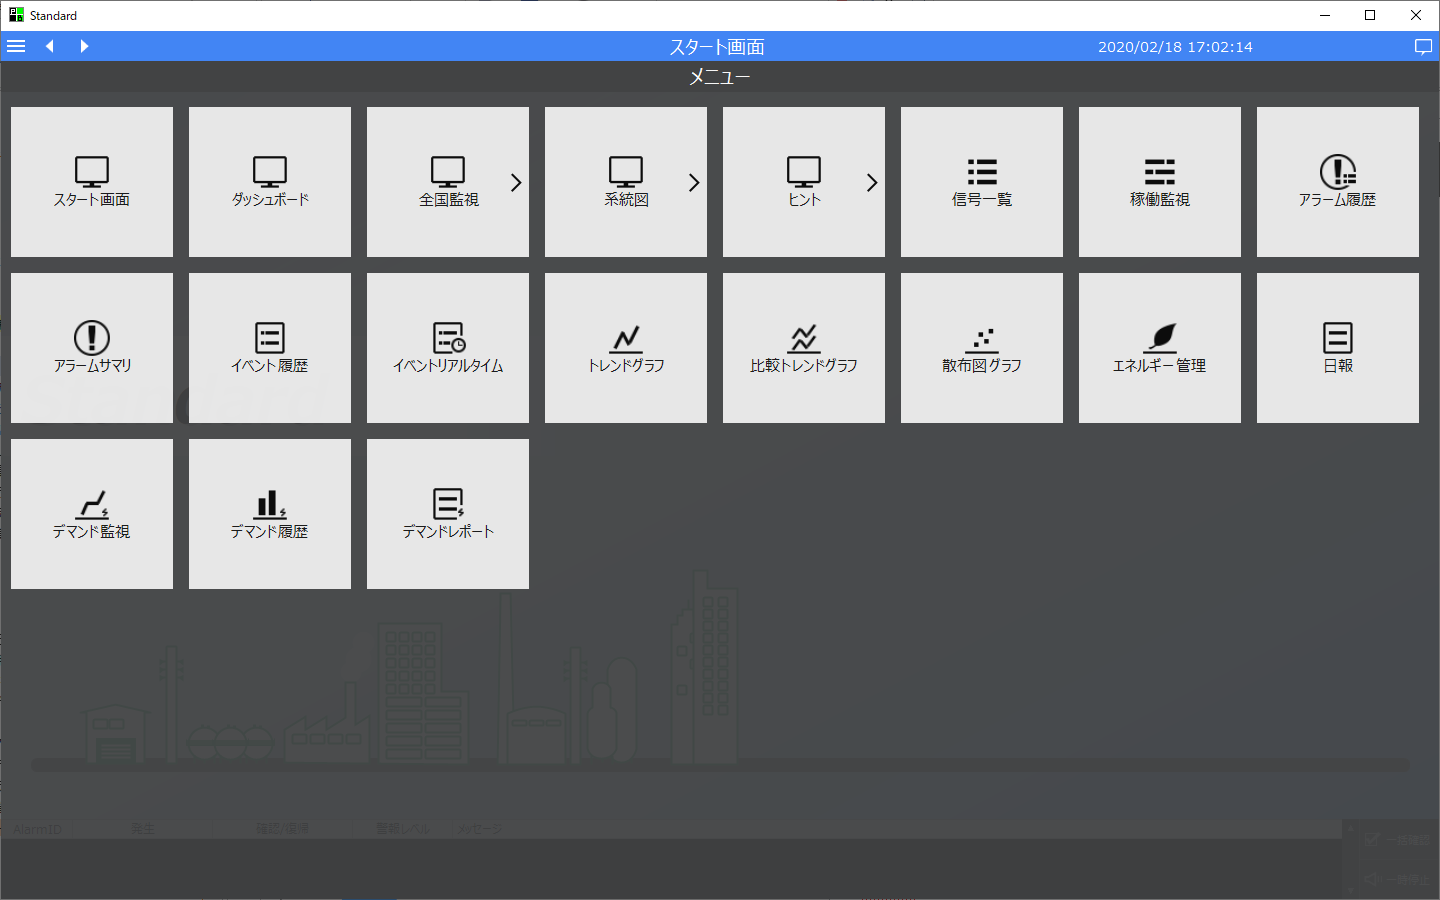
When you click a button from the menu, the display will change to the desired screen and the menu screen will automatically return to a hidden state.
Furthermore, hierarchical menu buttons have a ">" sign displayed, and clicking it will display the menu at the next lower level.
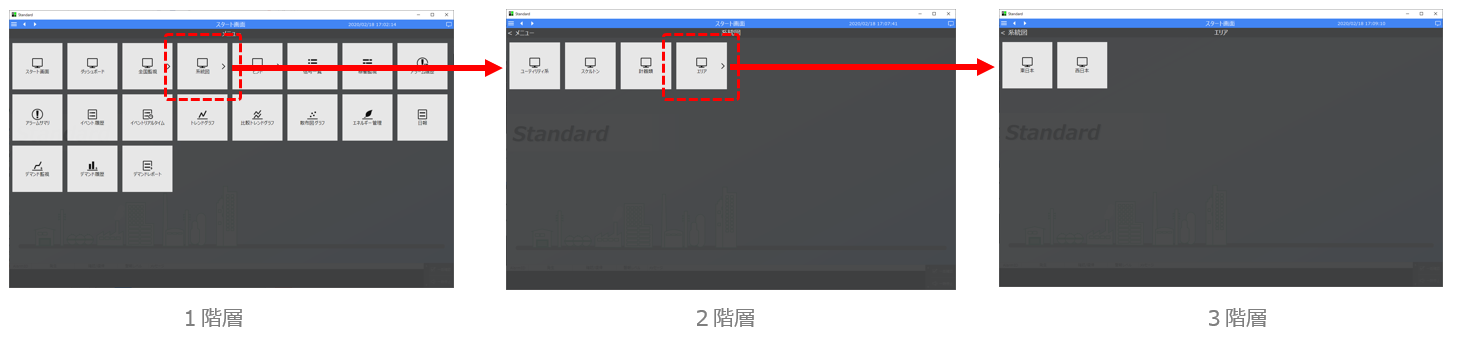
For information on how to edit the items displayed in the menu, see "Editing Menus".