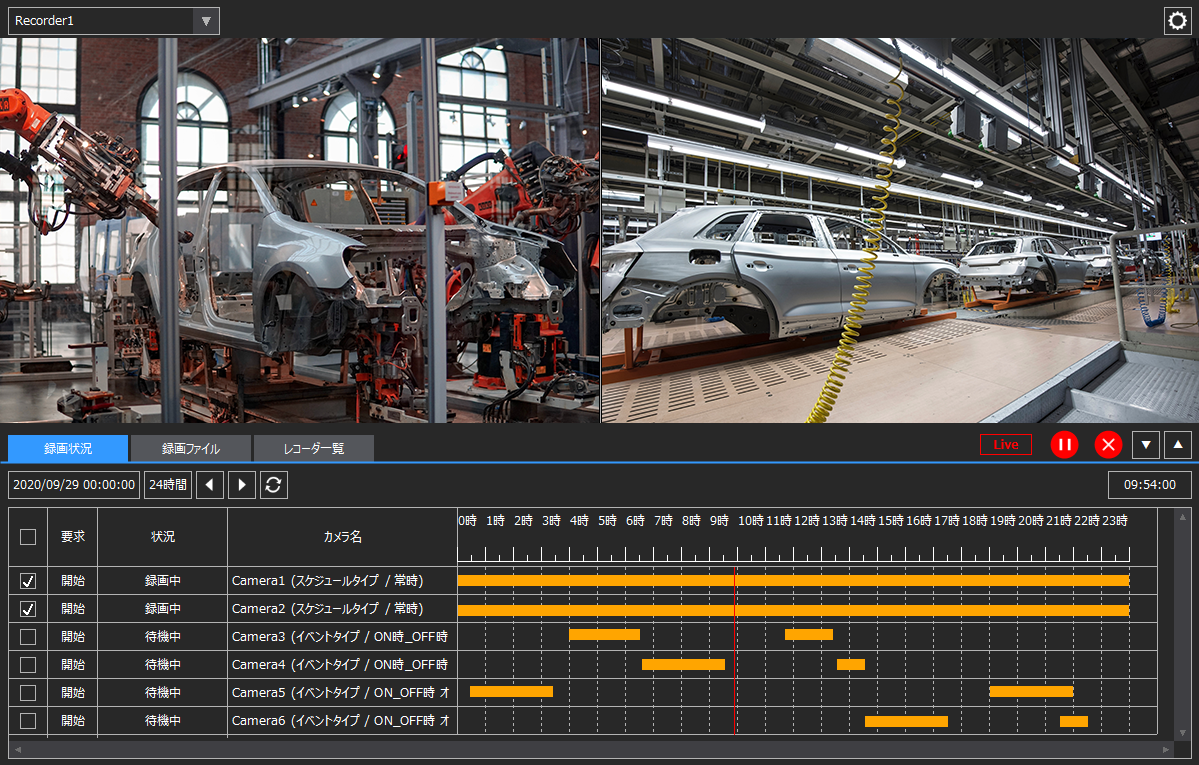
The video recorder function is provided as a screen library, and is a function for recording and playing streaming video from various companies' general-purpose network cameras as video files in MP4 format. In addition to starting and stopping recording manually, you can set the start and stop times for recording for each day of the week as a weekly schedule to record automatically, or record automatically when the event condition ON/OFF is detected. You can also overlay tag values on the recorded video.
(Video recorder screen)
Below is an overview of the Video Recorder features. Click on the links below to jump to the relevant section on this page.
•Simultaneous connection to multiple cameras and distributed processing
•Recording with time and tag values overlaid (overlay)
•Flexible automatic recording settings
•Camera display area (video player)
•Selecting recorded data from the time chart
•Recorded data can be played back from various locations
•Record the currently displayed video as a separate video
The video recorder can be connected to a general-purpose network camera.
Camera Type |
Contents |
Network Camera
|
"MJPEG" or "Supports the "H.264" image compression formatIt can connect to a network camera and display live video from the camera or record it as a video file.
|
Nekaroku
|
You can connect to a network camera connected to Nekaroku. For details about Nekaroku, please refer to "Collaboration with Mitsubishi Electric's "Nekaroku"".
|
Simultaneous connection to multiple cameras and distributed processing
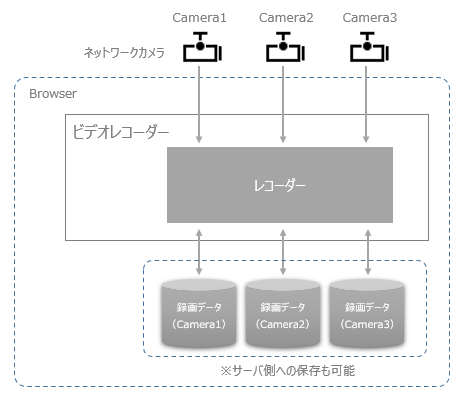
The video recorder's recording process is performed on the client side (Panel Browser side), and it can connect multiple network cameras in parallel at the same time, recording the footage from each camera as a separate video file.
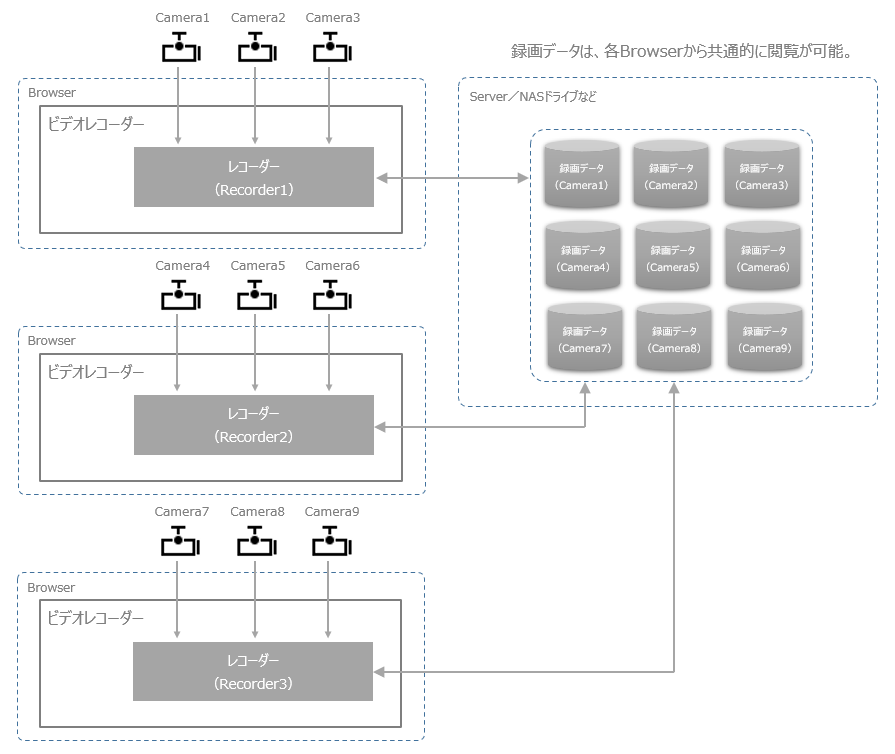
You can also prepare multiple client PCs and distribute the recording process using the video recorder. By saving the recording data of each distributed recorder on the server side or setting it to save/reference to a network drive such as NAS, you can view it commonly from all client PCs. Note that there are important concepts of "recorder" and "recorder terminal" in video recorders. For information on distributing the recording process among multiple clients and the concept of recorders and recorder terminals, please refer to "About recorders and recorder terminals".
Recording with time and tag values overlaid (overlay)
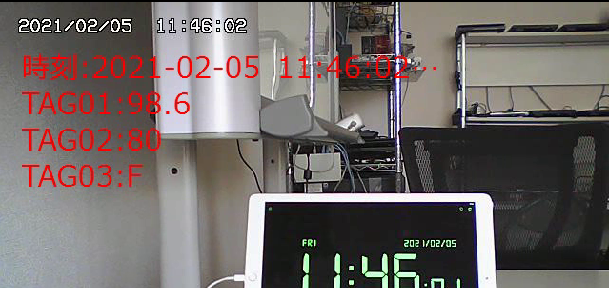
Using the overlay function, you can overlay the time or tag value on the recorded data image, or record a lamp display based on the conditional judgment of the tag value on the image.
(Overlay example)
|
This function makes it possible to know at what point in the video a condition was detected and what the various numerical values were at that time, which can be useful when analyzing the cause of equipment abnormalities.
|
Flexible automatic recording settings
The video recorder offers two types of automatic recording settings: "Scheduled" and "Event-specified."
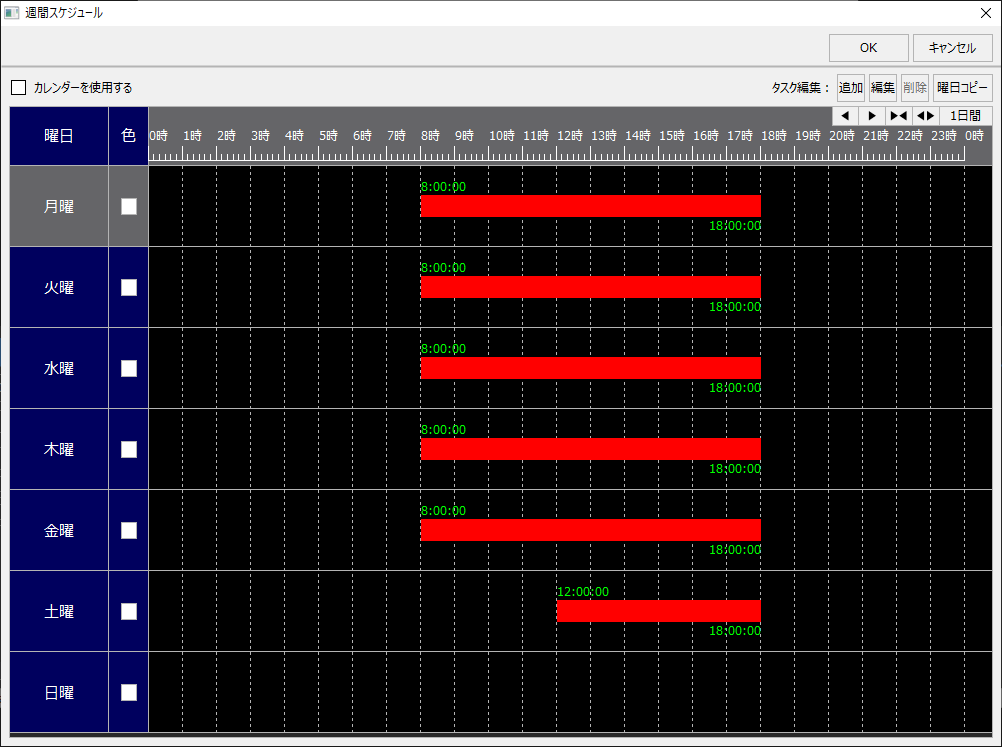
The schedule allows you to set up automatic recording schedules with start and end times for each day of the week from Monday to Sunday.
(Example of schedule specification)
|
You can freely register multiple ON/OFF definitions (tasks) in a schedule.
You can also use the calendar for your schedule.
Using the calendar, you can set schedules for Holidays, Special Day 1, and Special Day 2. With the Holidays, Special Day 1, and Special Day 2 schedules, you can define which dates are holidays, Special Day 1, and Special Day 2 separately in the calendar, apart from controlling each day of the week from Monday to Sunday. This allows you to control the days that fall under Holidays, Special Day 1, and Special Day 2 defined in the calendar according to the Holidays, Special Day 1, and Special Day 2 schedules.
|

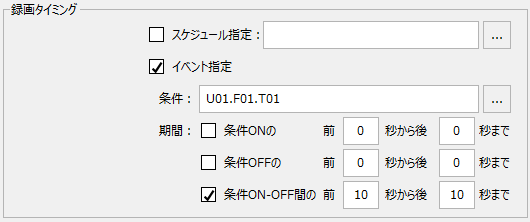
With event specification, recording will start and stop depending on whether the event detection conditions set on the screen are met.
(Example of event specification)
|
Event conditions can be set not only to simply check whether the tag value is True, but also to other flexible conditions such as comparing the tag value with the result of arithmetic operations or logically comparing multiple tags.
You can also specify the number of seconds before and after the condition is met, and record the specified number of seconds before and after the timing when the recording condition is detected. By recording the state before and after a problem such as an alarm occurs, it is useful for analyzing the recorded data to see if there is a problem.
|
Camera display area (video player)
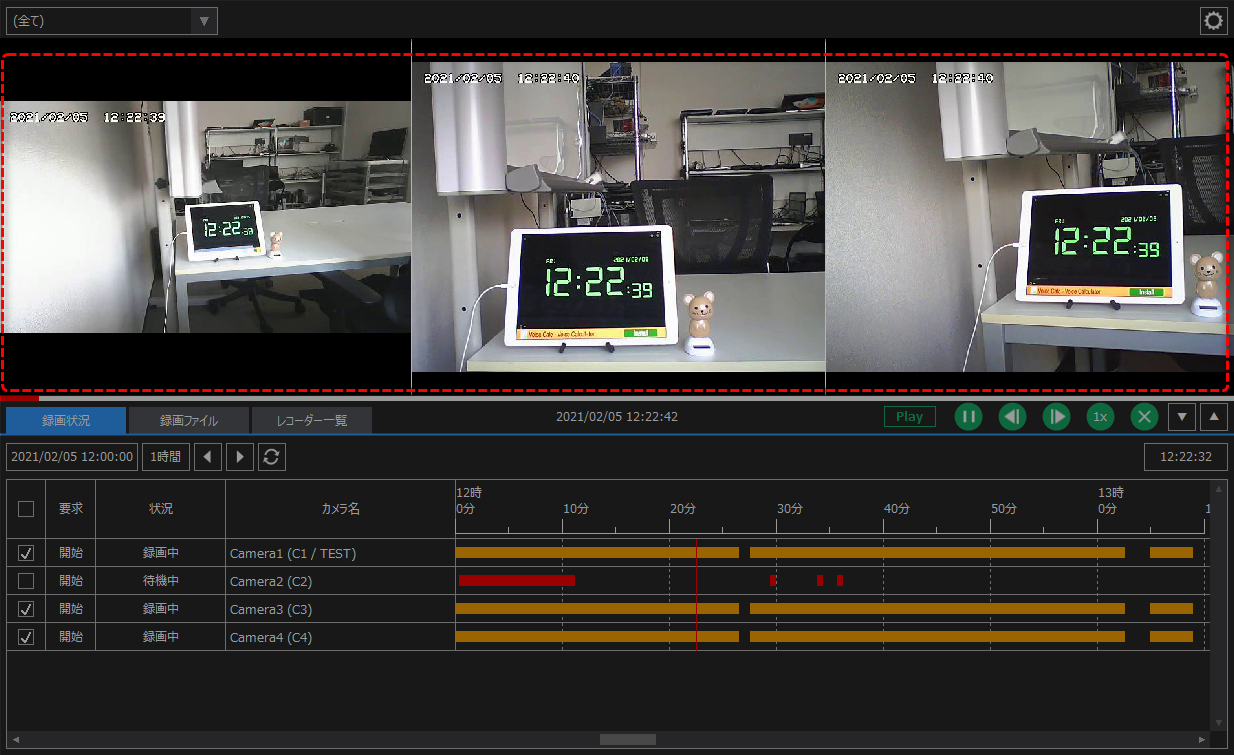
The video from the selected camera is displayed in the video player at the top of the video recorder (camera display area). If multiple cameras are selected, multiple video players are displayed, allowing you to view the video from each camera side by side.
|
The example on the left shows three cameras displayed simultaneously. In addition to displaying recorded data, the camera display area can also display live video from the currently selected camera.
|
Selecting recorded data from a time chart
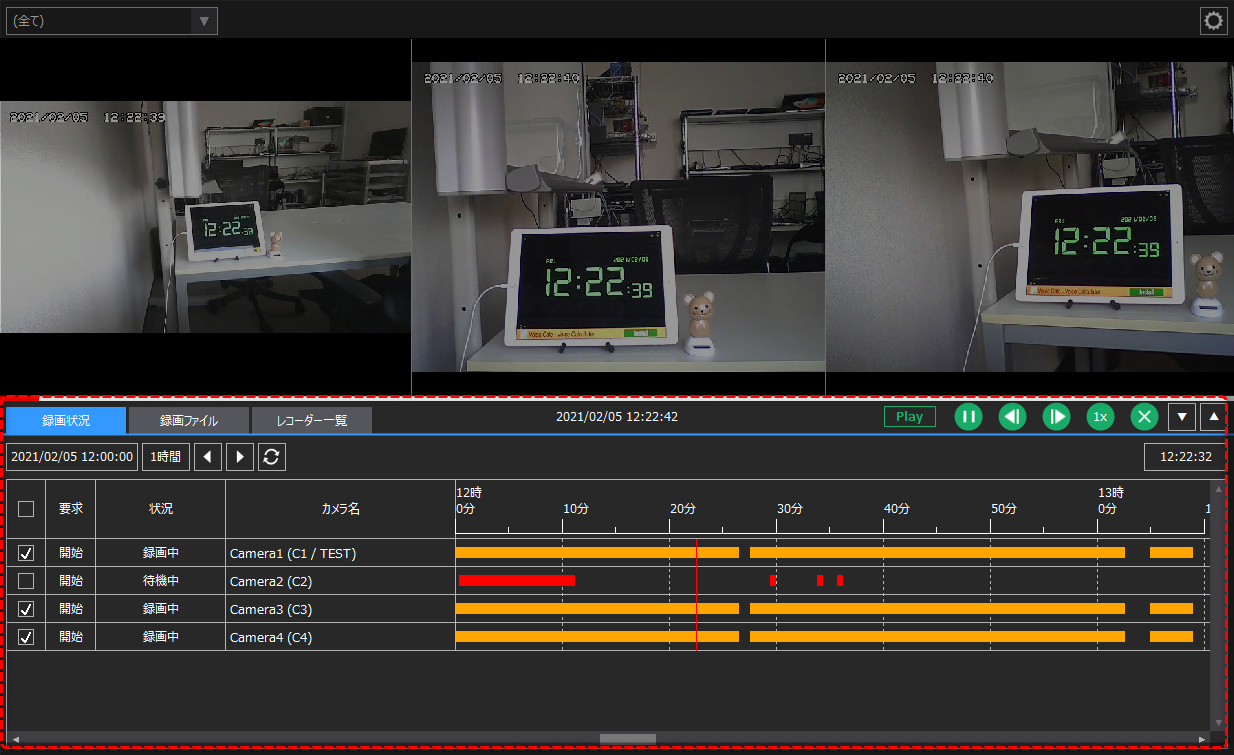
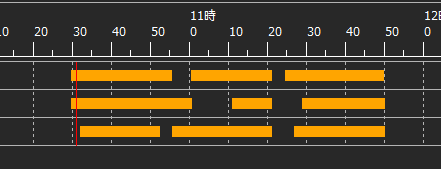
The recording status of each camera is displayed in a time chart at the bottom of the video recorder (recorder operation area). Time periods with recordings are displayed as bars, allowing you to visually locate time periods with recorded data quickly. By selecting the time period you want to play from the time chart, you can immediately display the video from the desired time period.
|
(Example of time chart display)
Furthermore, if you select multiple cameras at the same time and perform playback, you can play back the recording data from each camera simultaneously from the same time.
|
Recorded data can be played back from various locations
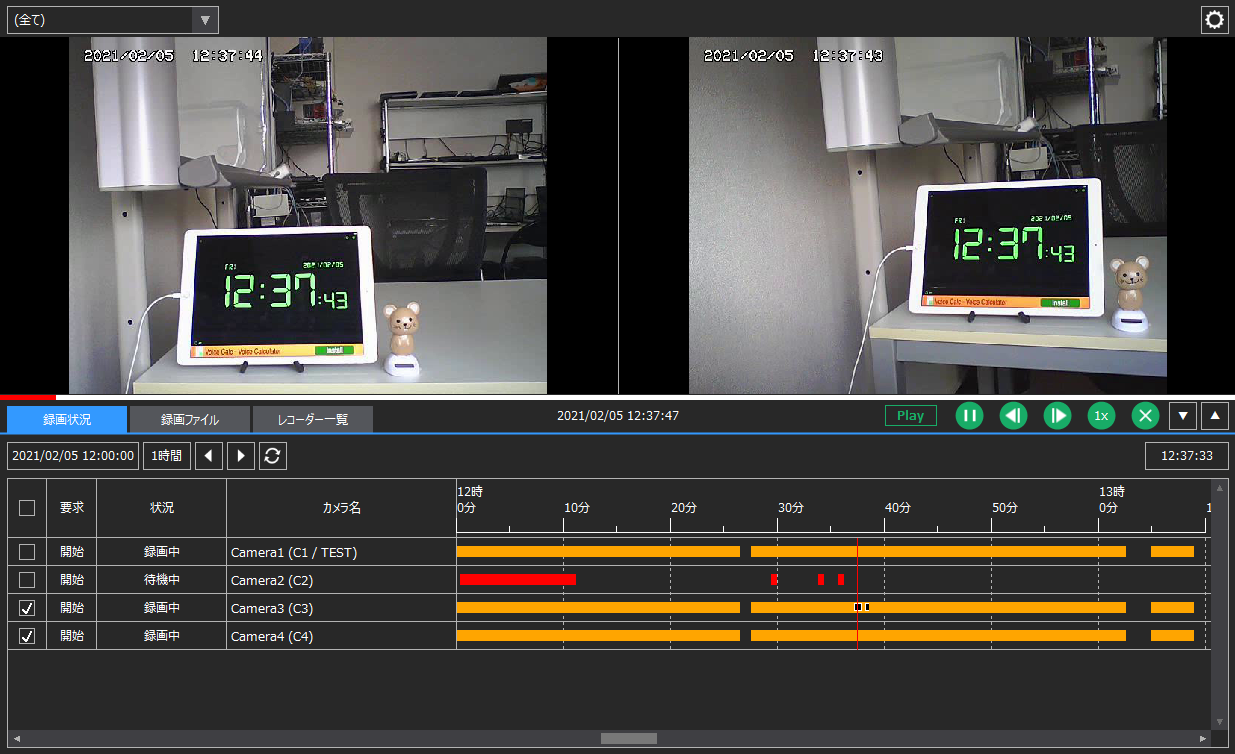
Data recorded by the video recorder can be played back in a variety of ways, including in the camera display area of the video recorder screen, using a video player, or in a split display (camera monitor).
(Playback on video recorder screen)
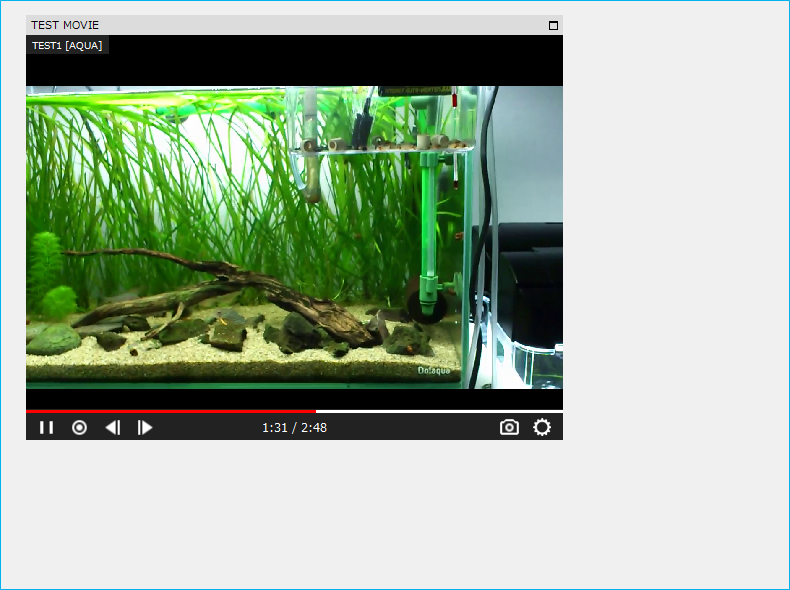
(Embed a video player into the form to play)
|
The video player is available as a video player part (screen library). You can freely place the part on a form such as a graphic screen to display live video from a camera or play back recorded data from a video recorder.
|

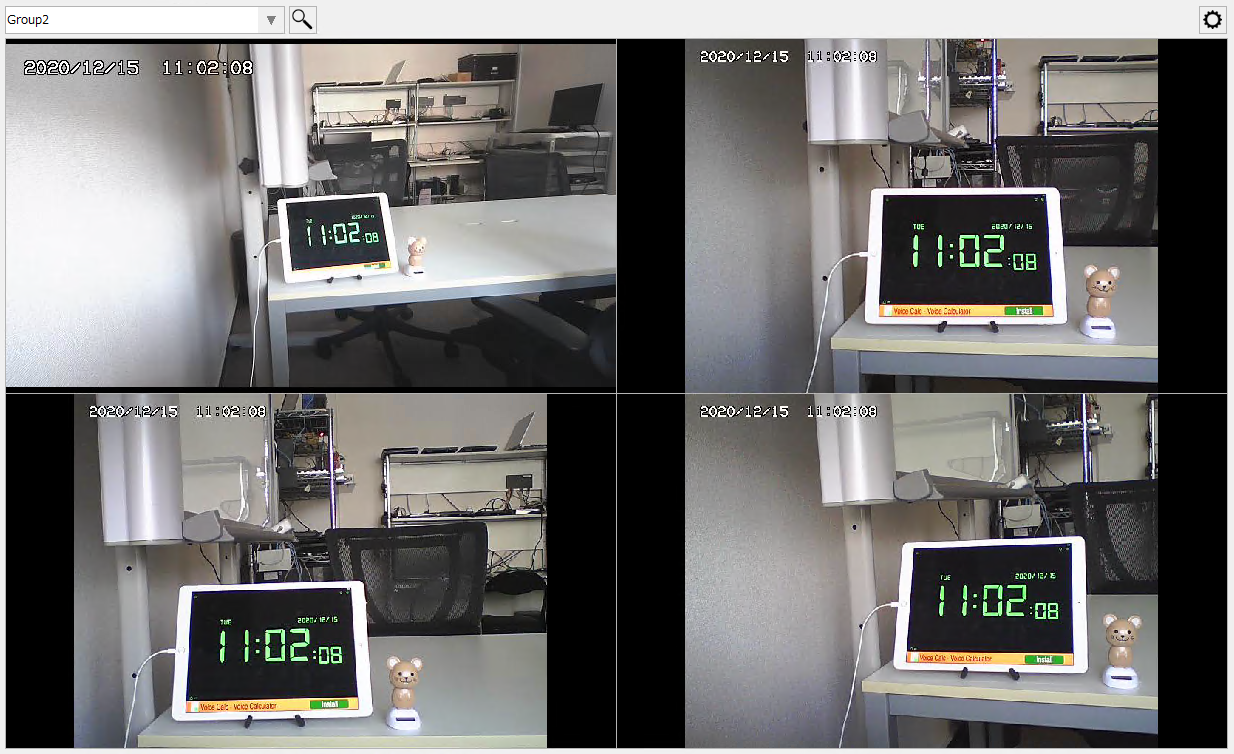
(Split screen recording and playback)
|
The split display function (camera monitor) allows you to display camera images side-by-side in a display frame, in the same way as a graphic screen, etc. The split display also allows you to play back live images and recorded data from the camera, in the same way as a video player.
|
Record the video you are playing as a separate video
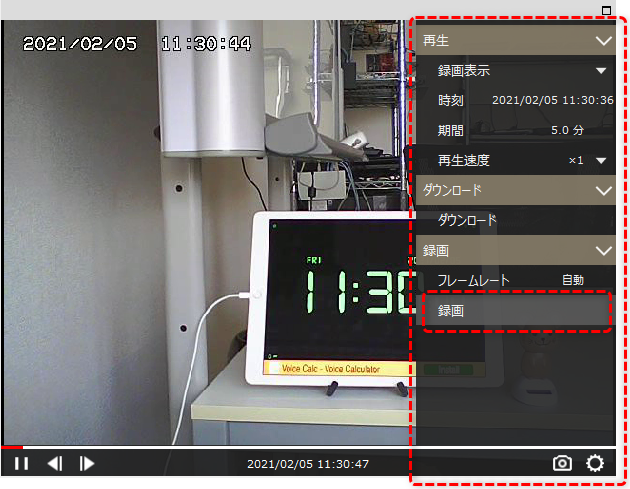
In addition to the recording function of the video recorder, there is a function that allows you to easily record and save the recording data or live video being played on the video player as a separate video file. This function can be called up individually from each video player that is displaying videos.
|
The image on the left shows the settings menu opened from the video controller of the video player. By selecting "Record" from the menu, you can record and save the currently displayed video as a separate video file.
This function allows you to extract only the desired portions of video data recorded by a video recorder and save them as separate video files.
|