dialog
|
■ Basic settings
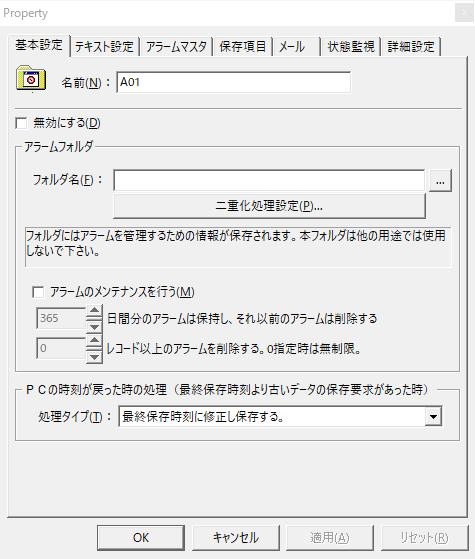 4
▪Alarm Folder Name
This is a dedicated folder used to store information for managing alarms. When setting up multiple Alarm server, specify a separate folder for each server.
The alarm folder stores information for managing alarms. It cannot be shared with other Alarm server. Be sure to create a folder for each Alarm server.
Alarm history is organized by date in a file named alarm[yyyymmdd].csv. If you want to delete alarm information, you can manually delete old alarm information by deleting files older than the date you want to delete. You can also automatically delete old alarm information by checking "Perform maintenance on alarm files."
▪Maintaining alarm files
Automatically delete old alarm history information. If you uncheck this setting, automatic deletion will not occur.
Alarm history storage can be specified on a daily basis and with a maximum number of items.
▪Processing when the PC clock is reset (when a request is made to save data that is older than the last saved time)
This is the process that occurs when the time is set back by adjusting the
PC time, etc.
When the PC time is set back due to time adjustment, etc., problems may occur with alarm processing if data older than the last saved time is saved. Therefore, if there is a possibility that data older than the last saved data will be saved by setting the PC time back, select "Save after correcting to the last saved time" (default).

|
If you uncheck "Perform alarm file maintenance", alarm history data will not be automatically deleted. Be sure to consider and decide whether or not you need to automatically delete history based on the requirements of the monitoring system you are building and the number and scale of alarm monitoring.
|
|
|
■Alarm Master
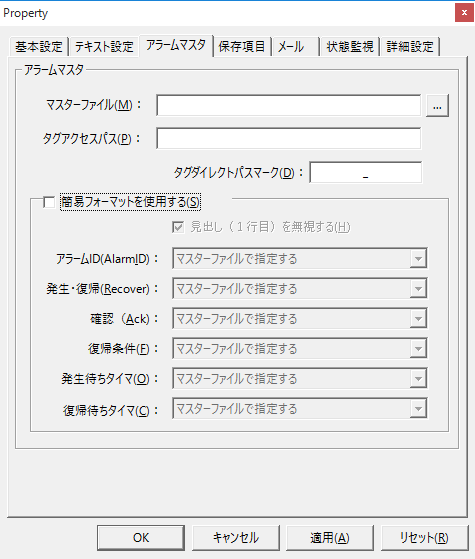
▪Alarm Master
For the format of the alarm master file, please refer to "Alarm master format".
|
|
■ Saved items
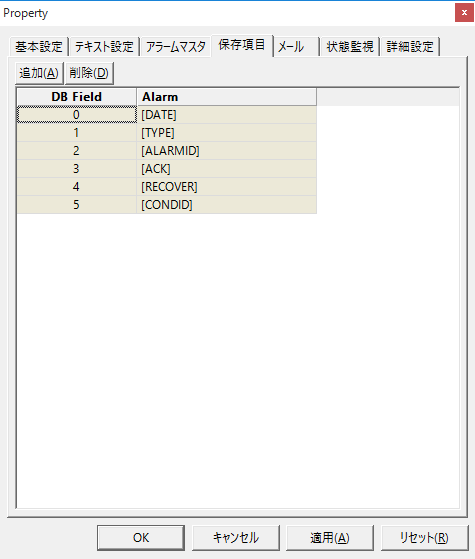
The storage item settings allow you to define the format of the alarm history data. By default, the [DATE], [TYPE], [ALARMID], [ACK], [RECOVER], and [CONDID] fields are defined as storage items.
For example, if you want to include the tag value at the time an alarm occurs in the alarm history message, you must add it to the saved items. Because tag values are constantly changing, for example, by recording the value at the time an alarm occurs as a saved item, you can include and display the tag value at the time of the alarm occurrence in the alarm history. Specifically, if the alarm master settings are set to include the tag value in the comment column called [CM3:TAG], you can add a tag value column to the alarm history data by adding [CM3:TAG] to the saved item settings.
For more information about configuring saved items, see "Include tag values in alarm messages.
|
|
■ Email
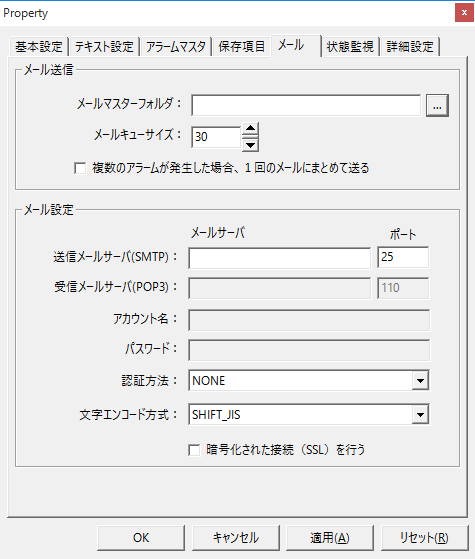
You can send an email when an alarm occurs.
To send alarm emails, you need to define the setting information for Send mail in a text-format configuration file called the mail master, and define a field for Send mail in the alarm master. Alarm emails are sent via a mail server. From the Alarm server action settings screen, you need to set the mail server name, port number, account, password, etc. to connect to the mail server of one of your providers, according to the authentication method of the mail server. Note that FA-Panel does not have a built-in mail server function. You need to prepare a separate mail server.
For details on how to configure email, see "Sending alarm emails".
|
|
■ Condition monitoring
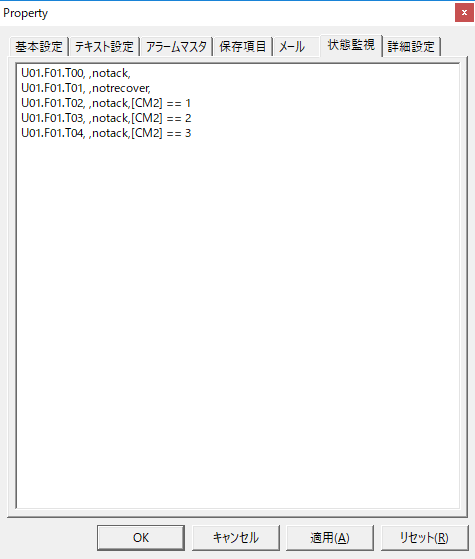
Alarm status monitoring allows you to monitor the overall occurrence of alarms according to the judgment conditions. For example, if even one alarm occurs overall, you can output a representative alarm signal to a tag, or detect a representative alarm for each level according to the value of the comment column specified in the judgment conditions.
For detailed information on how to configure this function, please refer to "Creating a representative alarm signal (Server Edition)".
|
|
■ Text settings (Alarm server actions only)
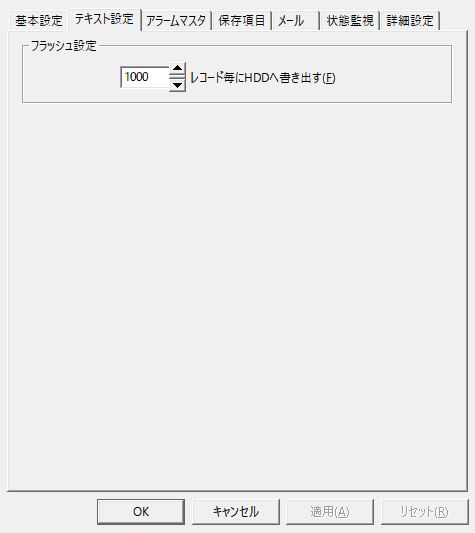
▪Flash Settings
For the Alarm server action, alarm information is written to a text file. The number of alarm information items specified here are written to the hard disk at once. If you want to write to a file immediately after an alarm occurs, specify 1. However, if you specify 1, the hard disk will be accessed every time, which increases the load on the HDD.
If you want to reduce the load on the
HDD, set the flash setting to a number greater than or equal to 2. For example, if you set it to 30, after 30 alarms have occurred, all alarms will be written to the hard disk at once. If you set the flash setting to 2 or more, and the server has shut down normally, any information remaining in memory will be saved to the HDD without fail. However, if the system shuts down abnormally for some reason, such as when the PC is turned off due to a power outage, some alarm information may not be saved to the HDD. If you enable the flash setting and want to ensure that alarm information is saved, use UPS or similar to ensure that the system is shut down even in the event of a power outage.
|
|
■ODBC settings (Alarm server (ODBC) actions only)
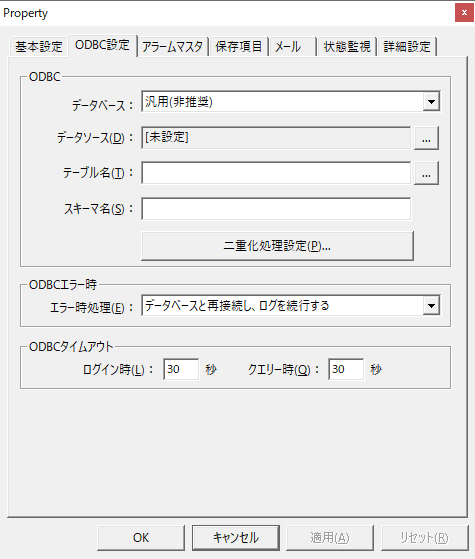
▪ODBC
When selecting the database, select "Generic"/"SQLServer"/"Oracle"/"MySQL"/"PosgreSQL". If you specify a non-generic database product, the processing will be optimized for each database, and each process will be faster.
For the data source, specify the ODBC data source name to connect to the database. For information on how to set up the data source, see "ODBC Settings" in Common Settings.
For table name, specify the name of the table that will store the alarm data.
If you want to specify the database schema name to connect, please specify the schema name. Note that if you are using MySQL, do not specify the schema name on this setting screen.
▪When a ODBC error occurs
Select either "Stop logging", "Continue logging", or "Reconnect to database and continue logging". Unless there is a special reason, set "Reconnect to database and continue logging".
▪ODBCTimeout
You can specify the timeout period in seconds for login and query.
For detailed information on how to configure this function, including how to set up the database table layout, please refer to "Saving alarm history to a database" and "Building alarms using a database".
|