Basic features of the standard framework
This page provides an overview of the basic functionality provided by the standard framework.
Click on the links below to jump to the relevant section of this page.
•Standard framework menu functions
•Screen display history function (previous screen/next screen)
•Common alarm summary display/alarm warning sound
•Information bar (guidance/related information/sticky notes)
•User management (login function)
•Standard Framework System Settings
(Example of standard project display: click to enlarge)
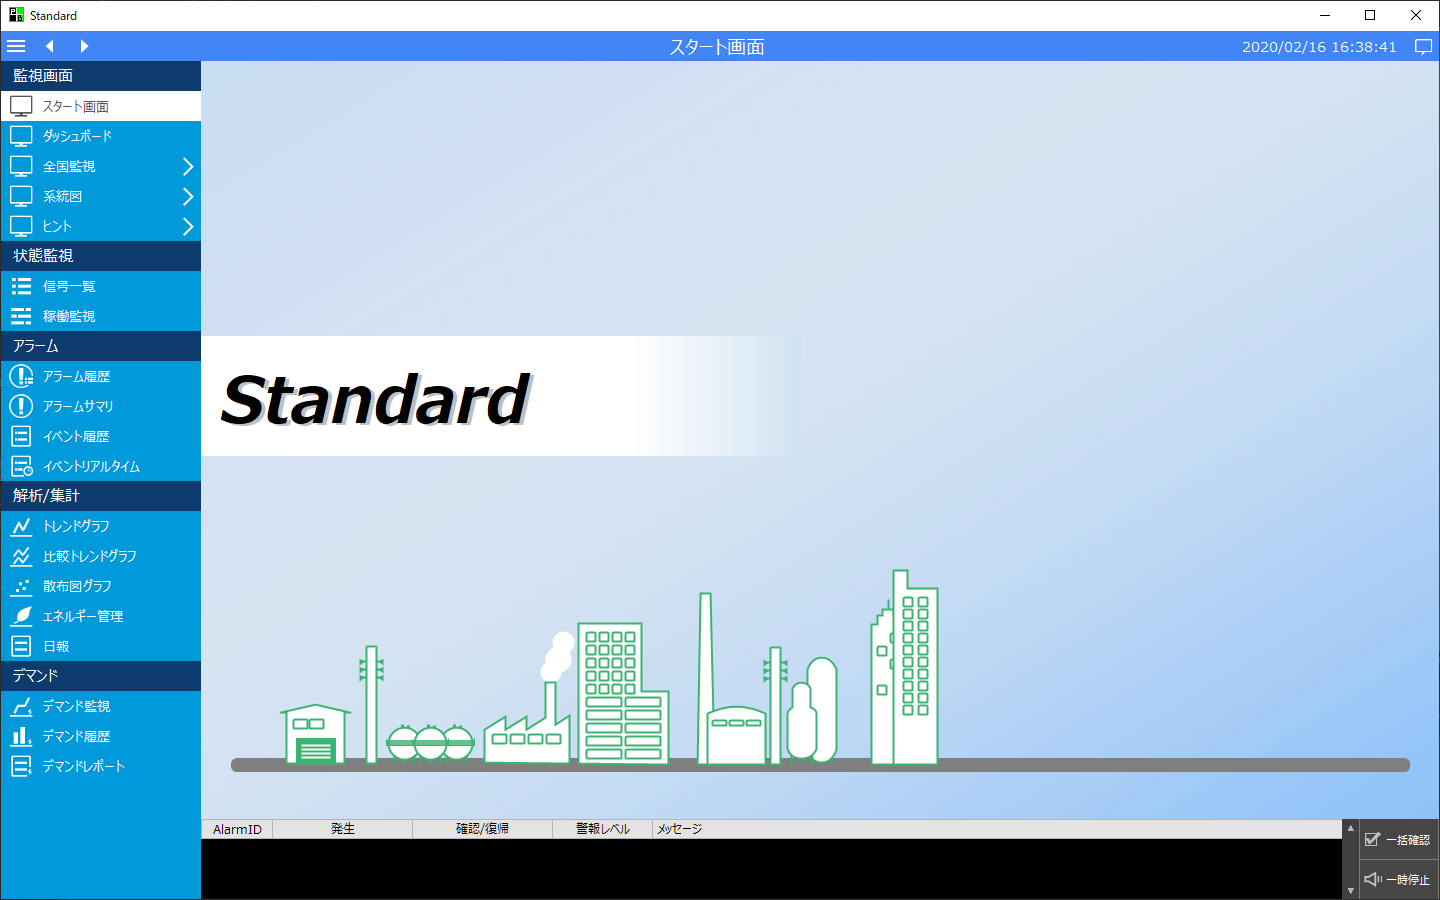
Standard Framework Menu Functions
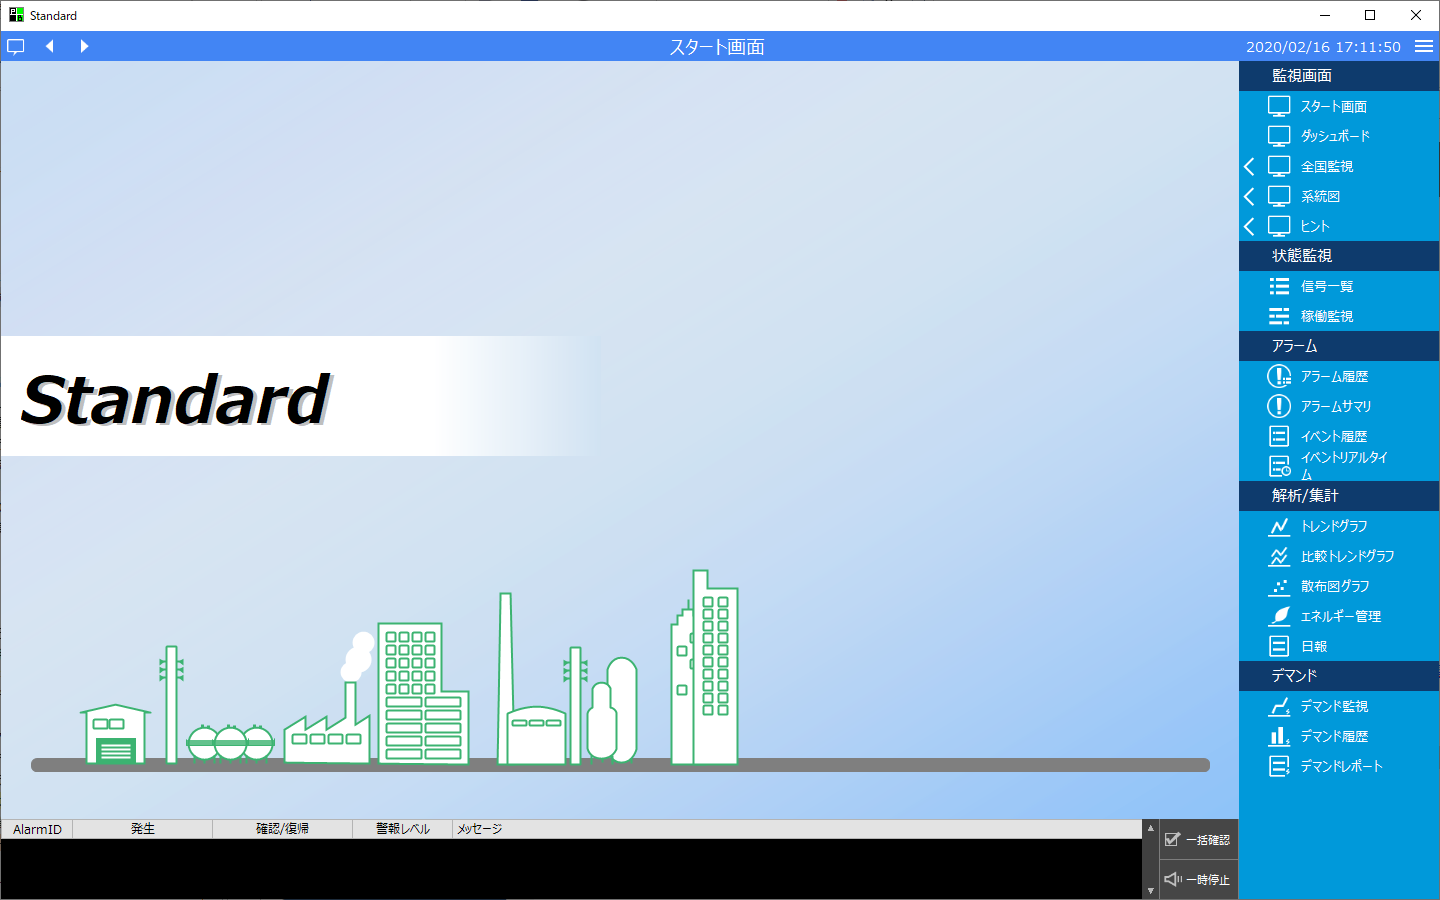
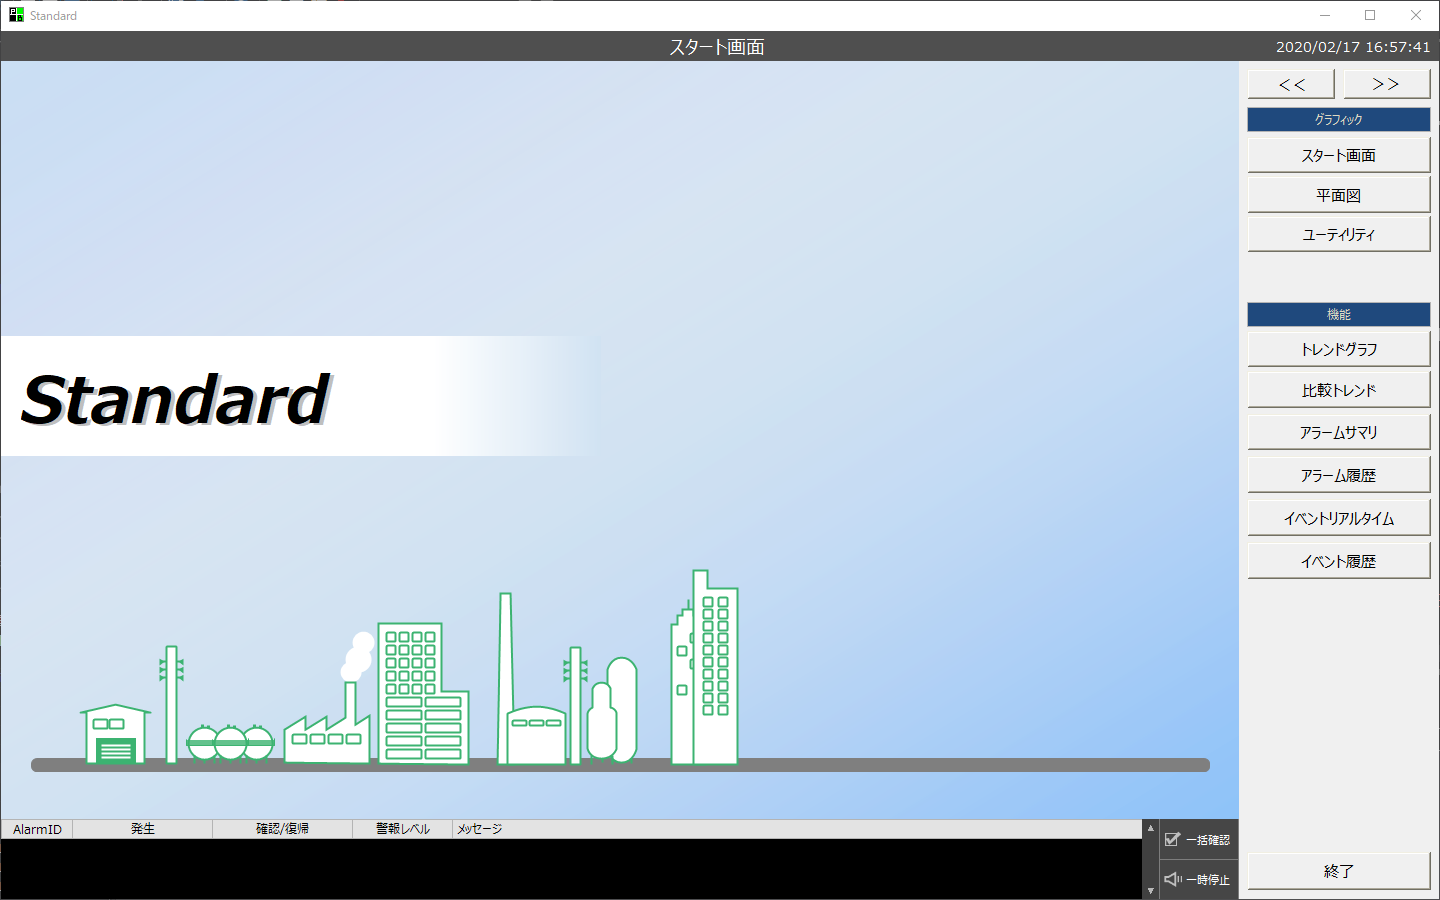
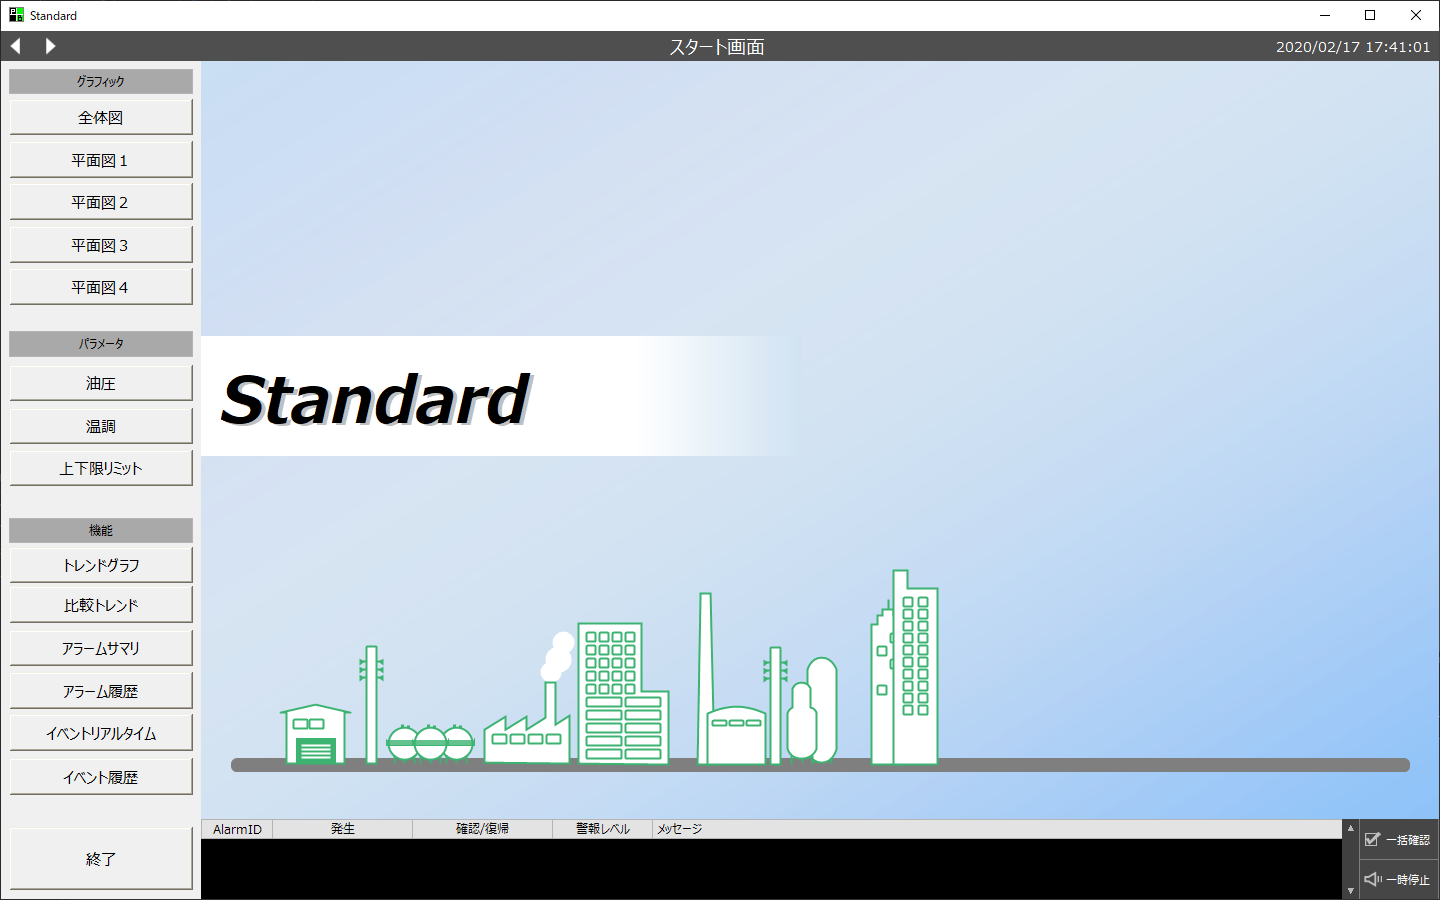
The standard framework comes with a menu function for calling graphic screens and standard functions. The menu display contents can be freely edited from the system settings screen, making it easy to implement the process for calling screens. In addition to calling standard function screens such as trend graphs, users can register their own graphic screens and special functions such as system settings and termination in the menu.
(Example of standard framework menu display: Click to enlarge)
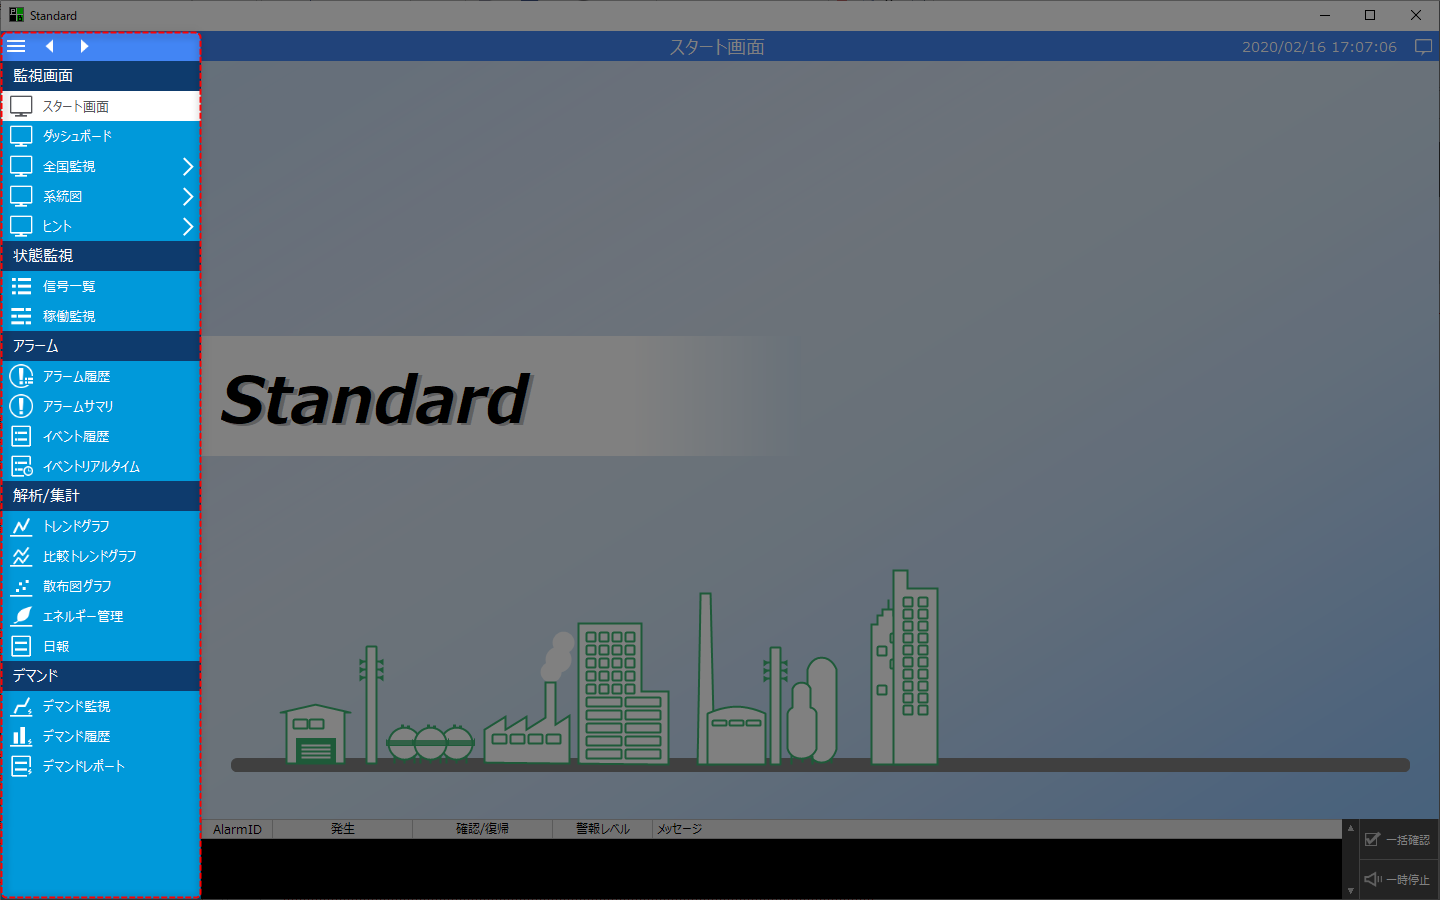
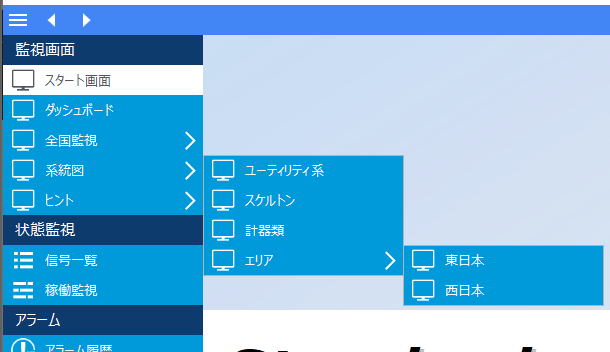
Menus can be grouped and organized into hierarchies, and you can choose your preferred icons.
(Example of menu hierarchy display)
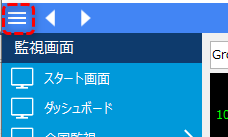
You can toggle the menu display on and off by clicking the Menu control icon.
(Example of a collapsed menu; click to enlarge)
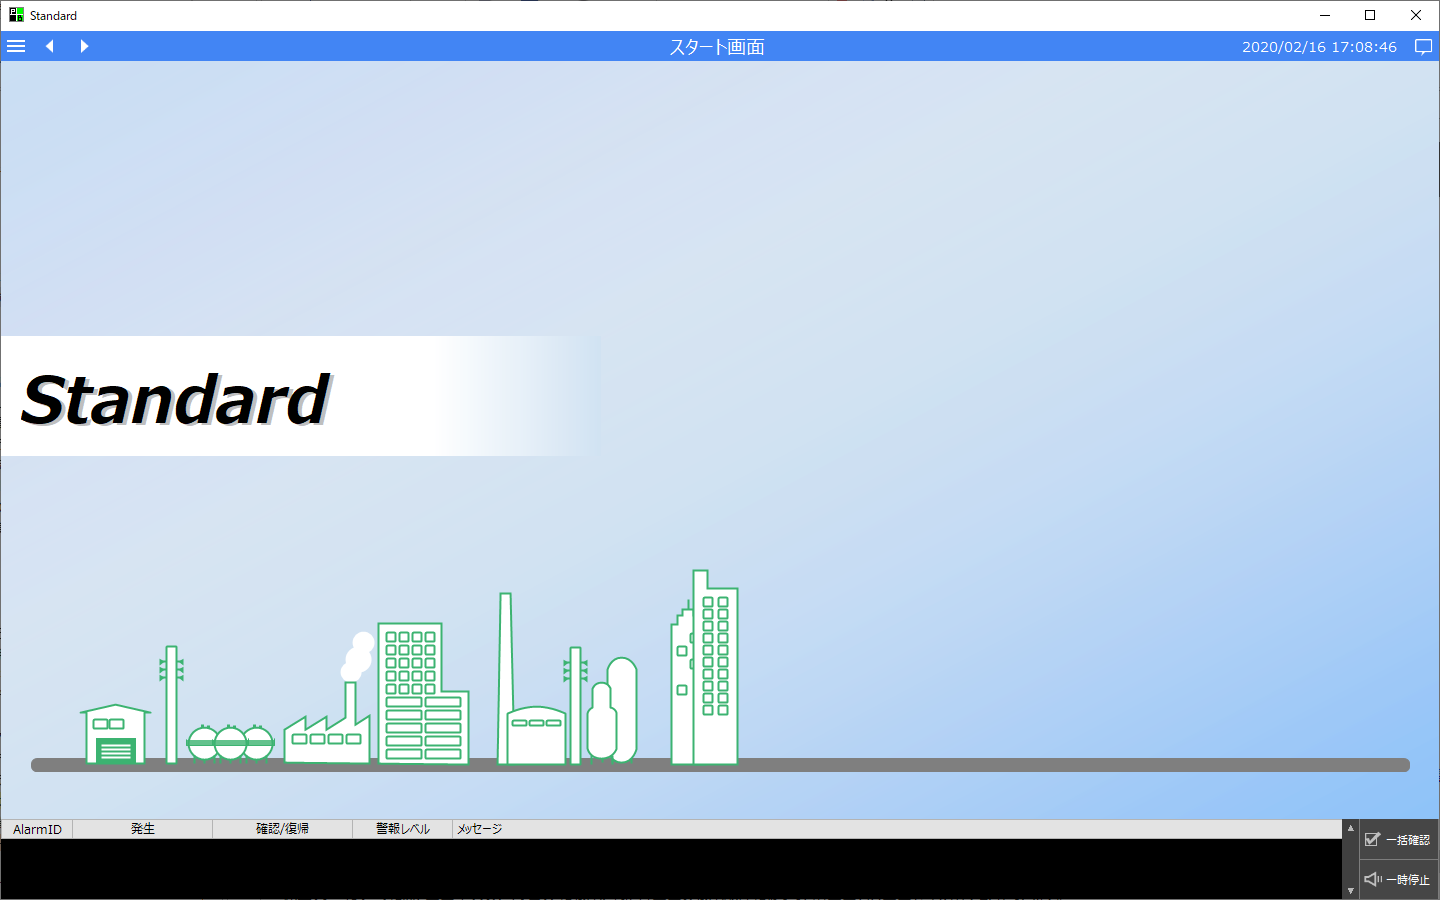
You can also set the menu to close automatically and switch its position from left to right.
(Example of menu displayed on the right: click to enlarge)
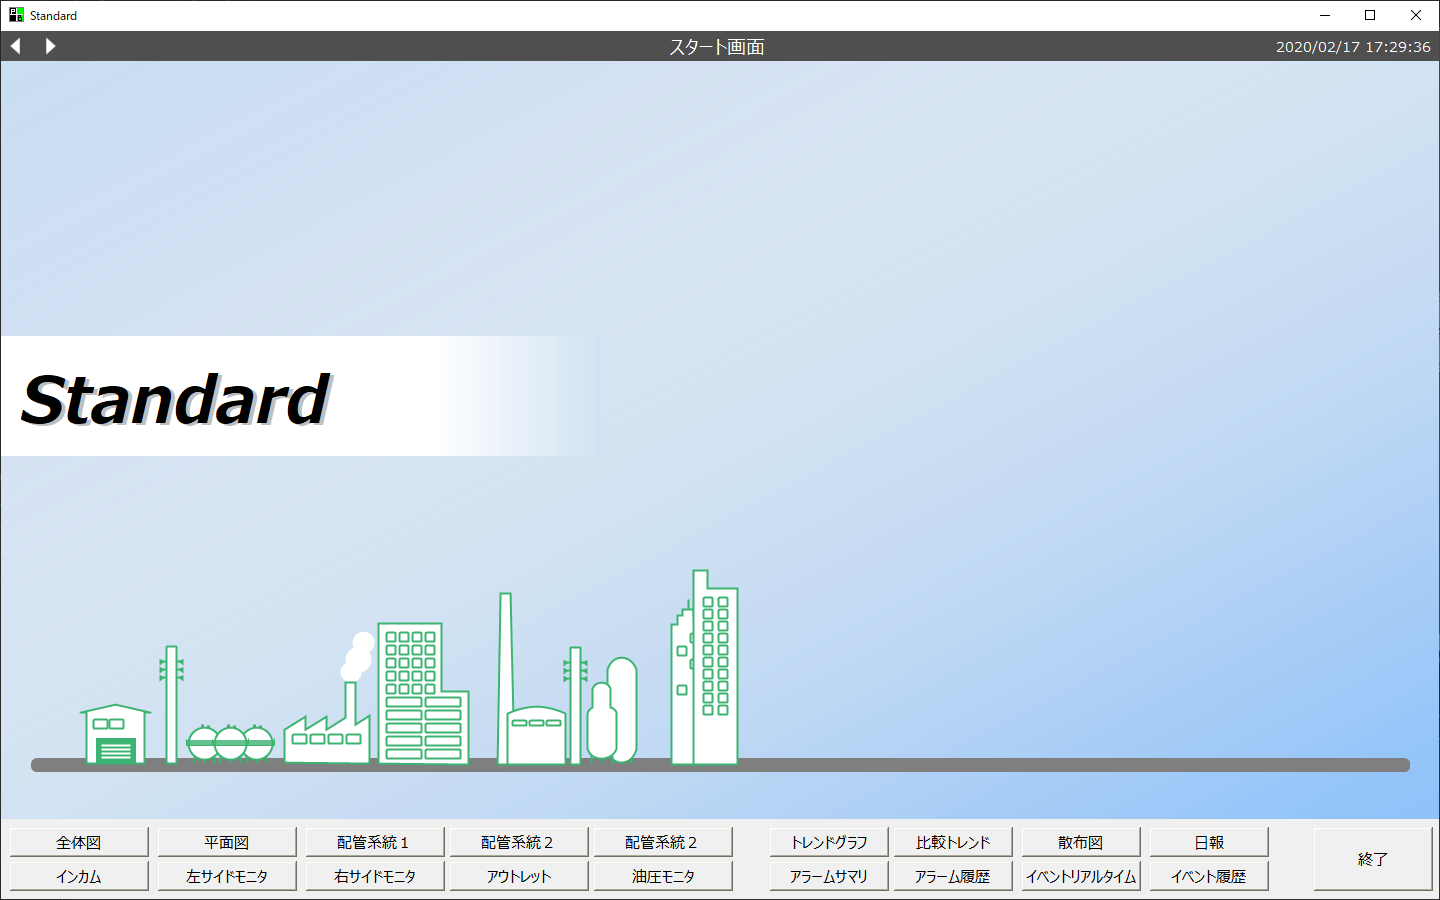
In addition to the "side menu" which displays menus on the left and right, there is also a "full menu" which displays the menu full screen. In the full menu method, clicking the menu icon switches to a full screen menu screen like the one below, and you can call up the desired screen by clicking each button on the menu. Furthermore, with the full menu, there is no need to arrange buttons in Panel Editor, as the buttons are arranged automatically according to the contents of the menu items registered on the system settings screen.
(Full menu example: click to enlarge)
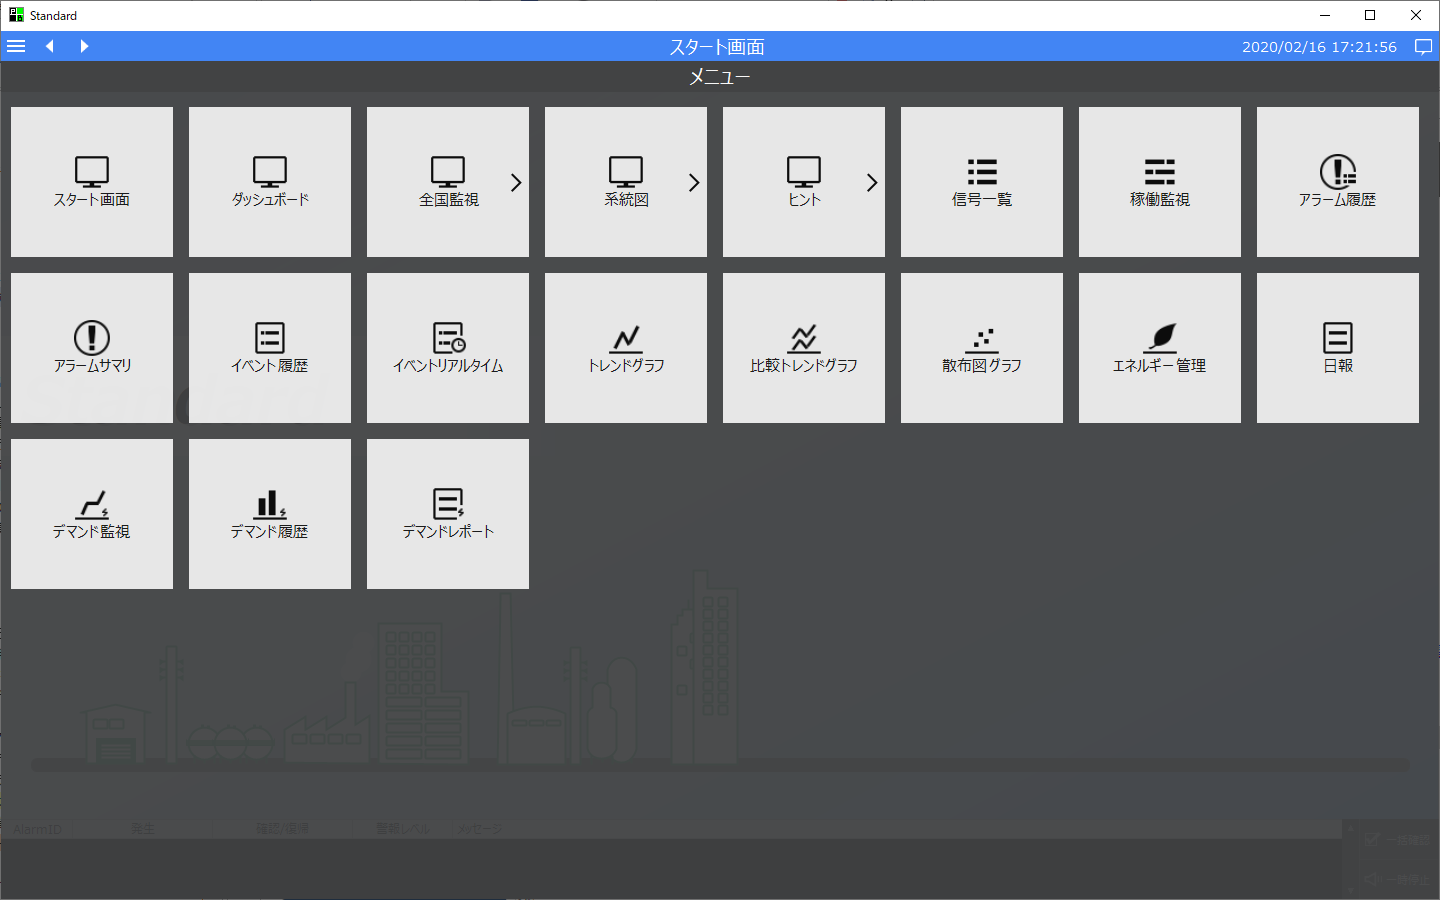
In addition, the menu display style (side menu/full menu) and display position (left side or right side) can be freely changed from the system settings screen. For information on the system settings screen, please refer to "Standard Framework System Settings" at the bottom of this page.
|
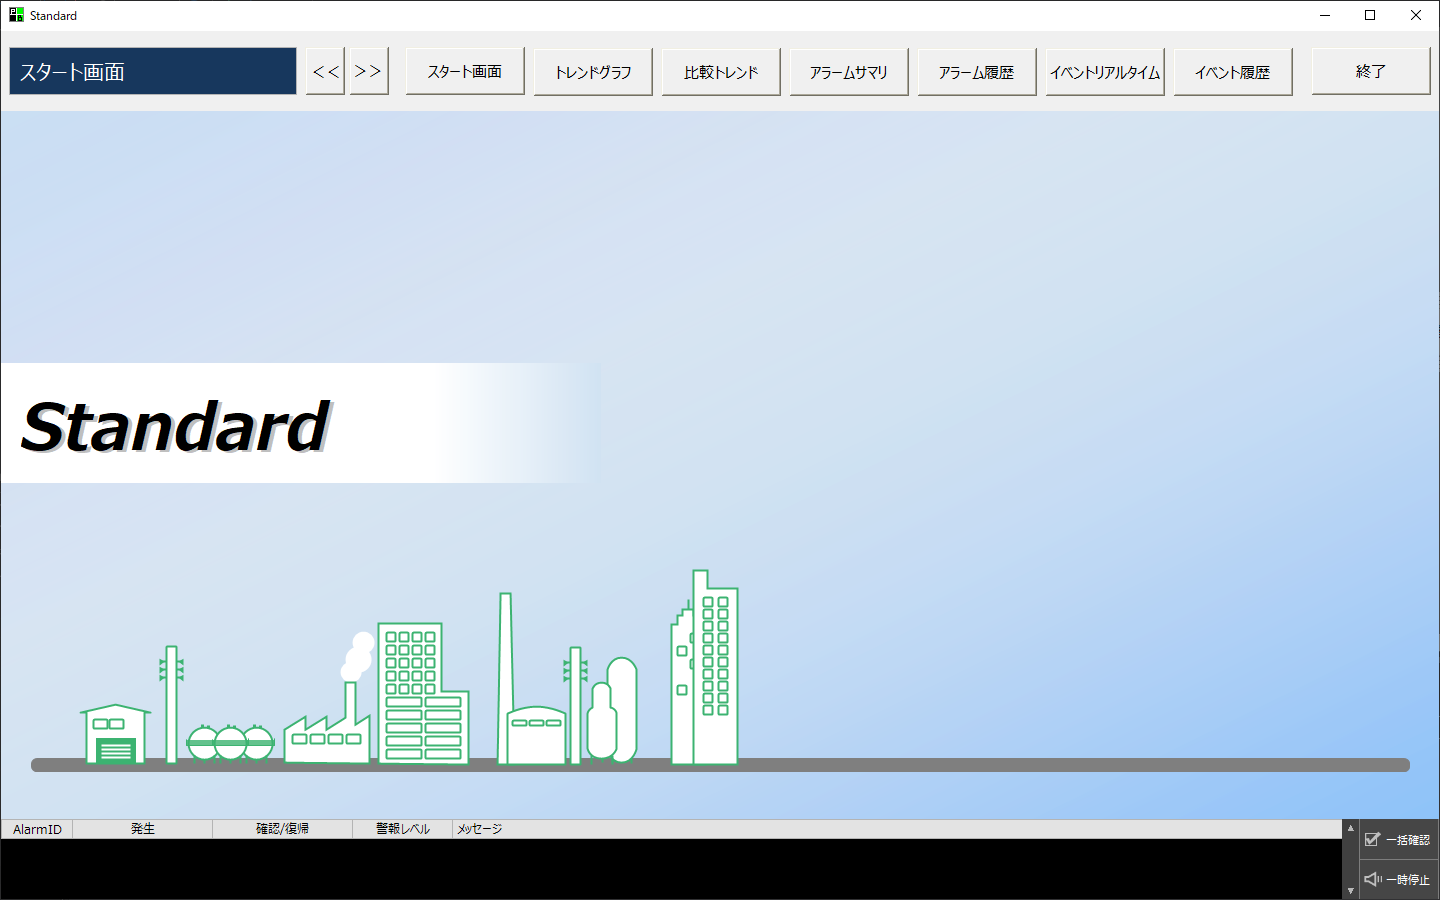
In the standard project, in addition to the side menu and full menu, you can also create your own classic menu by placing buttons on the top, bottom, left, right, etc. of the screen. For details on the menu style, see "Menu Style of Standard Project".
(Example of creating a classic menu: click to enlarge)
|

The standard framework provides a "split display" function that allows multiple screens to be displayed side-by-side on the main area.
You can bring up the split view at any time by clicking the following icon in the title area of the screen.
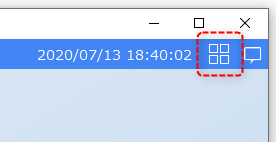
Split display settings can be flexibly configured. Users can freely configure how the screen is split and what screen is displayed in each split display frame during operation. Multiple screen split definitions can also be registered as groups, allowing users to select any group from the screen to switch between split displays. It is also possible to assign a network camera to a split display frame to display video.
(Example of 4-part display: click to enlarge)
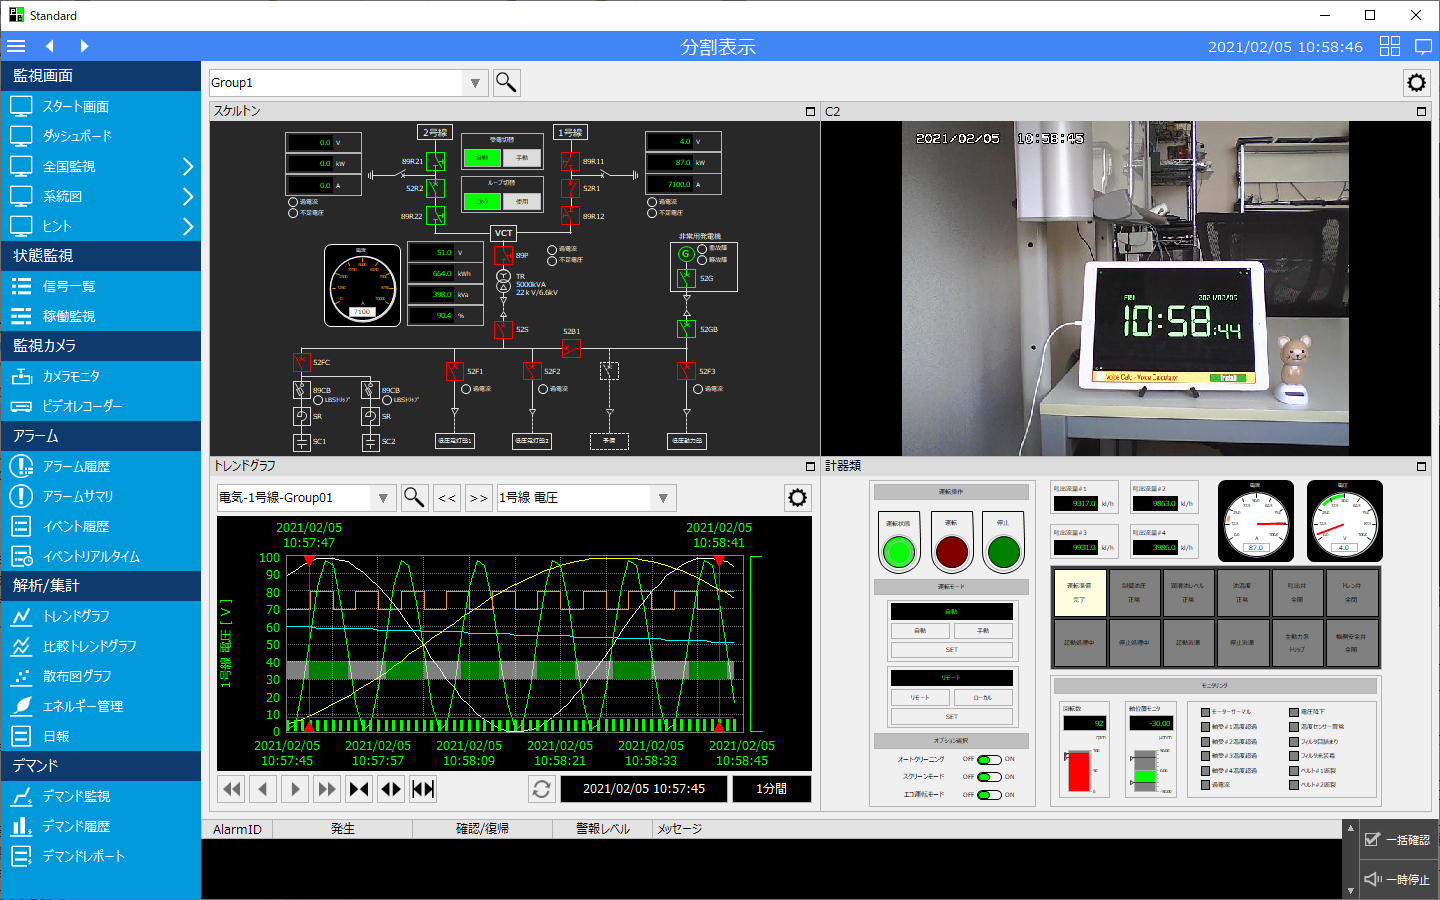
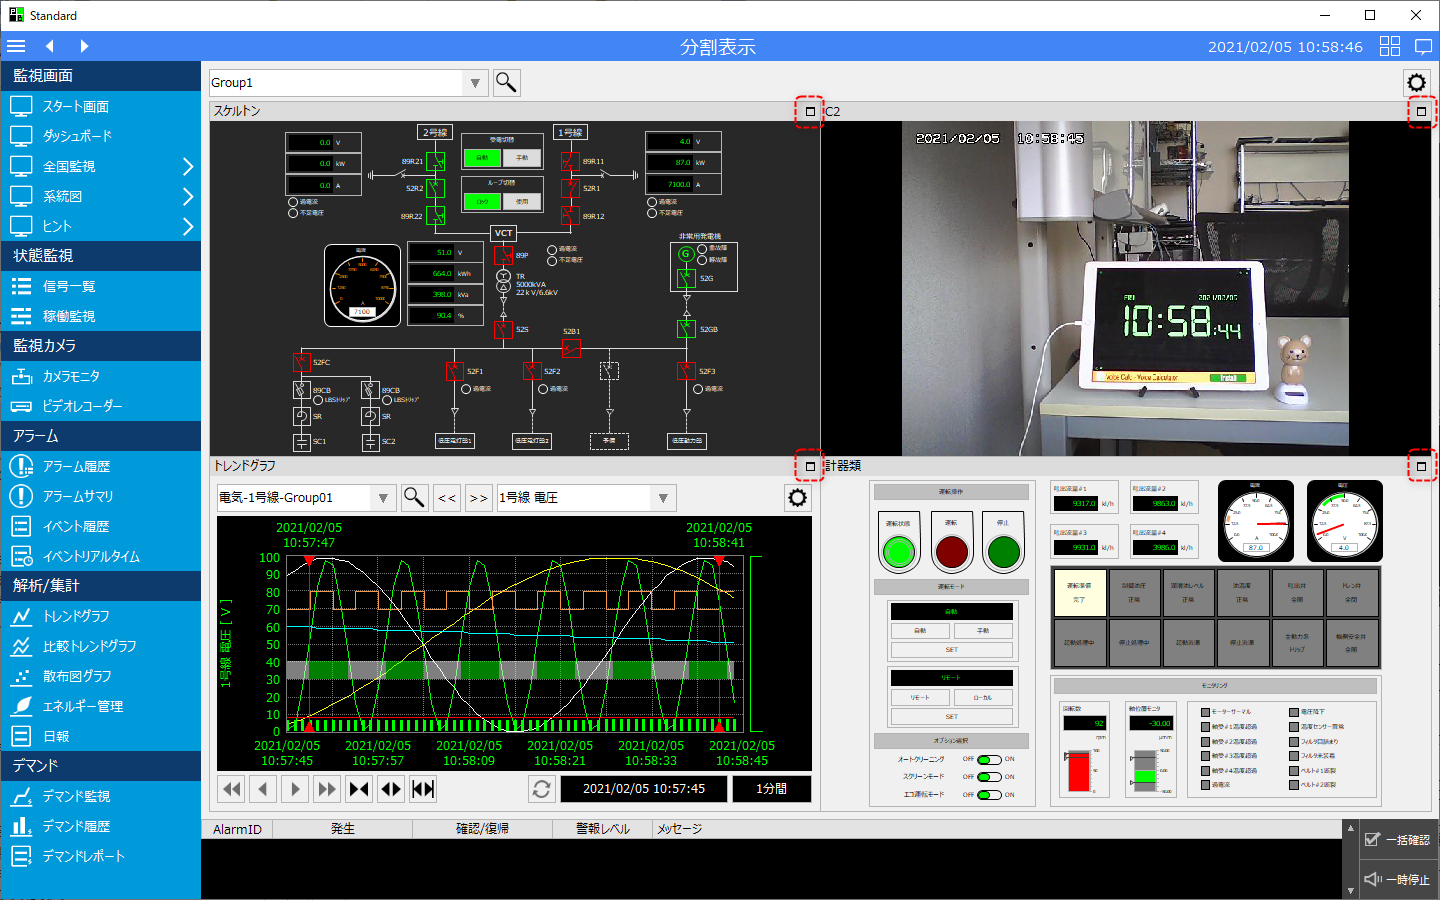
For each display frame in the split view, you can specify options such as showing/hiding the title bar and showing the title when you hover the mouse over it.
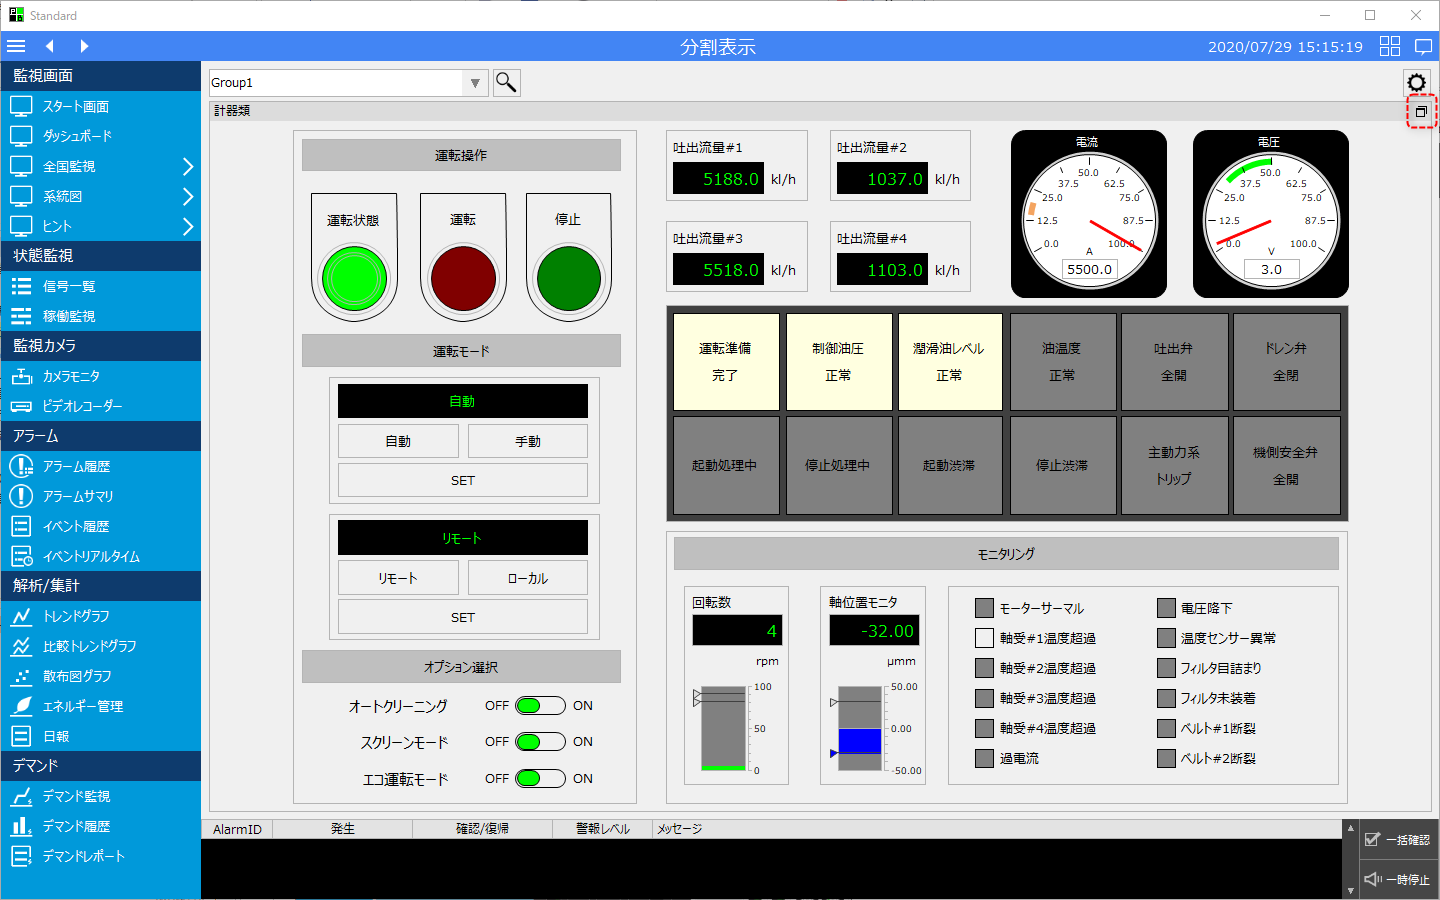
Furthermore, when the title bar is displayed, you can click the icon on the right side of the bar to display the split screen in full screen.
Below is an image of the full screen display. Click the icon on the top right to return to the original split screen.
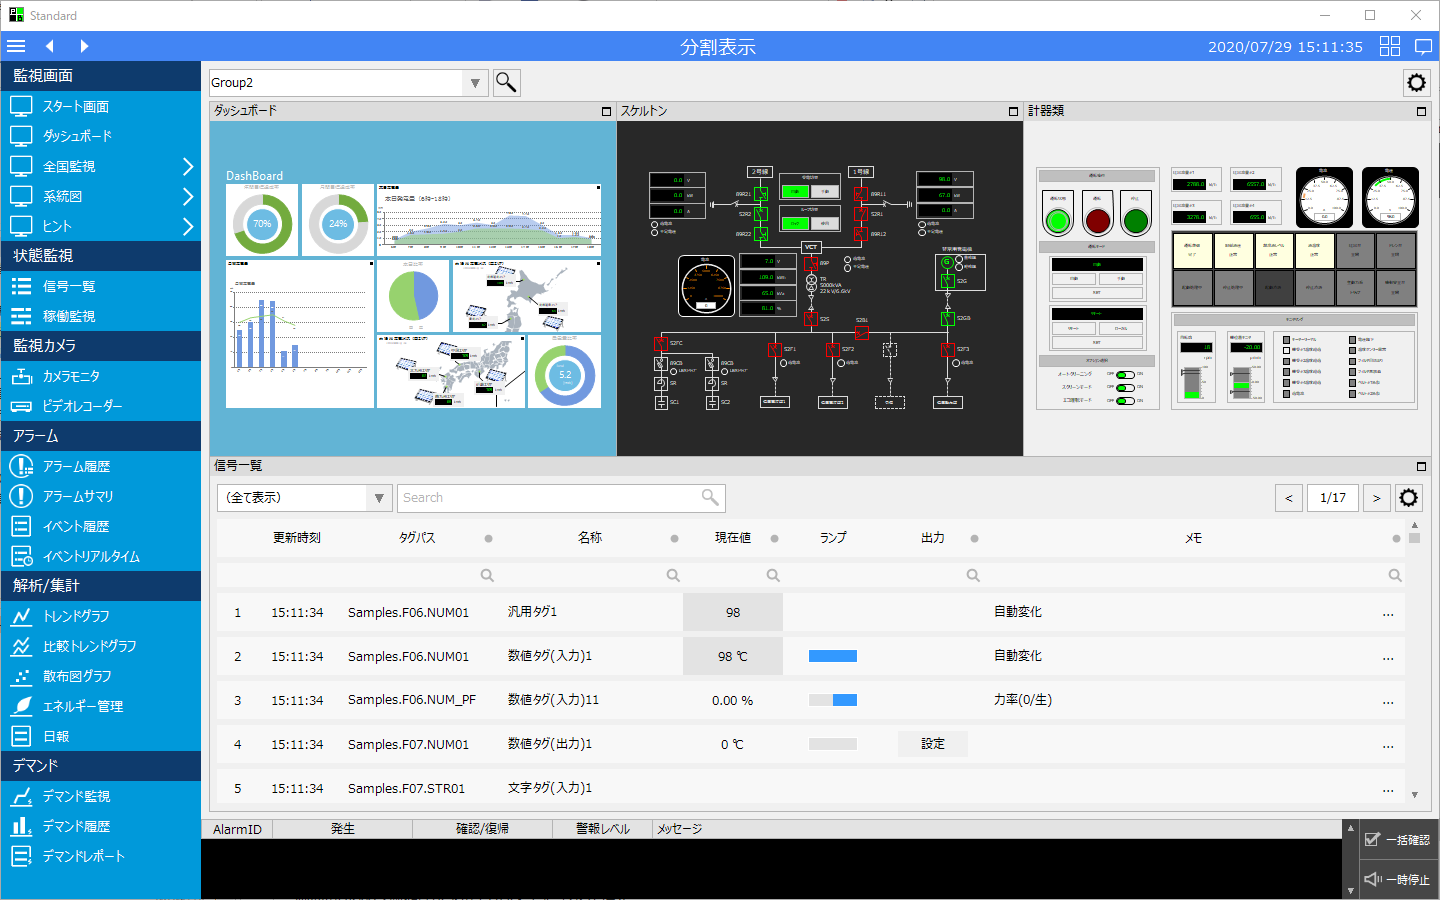
Furthermore, display frames can be merged, allowing you to define flexible split layouts.
The following is an example in which the number of divisions is 2 rows x 3 columns, and the three bottom display frames are merged into one.
(Example of the upper half divided into three parts and the lower half displayed in a single horizontal frame: click to enlarge)
For details about this function, please refer to "Split Display" in the Surveillance System Building Guide.
Screen display history function (previous screen/next screen)
The standard framework includes the ability to call previous and next screens in the order in which each screen is displayed in the main area.
Screen switching can be done using the arrow icons below.
Common alarm summary display/alarm warning sound
The alarm summary can be displayed in common, and a function to sound an alarm when an alarm occurs is also included.

The alarm summary is always displayed, allowing you to immediately know the latest alarm occurrence status.Also, when an alarm occurs, you can immediately check it and stop the alarm sound by using the buttons in this area.
You can check all alarms at once by using the following buttons.
The alarm can be stopped by pressing the button below.
The common alarm summary can be displayed either at the top or bottom of the screen. The display location can be freely changed from the system settings screen. For information about the system settings screen, see "Standard Framework System Settings" at the bottom of this page.
Information bar (guidance/related information/sticky notes/login)
The standard framework has a powerful feature called the "information bar." The information bar has a variety of functions, including a memo function (guidance function), related information function, sticky note function, and login function, and the content displayed changes depending on the currently selected information (such as a tag).
(Information bar example: click to enlarge)
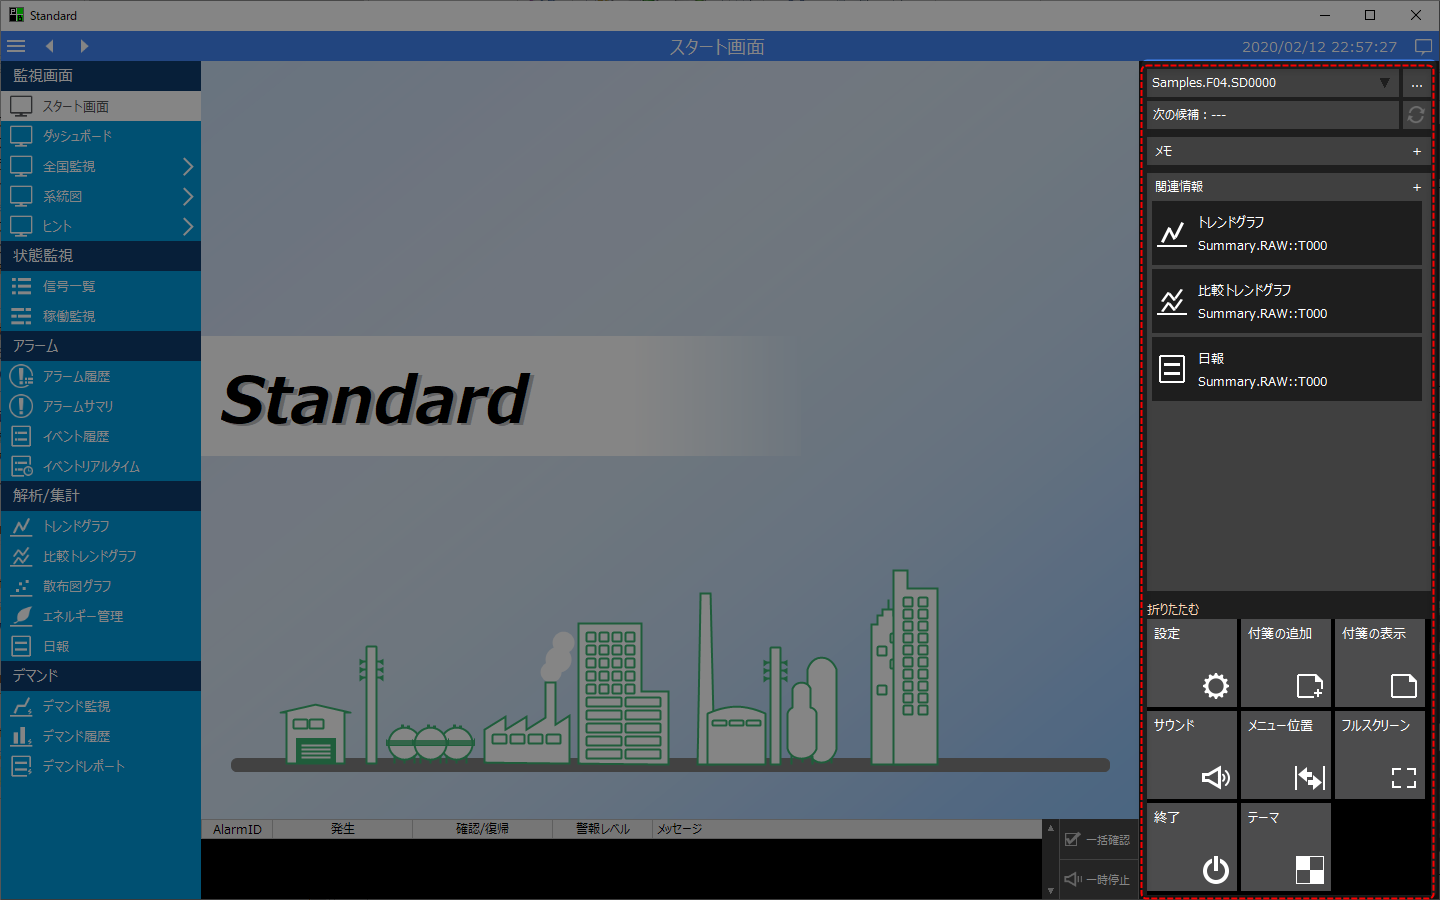
The information bar can usually be displayed/hidden using the following icon in the upper right corner of the screen.
The information bar has a variety of functions.
|
■ Guidance function
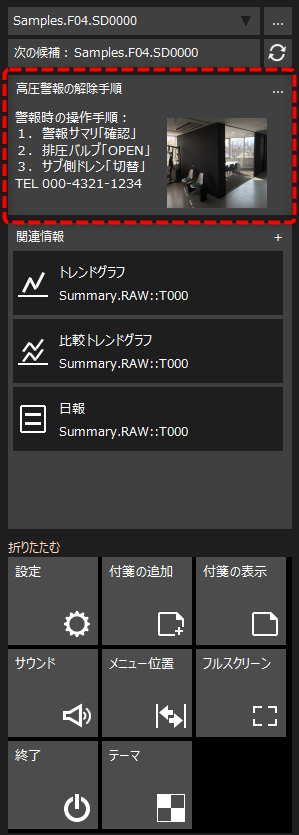
The image on the left shows the guidance information being displayed.
The guidance function allows you to freely register information such as memo information, image files such as photos, video files, and PDF files. Guidance information can be associated with information such as tags and alarms, and guidance associated with information selected from signal lists and alarm summaries can be displayed. For example, you can use it as an operation guide during operation, such as registering recovery procedures and emergency contacts when an alarm occurs, or displaying operating methods and precautions for the equipment to be operated.
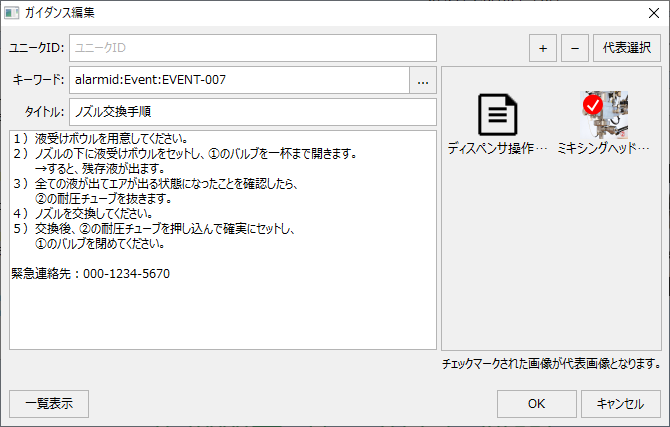
Guidance information can be freely added and edited from the Guidance registration screen.
(Example of guidance registration screen)
For more information about this feature, see "Guidance" in Building Core Features. |
|
■ Related information function
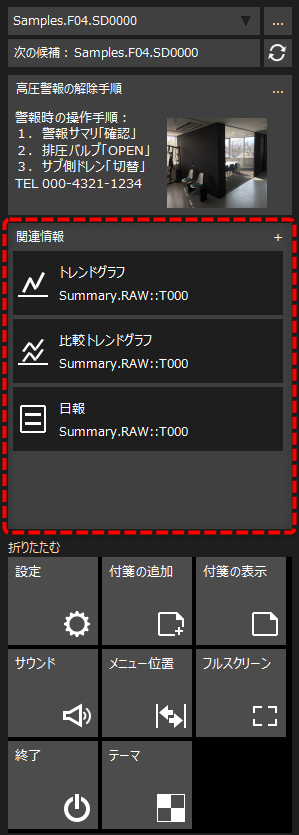
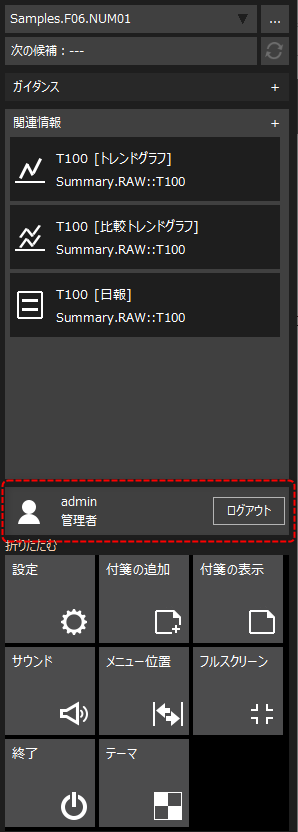
The image on the left shows related information being displayed.
Related information is information for linking to other functions based on the relationship between tags, data sources, alarm IDs, etc. For example, when you select a row in the signal list or alarm summary, if the selected tag has been configured as a target for logging and aggregation processing, it will be displayed as related information as shown on the left. By clicking on the related information on the left from the information bar, you can call up the trend graph screen associated with the target tag, or view a trend graph from the information of the alarm selected on the alarm history screen.
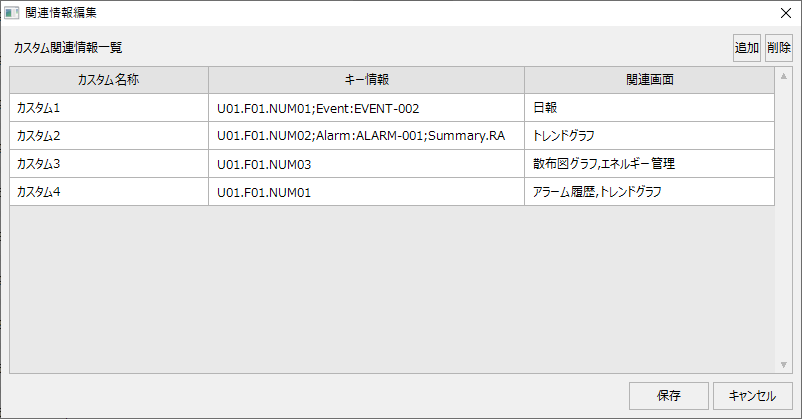
Furthermore, the definition of related information can be freely added/edited while the system is in operation. By registering your own related information, you can customize the screen transitions from the information bar.
(Example of related information editing screen)
For more information about this function, please refer to "Cooperation between functions (use of related information)". |
|
■ Sticky note function
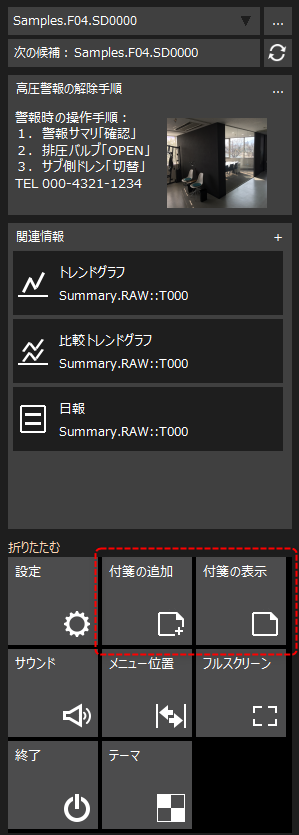
You can access the sticky note function from the following icon on the information bar.
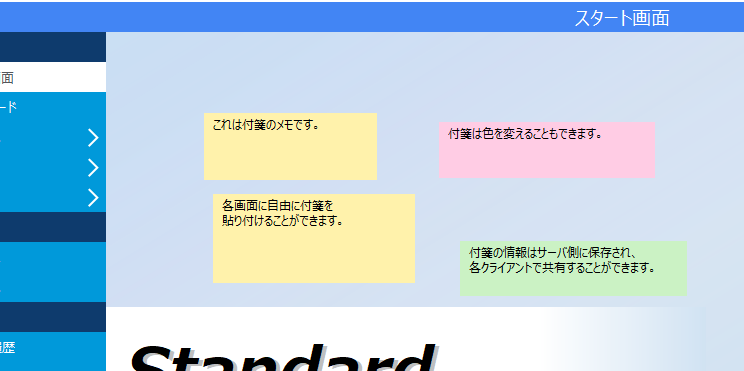
The sticky note function allows you to paste text information on the screen like a sticky note. The sticky note information is stored on the server side, so information can be shared between multiple clients using sticky notes.
(Example of a form with sticky notes attached)
For more information about this function, please refer to "Sticky Notes Function". |
|
■User management function (login function)
The information bar displays information about the currently logged in user.
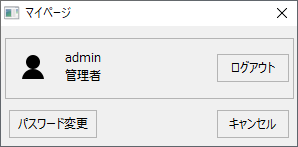
When you click the user information display frame, the following "My Page" dialog will be displayed. Currently logged-in user information will be displayed on My Page, and users can change their own password (only if they have the permission to change passwords) and log out.
Clicking the "Logout" button in the above dialog or on the information bar will log you out.
|

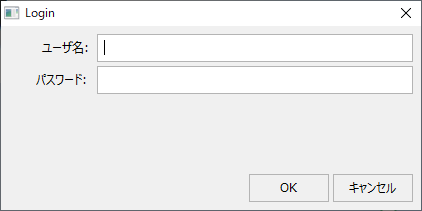
Once you have logged out, the button on the information bar will change to "Login." Clicking this button will display the login screen.

(Example of login screen)
For details about this function, please refer to "User management for standard projects (login function)" in the Monitoring System Construction Guide.
User management (login function)
The standard framework has a built-in user management function (login function).
You can freely add user information to be used for login.
(Example of user registration screen: click to enlarge)
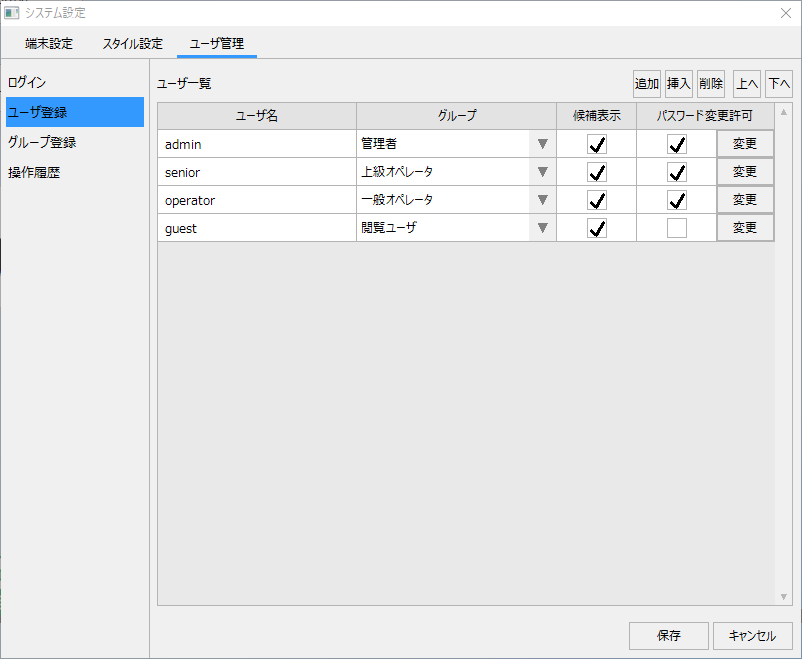
Each user belongs to a group. In group settings, you can set the style to be applied to the group, the authority level, and whether or not to allow the use of various screens and functions. A style is information that defines the layout of the screen display frame and the items to be displayed in the menu. Style definitions can be freely added from the system settings screen. For example, if you want to switch the menu display contents depending on the user who logs in (for example, if you want only certain users to be able to use certain functions), you can define multiple styles with different menu display contents and assign the desired style to the target user group, which will dynamically switch the menu display items depending on the user who logs in to the system.
(Example of group registration screen: click to enlarge)
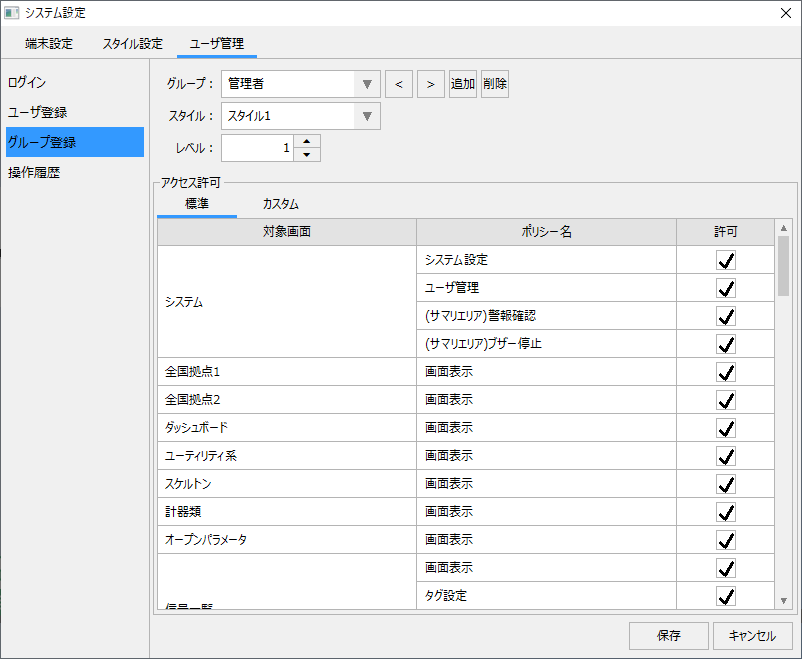
Users of the system log in with a user name and password. Normally, when operating with a standard project, users must log in, but if there is no need to manage access rights for individual users, you can set it to log in automatically.
(Example of login screen)
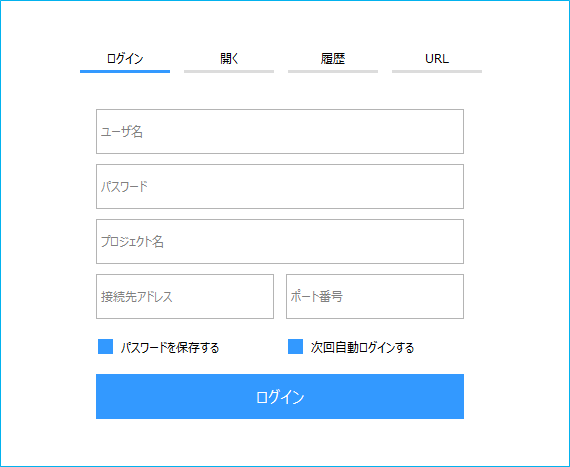
For details about this function, please refer to "User management for standard projects (login function)" in the Monitoring System Construction Guide.
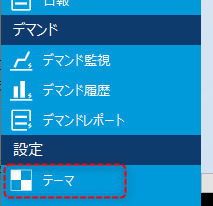
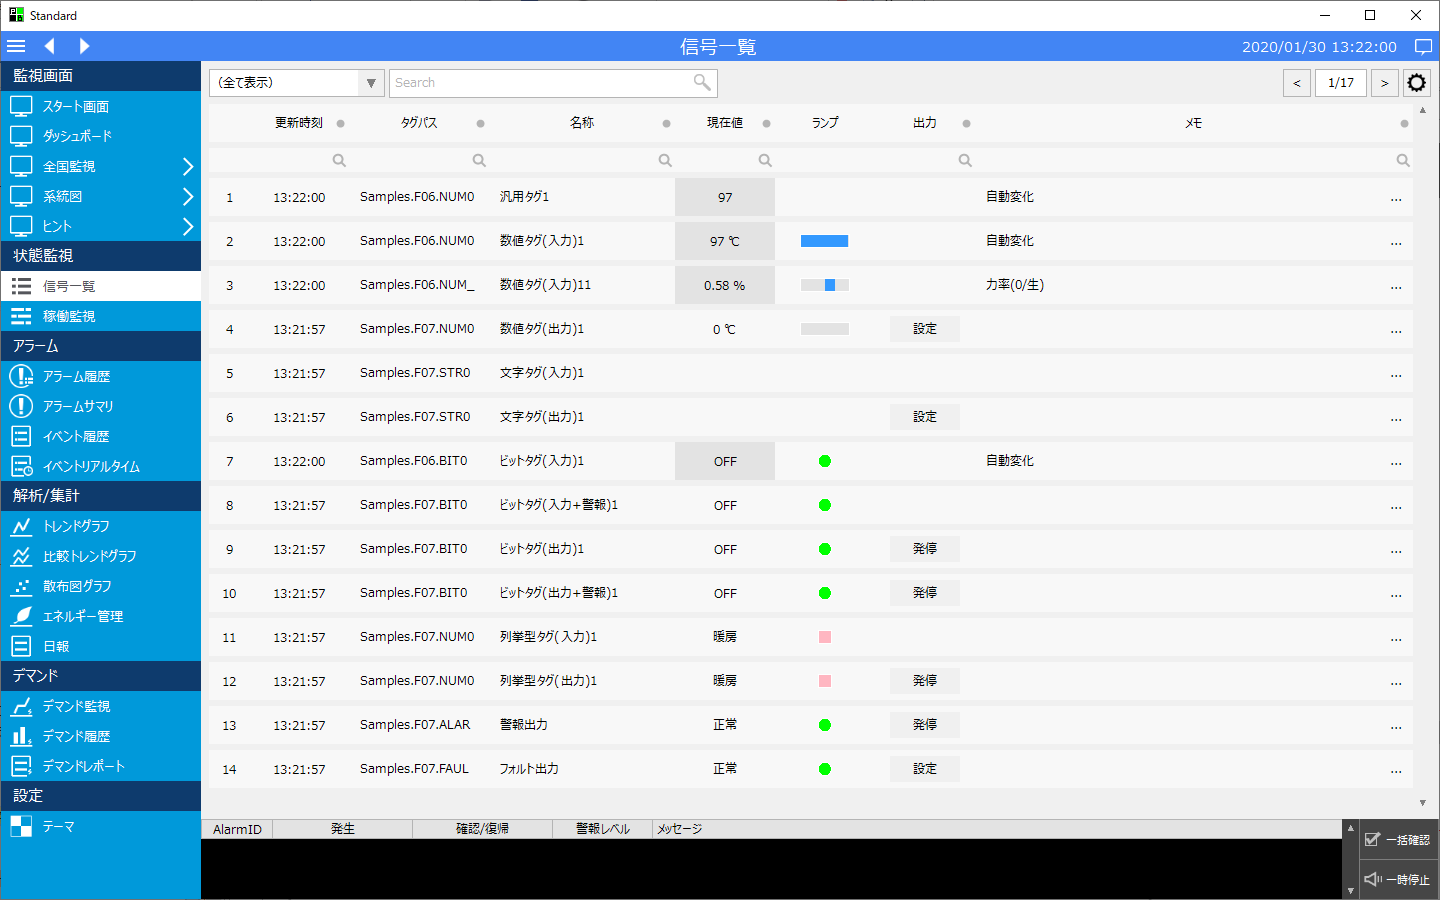
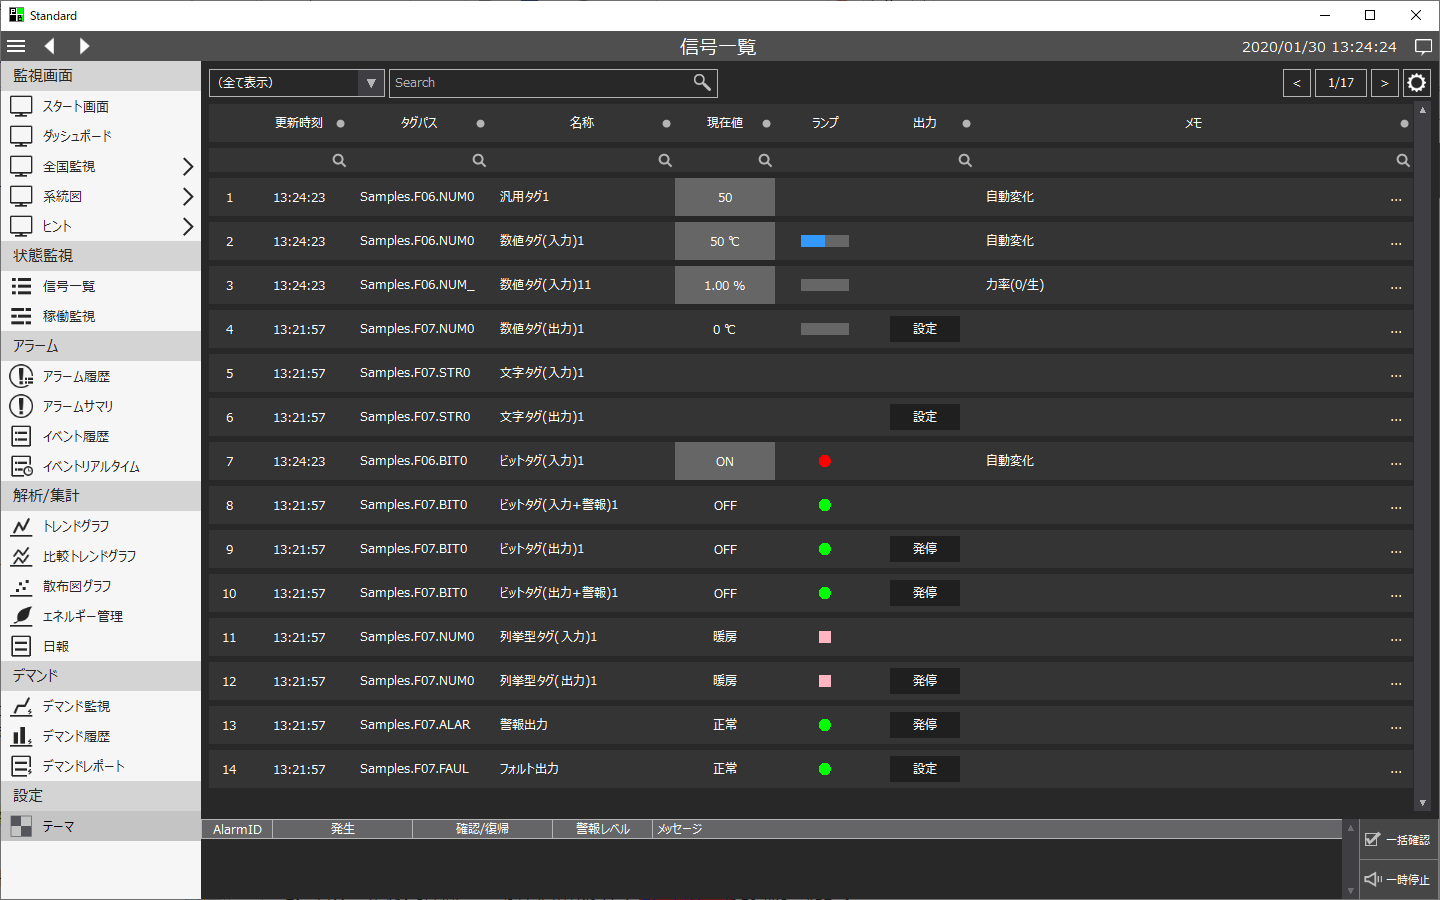
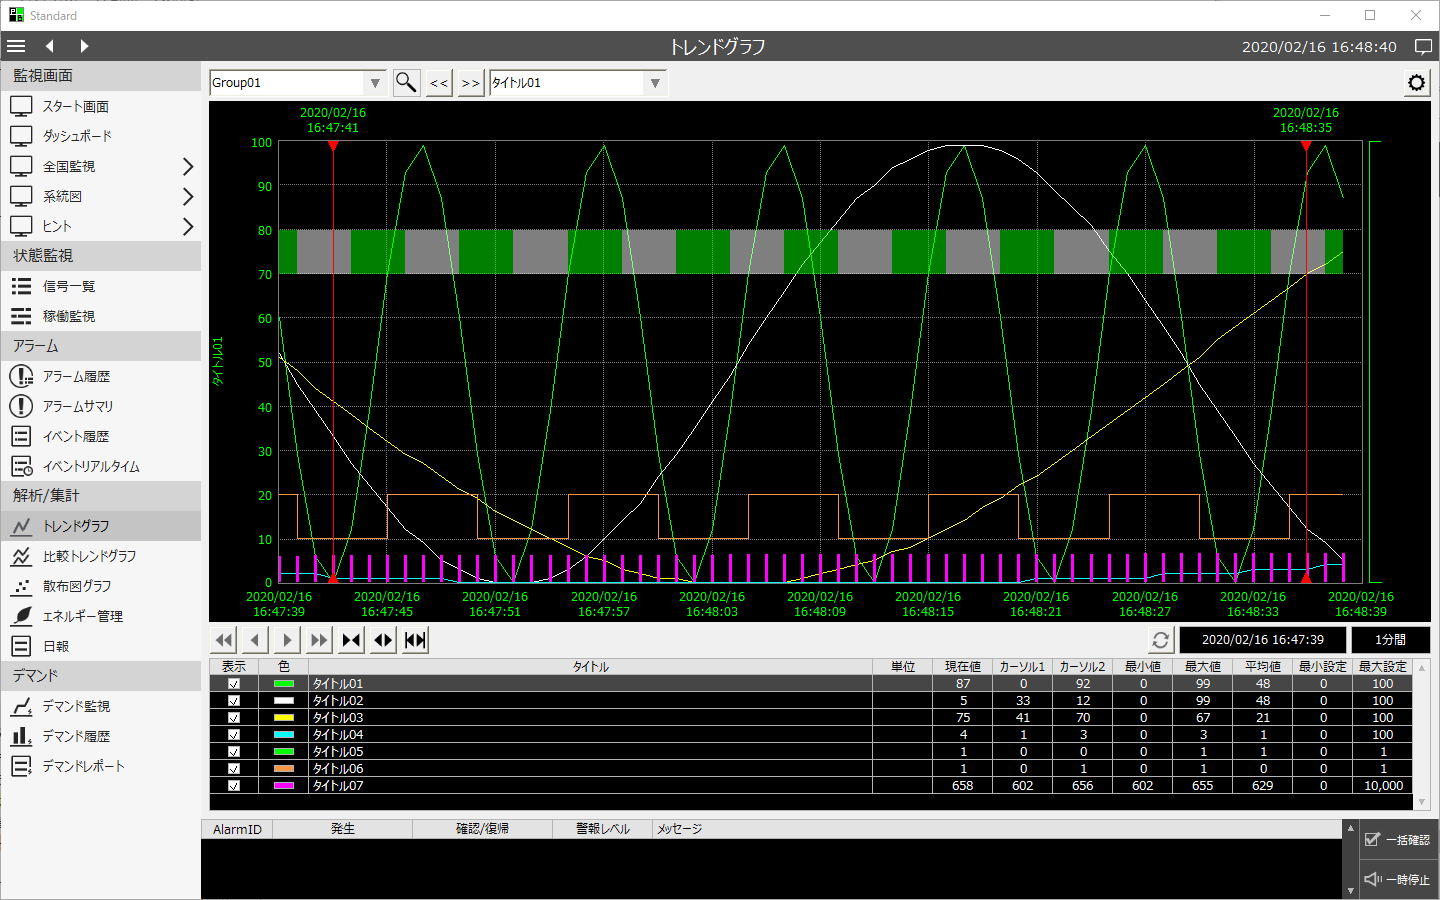
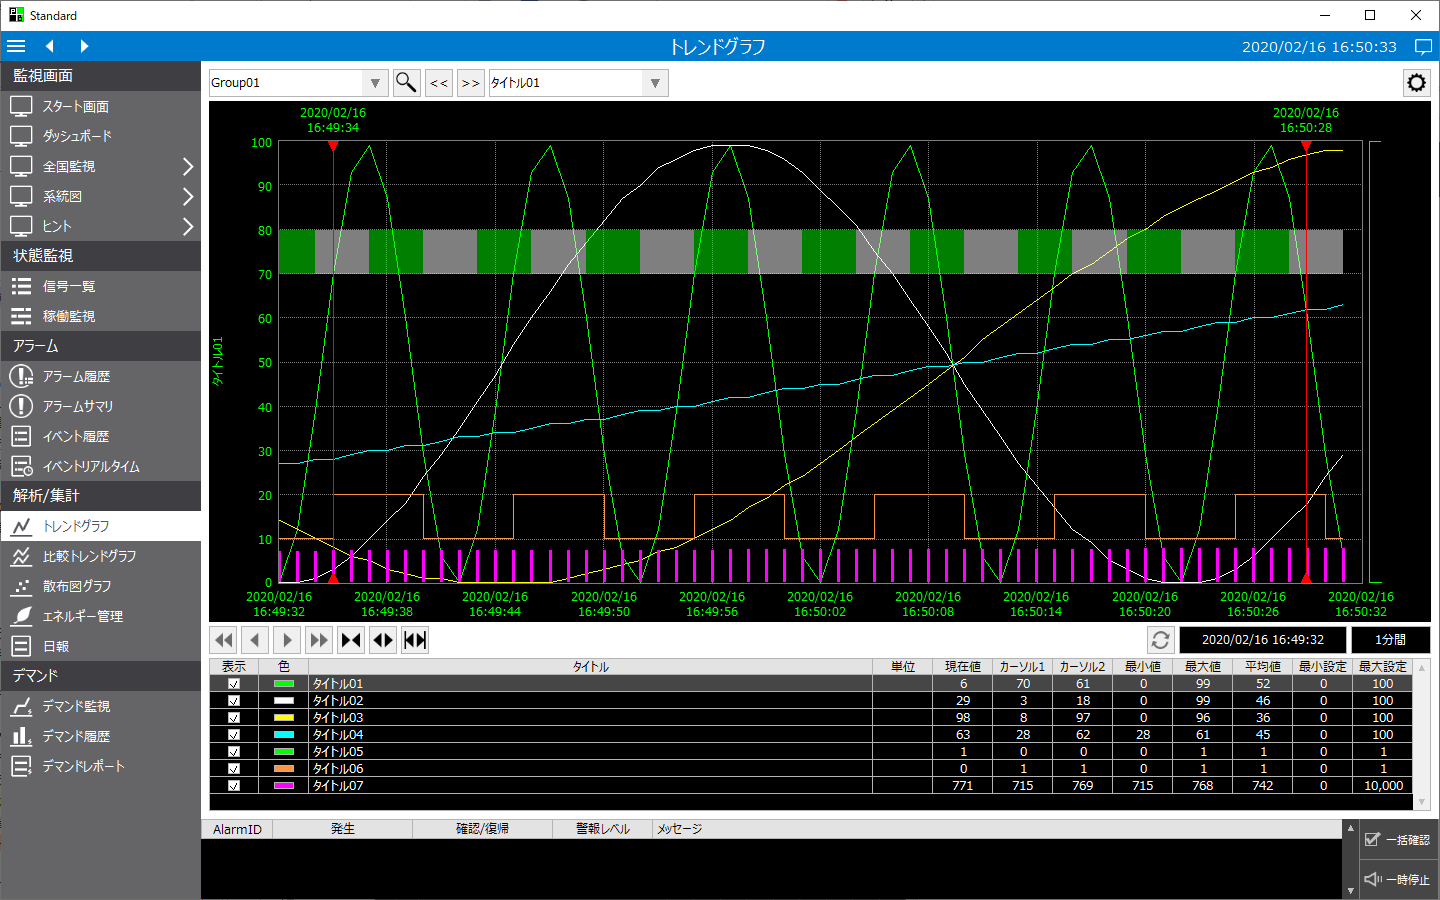
The standard framework supports visual themes. Visual themes can be changed from the system settings screen. In addition, by adding a visual theme calling function to a menu item, it is possible to freely switch between themes during operation.
(Example of adding to the main menu)
(Visual Theme Settings dialog)
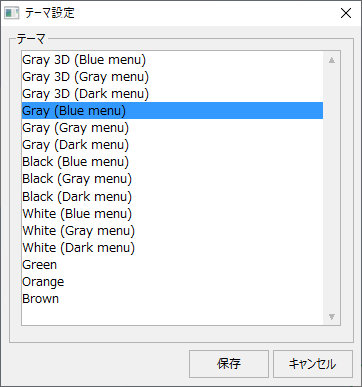
By changing the visual theme, you can dynamically change the menu display color, whether or not buttons are displayed with raised or recessed edges (whether classic buttons are displayed or modern flat displays), the screen background color, etc. For more information about visual themes, see "Visual Themes" in the Screen Creation Guide.
Below is an example of switching visual themes (click on the image to enlarge):
(List of traffic lights when the visual theme "Gray (Blue menu)" is selected)
(List of traffic lights when the visual theme "Black (Gray menu)" is selected)
(Trend graph when visual theme "Gray 3D (Gray menu)" is selected)
(Trend graph when visual theme "White (Dark menu)" is selected)
Standard Framework System Configuration
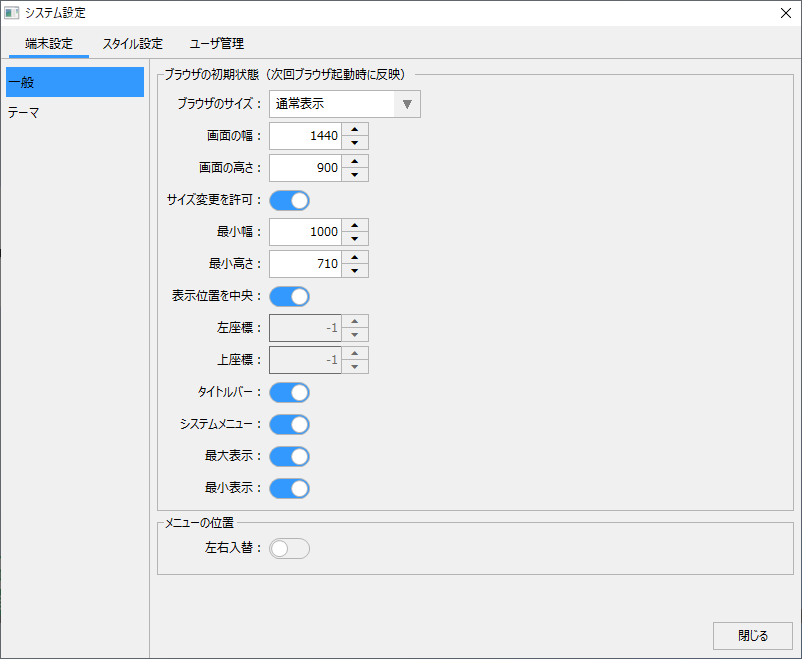
The standard framework provides a system configuration screen.
(System settings screen)
|
On the system settings screen, you can freely change the following settings during operation.
•Switch between browser display modes (normal, full screen, etc.). •You can edit the layout of the display frame. For example, you can change the way the menu is displayed (change to a full menu instead of using the side menu), swap the menu display position from left to right, or swap the alarm summary display position from top to bottom. •You can change the items displayed in the menu. You can add your own graphic screens to the menu, or add special functions such as system settings and an exit button to the menu. These settings can be defined multiple times as styles. •Settings related to login functions, registration and editing of user and group information (authority settings, etc.).
|
For details on the menu and layout setting procedures (style settings), please refer to "System Settings for a Standard Project" in the Surveillance System Building Guide.
For information about user management (login function), please refer to "User management (login function) for standard projects" in the Monitoring System Construction Guide.